
Here’s a variation of a recipe in MY BOOK which I have adapted from one of my favourite vintage recipe books, snappily entitled “Morning and Hot-Plate Goods including Scones, Buns, Teabread, etc” by John Boyd.
It is a book for professional bakers, in that the recipes inside involve ingredients measured in pounds rather than ounces, but it is compact nevertheless, with a jaunty yellow cover and both line and photographic illustrations throughout. It is undated, but after a quick search of t’internet, the mid 1940s seems a good guesstimate of age.
The book claims that this is the original recipe of those buns in the 18th century that caused everyone ‘taking the waters’ in Bath to put on so much weight, allegedly forcing Dr Oliver to invent the altogether much less fun Bath Oliver biscuit for people to nibble on instead. The dough is a deep, golden colour from all the butter and eggs, and dotted with crunchy sugar and orange peel. Don’t be alarmed at the quantity of nutmeg, it looks a lot, but it’s not overpowering at all – skimp on it at your peril.
These buns are definitely an indulgence – a delicious, DELICIOUS indulgence, but the freezer is your friend and thus these treats can be spread over a few weeks, rather than having to consume them all in one sitting, however tempting that may be.
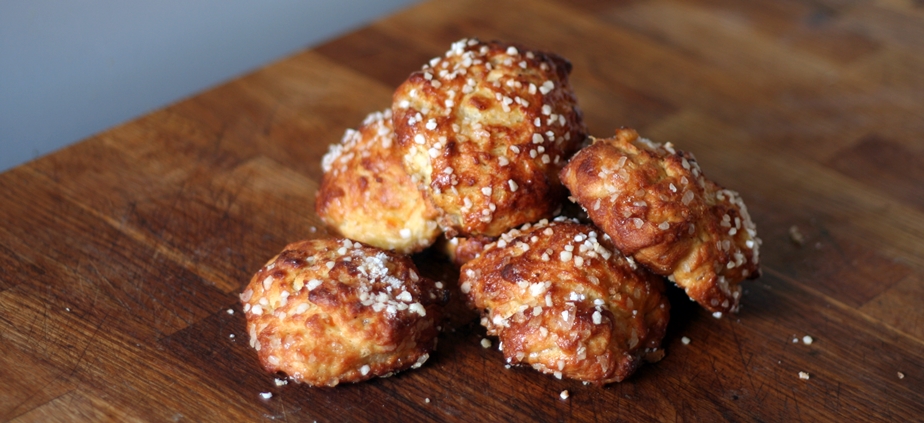
Since my book came out, I’ve picked up a couple of snippets of additional information about Bath Buns. Despite their rich ingredients, their appearance wasn’t supposed to be a smooth, spherical ball of dough, rather they were deliberately of a rough and craggy exterior, which, I must admit, is a great contrast to their soft, luxurious interiors. The iconic sugar nib topping remains.
Some recipes suggest using a pair of spoons to portion out the soft dough, but thanks to a quick flick through MANNA by Walter Banfield, I discovered an altogether easier method (see below).
The recipe calls for fresh yeast – my latest fad – but feel free to substitute rapid-rise yeast if preferred.
Luxury Bath Buns
Makes 16-ish
450g strong white flour
4 large eggs
225g unsalted butter
30g granulated sugar
30g fresh yeast
60ml milk
2 whole nutmegs – grated
225g sugar nibs
2oz candied orange peel – finely chopped
3 drops lemon essence (original) or the zest of a lemon (my suggestion)
1 large egg for glazing
- Heat some water in a small pan.
- Crack the eggs into a bowl and add the milk.
- Whisk together, then put the bowl over the simmering water and whisk until the mixture is warmed, but no hotter than blood-temperature (dip a clean finger in to test).
- Whisk in the yeast and 50g from the flour and set aside to rise for 30 minutes.
- While this is working, in another bowl, gently warm the butter over the simmering water until soft. Add the granulated sugar, nutmeg and lemon essence/zest and whisk to combine.
- Combine the two mixtures after the yeast has been working for 30 minutes and stir into the remaining flour.
- Knead well for 10 minutes. It is an extremely soft dough, but please resist the temptation to add any more flour as this would compromise the texture of the finished buns (I use a stand mixer & a dough hook).
- Adding the nibs and peel: Here you have a choice. You can add in 150g of the nibs at the end of the kneading, then set it to rise, OR you can add in 150g of the sugar after the first rise. Adding the sugar straight after the kneading will mean it leeches moisture from the dough and starts to dissolve as the dough rises, leading to less of a crunch in the bite of the finished bun. Add 150g of sugar nibs after the first rise, and they are still relatively large and crunchy, even after baking. The rest of the nibs will be scattered over the top of the buns, so their crunchiness needs to be factored into your decision as well. The peel can be added at either time, but I generally add it after the kneading to allow its aroma to permeate the dough.
- Cover the bowl with cling film and leave to rise for 1 hour.
- Tip out the dough and pat down.
- Add the sugar/peel if not already done so.
- Portion the dough into pieces weighing 150g. Form these pieces into neat balls, then gradually stretch the ball of dough between your hands until it pulls in half – pretty much like those diagrams of cells dividing. Place the buns with the torn side upwards onto baking sheets lined with parchment paper. In the recipe in my book, the buns were placed atop a sugar cube soaked in lemon juice. As the buns cooked, the sugar and lemon juice melted together to give a deliciously crunchy coating to the base of each bun. These buns are so rich from the butter and the sugar nibs, this isn’t necessary, however the parchment is a must to ensure they don’t stick.
- Whisk the egg with a little water and glaze the buns, then allow to rise for 45 minutes.
- Preheat the oven to 200°C/180°C Fan.
- Glaze the buns again, then top with the remaining sugar nibs
- Bake for 15-20 minutes, turning the tins around after 10 minutes to ensure even browning.
- Remove from the oven and leave on the tins. Cover the hot buns with clean tea towels to keep the crust soft as they cool.
- Enjoy warm.
