
This is a recipe that I’ve had on my ‘To Do’ list for years. I first came across it in an old, spiral-bound, Women’s Institute cookery book. Over the years I’ve seen many different versions, some with sour cream, some from the 19th century are made with “Swiss Milk” (the equivalent of modern condensed milk – although just to be confusing, some recipes sometimes list “unsweetened Swiss Milk”, thus making it equivalent to evaporated milk). It would be interesting to see how these recipes compare in texture to the classic fudge recipe posted elsewhere on this site.
But anyhoo…

This version, from 1901, uses red currant jelly, which gives the toffee a lovely reddish tinge and a delicious tang of sharpness against the sweetness from all the sugar. Redcurrants are about to come into season, and this recipe might be useful to either use up last year’s jelly or make use of this year’s fresh batch. Alternately, you can just buy red currant jelly in the supermarket.
I deliberately chose this version because it dates to the height of Russian Toffee popularity, and I find it funny that the writer sees fit to include finger-wagging admonishment to take care to make it properly and not over-cook it, all the while failing to give proper instructions on how to do just that.
So! Let us talk about the intricacies of toffee making.
In short, there aren’t any. It is fundamentally about heating your sugar mixture to a particular temperature point in order to achieve a certain texture when it cools down. This is done by heating until sufficient moisture has evaporated, which will result in the sugar reaching a high-enough temperature.
The difficulty for our Victorian ancestors and earlier was, a lack of sufficiently detailed thermometers with which to aid their efforts. That’s not to say that sugar confectionery was unheard of in earlier times. Quite the opposite, in fact. Confectioners in Times of Yore™ devised a visual scale to judge the heat of the sugar solution, and divided it into six levels, each with their own particular uses: smooth, pearled, blown, feathered, cracked and caramel. Francis Massialot’s “The Court and Country Cook” (1702) goes into detail across several pages describing the physical and visual cues of each stage.
Luckily for modern cooks, there are digital thermometers which can eliminate much of the guesswork. The difficulty lies in ensuring that the whole of your batch of boiling sugar has reached the correct temperature, hence the need to keep your mixture well stirred. Care must also be taken, if using a probe thermometer, not to accidentally touch the tip against the bottom of the pan, which will register as several degrees higher than the sugar itself.
All that remains is to decide on the consistency you wish to enjoy your toffee. You can take it to whatever degree you prefer. I have made this specific recipe four times, taking each batch to a different temperature and each has its pluses and minuses. Its up to you which you choose.
- 120°C – toffee is soft and chewy at room temperature.
- 130°C – toffee is firmer but still chewy. Thin sheets will bend easily.
- 140°C – toffee is hard at room temperature, but will soften in the mouth and become chewy.
- 150°C – toffee is brittle at room temperature, will eventually soften in the mouth and become chewy.
Personally, I prefer the last two: for toffee to consume as is I like to take it to 150°C; for toffee to use in other recipes, since it will have further heating in the oven, I prefer to take it to just 140°C.
One final point, toffee is hygroscopic. It loves to absorb moisture. As soon as it is cooled, you should pack it in an airtight container. A plastic ziplock bag might lack visual appeal, but it is marvellous for keeping your toffee shiny and free of stickiness for days on end. Alternatively, you can choose to either wrap your toffee pieces in waxed paper or cover your toffee in chocolate to prolong its shelf life.
Russian Toffee
This is just a half batch of the original recipe, and still makes a sizeable slab. I have elected to interpret ‘loaf sugar’ as soft, light brown sugar, for added flavour. After a few trial runs, I opted to omit the vanilla as it wasn’t adding anything to the flavour, and actually impairing the redcurrant flavour coming through. You could vary this recipe by using similar quantities of other sharp fruit jellies such as cranberry, black currant, quince or apple.
225g soft light brown sugar
115g unsalted butter
100g red currant jelly
150g double cream
200g dark chocolate (optional)
- Line an edged baking pan with baking parchment. I used a pan 30cm x 22cm and it was more than large enough.
- Add all ingredients to a pan and heat gently until the butter and jelly have melted and the sugar dissolved. A wide pan (like a frying pan) is better than a tall (saucepan) pan, as the greater surface area facilitates evaporation.
- Increase the heat slightly (I suggest level 6 on a 1-9 scale) and stir gently but continuously until the mixture boiled for several minutes and has thickened slightly.
- Check with a thermometer (if using a frying pan, you may need to tilt it in order to get an accurate reading of the sugar mixture temperature), and remove from the heat when your sugar mixture has reached your chosen temperature.
- Pour the mixture onto the baking parchment in your prepared pan and allow to cool. NB If you wish to mark out your toffee into squares like in the top picture, don’t let it cool longer than 8 minutes before doing so, otherwise it will have set too firmly.
- To mark out your toffee, lightly butter the blade of a long, straight-bladed knife and press down firmly into the toffee. About 1.5cm squares is a good size. The knife won’t easily cut all the way through, but will make strong enough marks so that it is easy to break into pieces when cooled.
- After 20 minutes of cooling, cover the pan with cling film, or slide the whole thing, pan and all, into a large ziplock bag, and leave to cool completely (both Sainsbury’s & Tesco sell XL ziplock bags that are ideal for this).
- If you’re planning to enjoy your toffee as is, then, once completely cold, you can give it a sharp tap on the counter and it should break into pieces quite easily. Be sure to transfer it to an airtight container to keep it free of stickiness.
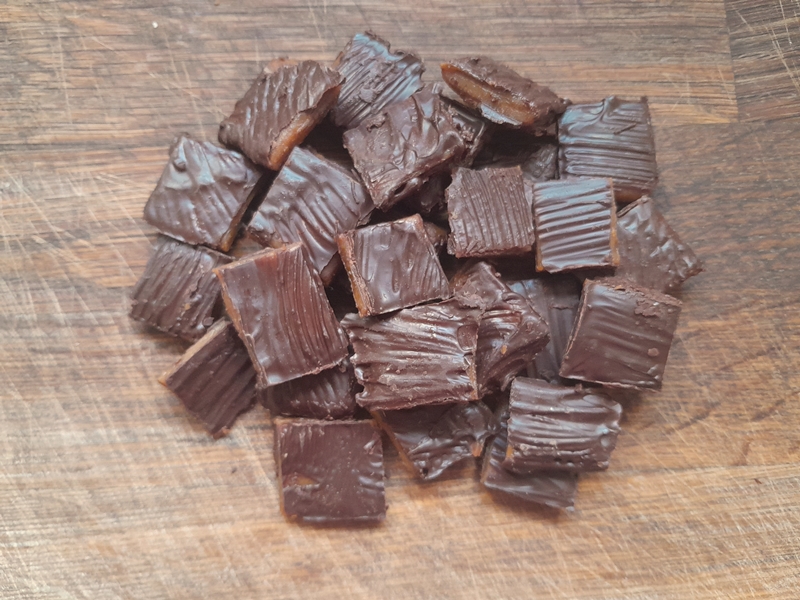
- If you’d like to cover it with chocolate, you can temper it relatively quickly and easily by using the seeding method and 200g of the chocolate of choice. I used dark chocolate. Also, Instead of dipping pieces individually, which is a Faff™, I opted to brush the tempered chocolate over the whole sheet, on both sides, then break into pieces once the chocolate had set and cooled. It doesn’t cover the toffee completely, but enough to keep it from dissolving into a sticky mess, and the contrast between the bitterness of the chocolate with the sweetness of the toffee and the tang of the redcurrants is delightful.
