
Confession Time: When it comes to recipe history, I’m afraid I’m bit of a “Well, actually…” person.
I’ll read some guff online about a recipe ‘backstory’, or some offhand comment not being sufficiently respectful of a British recipe, or even another country’s claim to something that originated in the UK and I really have to exercise great self control in order to refrain from leaving a comment beginning “Well, actually…”.
Then again, sometimes I just can’t help myself, and I’ll make a blog post, and so here we are at the dessert topic of Floating Islands.
The initial thing I take issue with, is Wikipedia’s assertion that “The earliest known English-language reference to a floating island is in The Art of Cookery Made Plain and Easy (1747)”. As will be shown below, the recipe is much older than that. What they probably meant was ‘first published in English’, because I have found a slew of manuscript recipes (OK, so it’s six. Is six a slew?) predating this claim, some stretching back well into the seventeenth century. Now you might quibble that manuscript recipes are not the same thing at all, and therefore don’t count, but these manuscripts have been dated, verified, digitised and made freely available online for over a decade, so *snaps fingers impatiently* get with it, Wikipedia.
The most delightful aspect of these early recipes is that they are much easier to make than the custard/poached meringue/caramel version of modern times. For such a simple dessert, there’s a lot of stress involved in making a lump-free custard, making shaping and poaching meringues so that they look neat and don’t collapse, making a caramel that doesn’t taste burnt, not to mention all the time it takes do do all of the above. Contrast this with, no exaggeration, if you have the ingredients to hand, you can serve up your dessert in 12 minutes – and that’s including 10 minutes of your kitchen gadget machine doing the whisking.
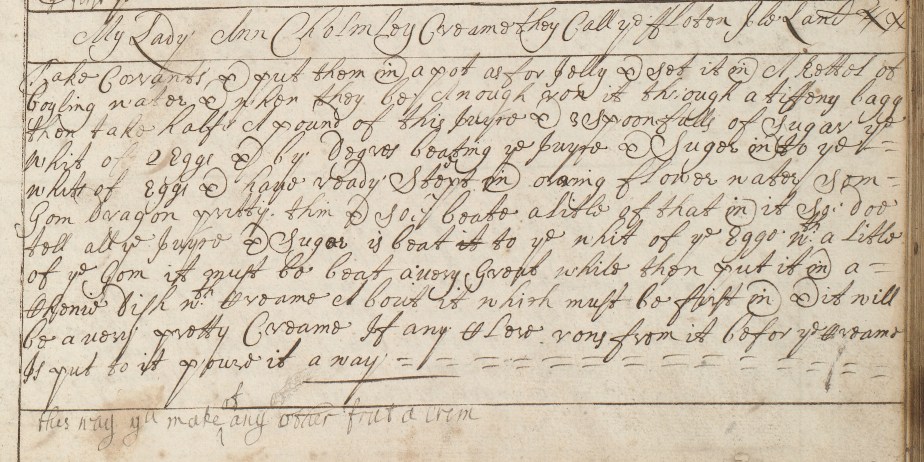
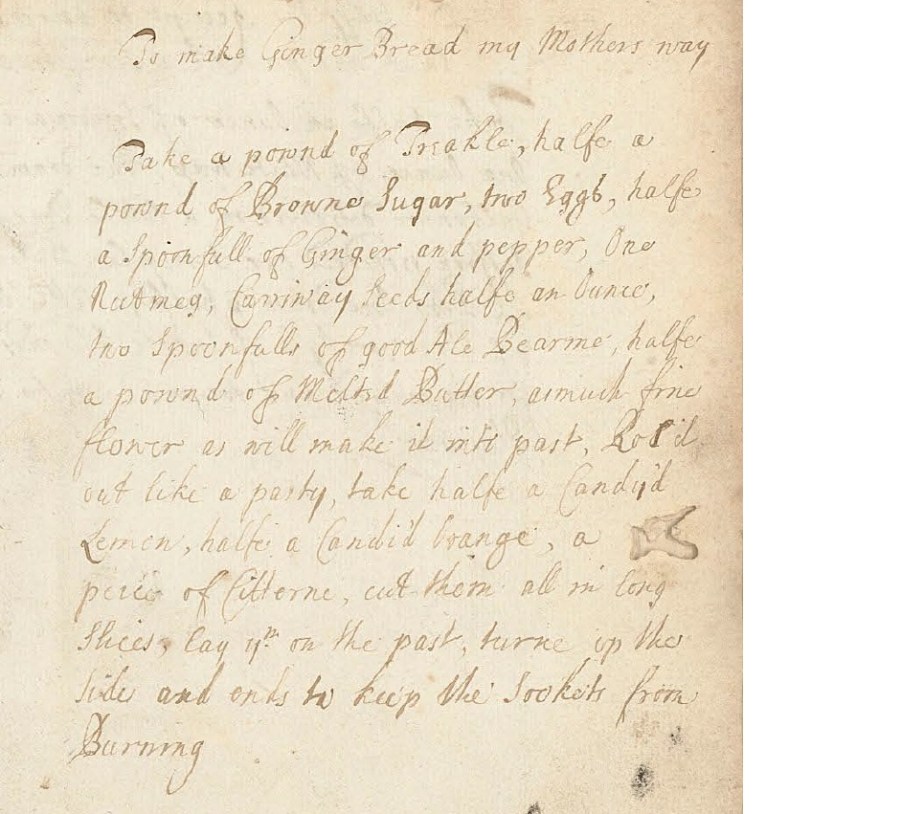
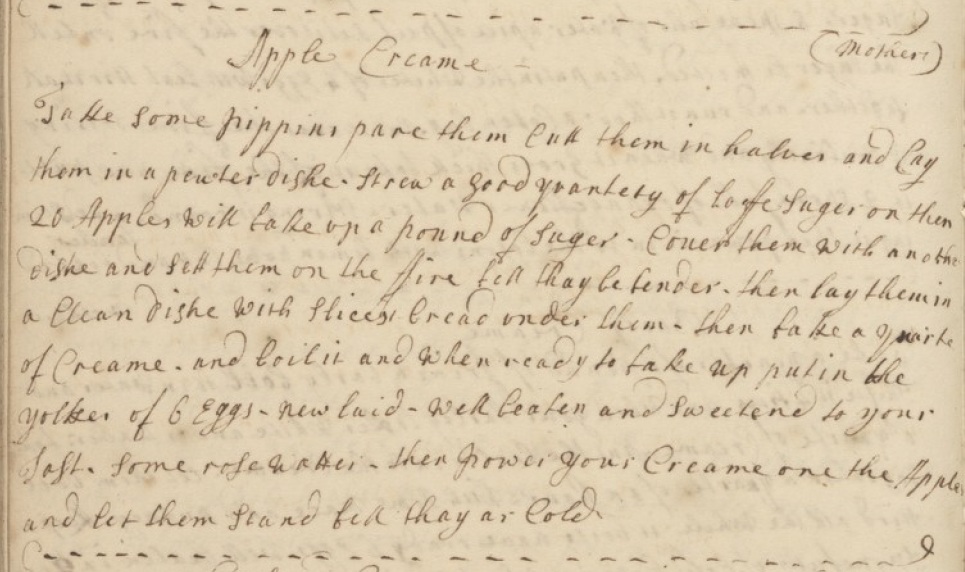
The earliest Floating Island recipe I have found dates from 1675, and is attributed to Lady Anne Cholmley (1637-1705). Lady Anne married Sir Hugh Cholmeley, 4th Baronet (1632 – 1688) in 1665, so this recipe attributed to her married name, appearing in a manuscript dated to 1675, fits the dating very well, and the “My Lady” honorific suggests the author was personally acquainted with Lady Anne herself.
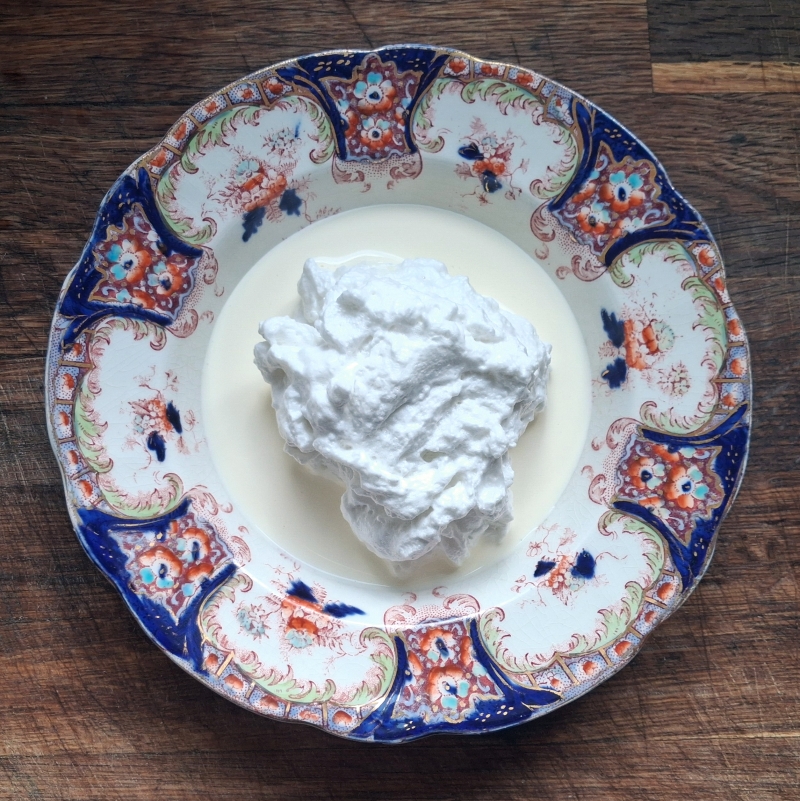
As already mentioned, this recipe is very quick and easy to prepare: fresh currant juice, sugar, egg-white and a little gum dragon (gum tragacanth), whisked together and served floating on a dish of fresh cream. It is very similar to the Dairy-Free Cream already published on this blog. I particularly like the later annotation that “This way you can make of any other fruit a cream” at the bottom. Gum tragacanth is still used in recipes today, giving durability in decorative sugarwork. However, in this recipe, it is employed to give structure (due to the liquidity of the juice). I had some in the cupboard (because of course I did) and tried using it in the recipe, but compared to the other methods, it didn’t appear to have a significant effect. Plus you have the extra Faff™ of having to soak it overnight to make a paste before proceeding.
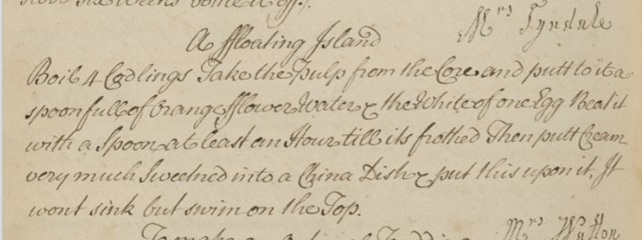
Mrs Tyndale’s Floating Island recipe is dated a little later ( circa 1690-1750), and uses apple pulp of codlings (cooking apples) instead of the fruit juice.
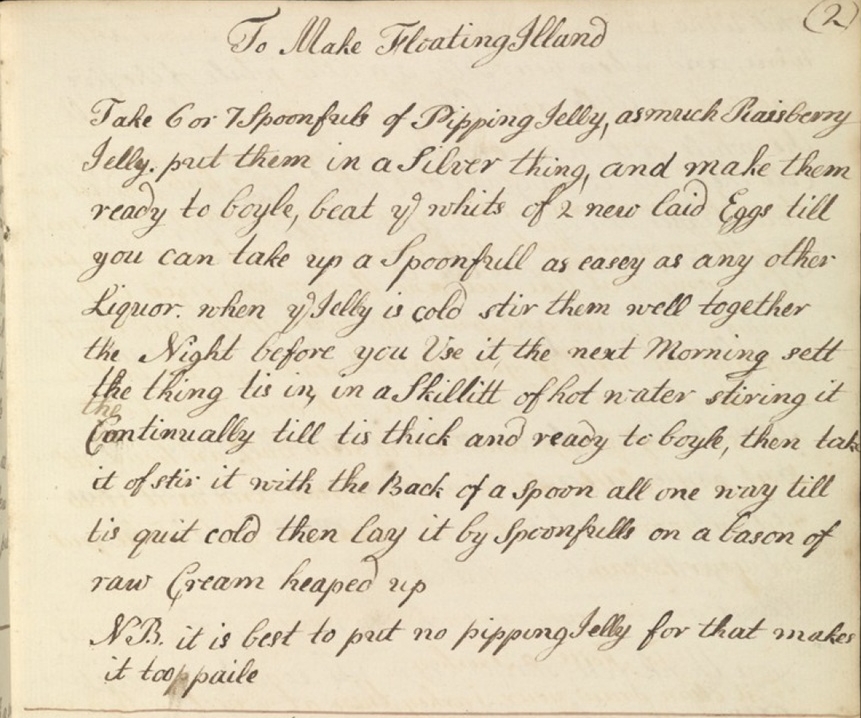
This version, from a manuscript dated 1700, offers yet a third variation of Floating Islands: Raspberry and apple jelly is stirred into egg-white and left overnight. The following day it is whisked over hot water until thickened, and then served in spoonfuls on a dish of raw cream. This is how Dairy-Free Cream is made, and using fruit juice already sweetened and set into a jelly, rather than straight fruit juice, gives the resultant foam a much longer ‘shelf life’. As can be seen on the Dairy-Free Cream post, I left the whipped foam on the counter top – for SCIENCE! – and it holds it shape, albeit slightly deflated, for over five hours. Great if you need to prepare your dessert in advance.
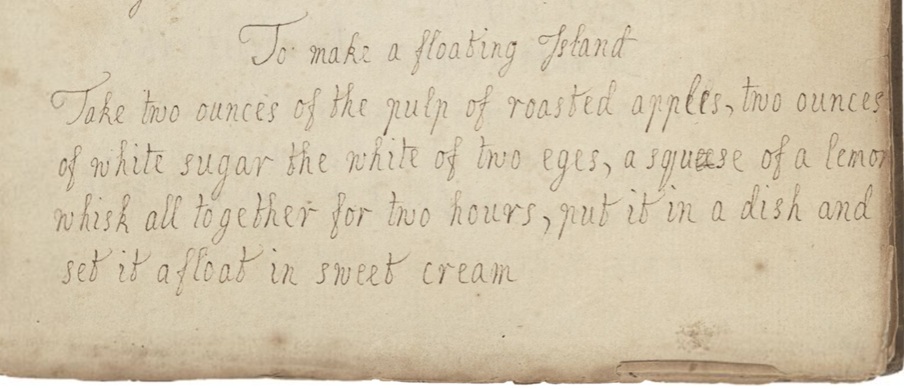
This recipe returns to the apple pulp version, albeit with a much smaller proportion of pulp. There’s proportionally rather a lot of sugar, but the addition of the lemon juice can balance that out. This version is leaning towards another classic British dessert, Apple Snow, an ethereal confection with which to treat any guests who have a sensitivity to dairy produce.
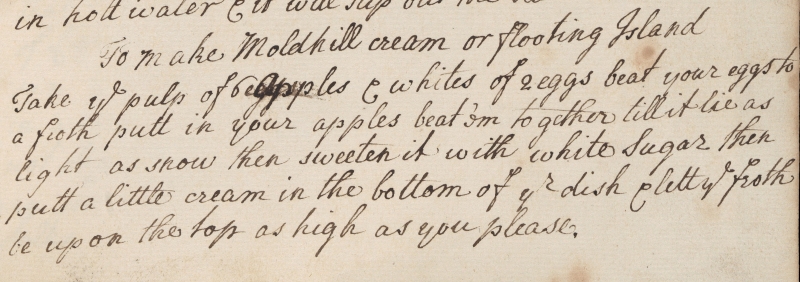
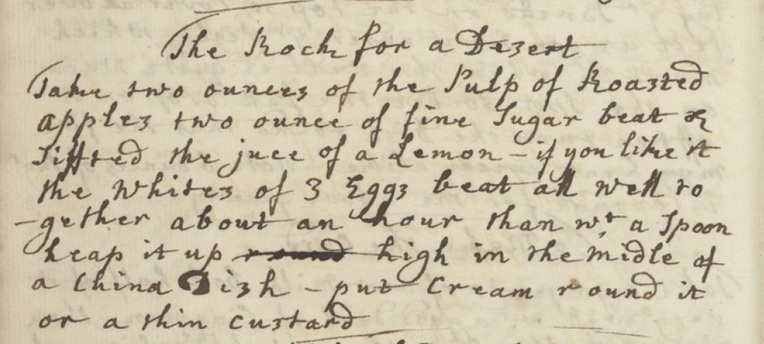
This particular recipe highlights one of the difficulties of old recipes – the names. Luckily, in this instance, the author has given us two names, one of which is Floating Island, but imagine if they had not? And this isn’t an isolated incident. The same recipe can be known by many different names all over the country. Conversely, the one name can refer to sometimes drastically differing dishes depending on location. In addition to all of the recipes listed here, other fruit/sugar/egg-white mixtures I’ve read have had the titles Irish Cream, Currant Cream, Spanish Butter, Blossom Cream and the very impressive The Rock For A Dessert (below). There are no doubt many more variations out there, for what is essentially the same recipe.
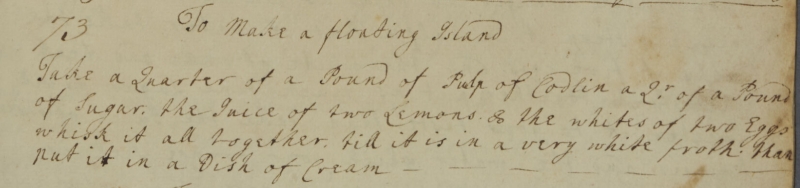
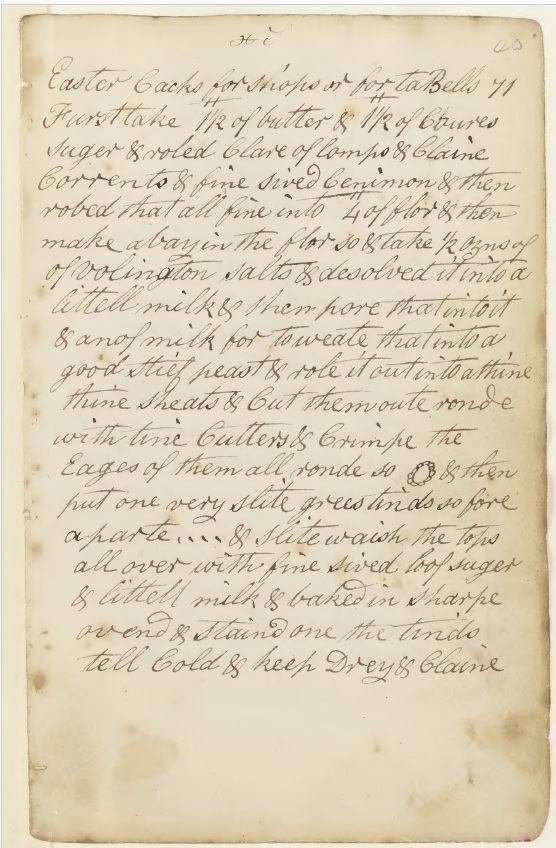
And finally, the last of the slew of pre-1747 Floating Island recipes, dating from 1741, is another apple-pulp-based version.
It’s interesting to note that the ingredients have, in general, moved from currant juices and jellies in the 17th centuries, to fruit-pulp-based versions in the 18th centuries.
Choose Your Own Floating Island Adventure!
The best version of this fruity cloud delight is the one for which you have the ingredients to hand, so I thought I’d offer a few suggestions and then you can make an informed choice.
- Egg-whites : You can use fresh, by all means – most people have eggs on hand, and all you need is a single large egg-white to make enough billowy clouds of fruit meringue to serve up to 8 people. The downside of this is that the lack of cooking might not be something everyone enjoys, plus you now have a solitary egg-yolk to keep/use. The solution is, of course, to use pasteurised eggwhites in a carton. Everyone’s happy and no pesky yolk to clutter up the fridge.
- Sugar : White, granulated or caster sugar is my recommendation. It adds sweetness but without impacting the delicate pastel colour of the whipped mixture. Some of the above recipes add sugar to the cream, but I feel this is unnecessary, and the cool richness of, say, double cream is a great counterpoint to the ethereal nature of the whipped meringue.
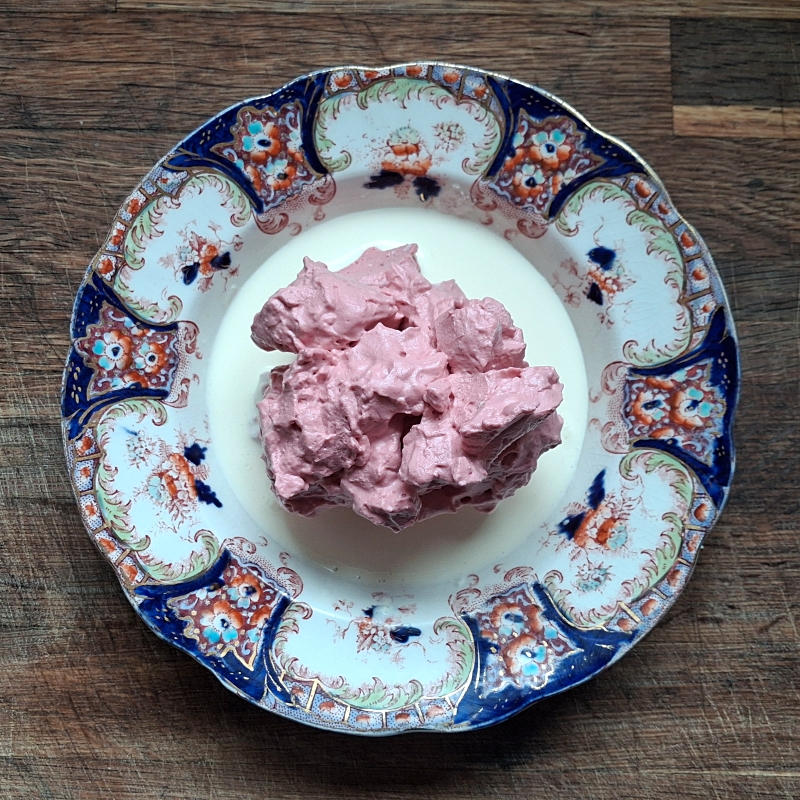
- Fruit juice vs fruit pulp : Both are delicious. The deciding factor to consider should be, how long until I serve it? If you are serving it immediately, then fruit juice is fine. When whipping up (no pun intended) the versions for the photos, I thought I’d make them all first, then photograph. But by the time I was on the third batch (so 15-20 minutes after finishing the first batch), the first batch was already collapsing. The fruit pulp gave the finished meringue more body, and a slightly longer standing ability.
- Fruit jelly : If you need to have some time between making your dessert and serving it, using a fruit jelly is optimal – the juice has already been sweetened and set, and is therefore much better at holding it’s shape when whisked. You can also warm and then sieve jam.
- Which fruit? : Honestly? Almost any. The main guideline here is that it should be tart/sharp. As can be seen in many of the recipe above, using lemon juice can add the necessary acidity if needed. Gooseberries, rhubarb, apricots (jam), and for jellies – all colours of currants, raspberries, quince, cooking apple, cranberry, pomegranate. Even though the meringue is sweetened with sugar, you still want to be able to taste a hint of sharpness.
Floating Islands
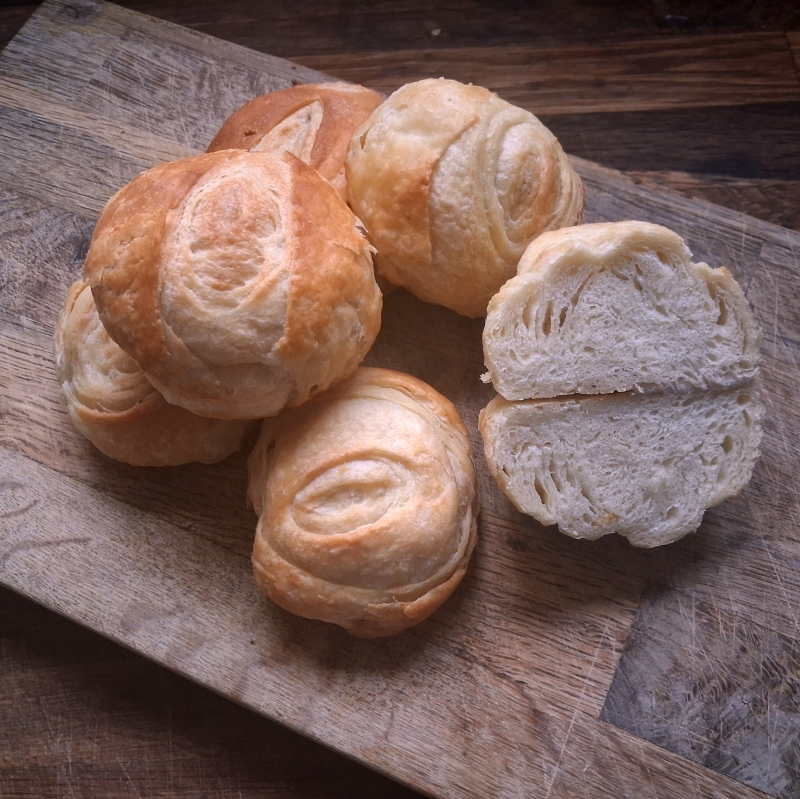
This recipe is a general guide, in that you can substitute whatever fruit/jam/jelly/juice you have. It makes a large volume, but it disappears in a puff, so you can serve giant portions to four, or more elegant servings to eight. Another idea I had that might appeal, would be a ‘flight’ of islands, each one flavoured differently, all floating on a sea of cream. Garnish with fresh fruit and berries if liked, but I must say, I prefer the simplicity of just fruit cloud and cream.
1 large/40ml egg white
100g/ml sharp fruit puree/juice/jelly/sieved jam
50g white sugar (omit if using jelly/jam)
Juice of half a lemon (optional)
To serve
Double cream
sugar (optional)
Fruit garnish (optional)
- Put all of the ingredients, except the cream, into a bowl, or the bowl of a stand mixer and whisk for 10 minutes.
- Sweeten the cream if liked.
- Portion out the meringue onto your serving dishes and pour round the cream. Some of the recipes above say to pour the cream first, but having tried that myself, it makes it very difficult to then place the meringue neatly. Much better to add the meringue to the dry plate and then pour round the cream.
- Garnish with fruit if liked.
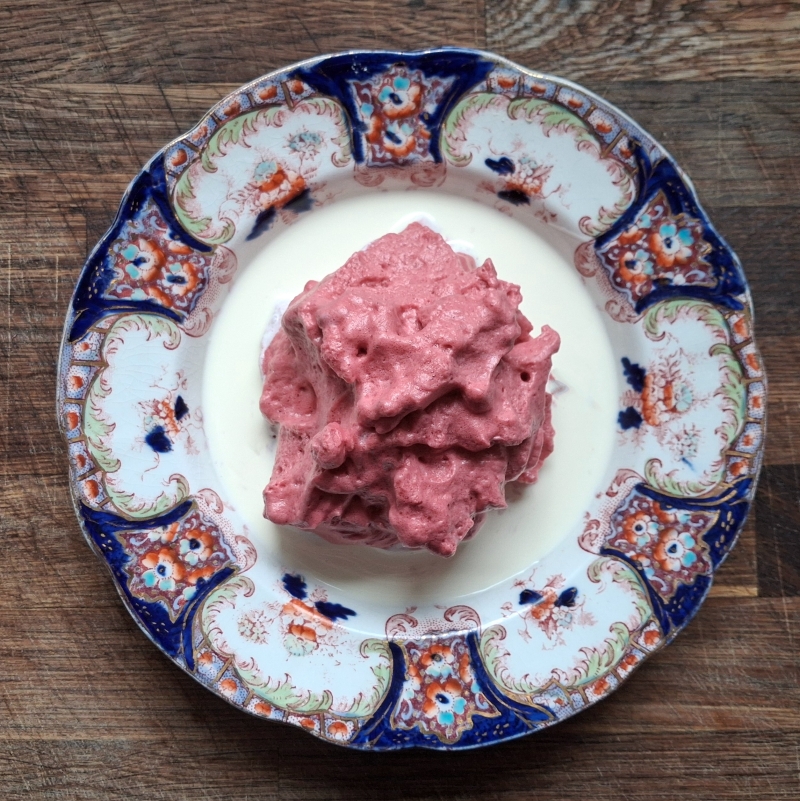
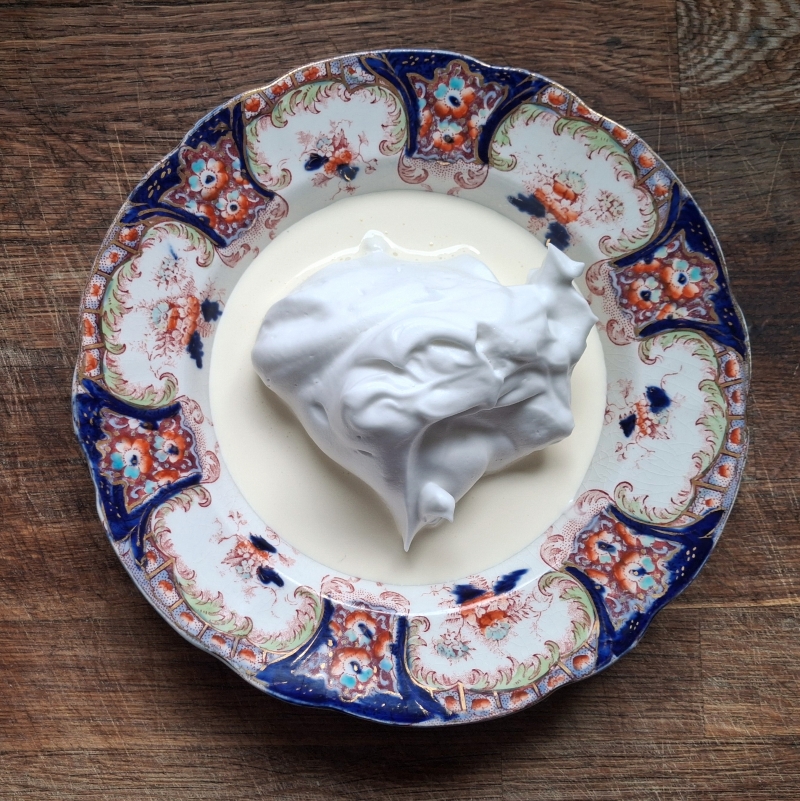
Close-up images from the top picture.
-
- With white currant juice.
- Black currant juice.
- Cranberry jelly. Yeah, don’t do this. I only tried it because I picked up cranberry jelly at the supermarket by mistake instead of redcurrant jelly (they were next to one another on the shelf). The colour was deep, but the flavour was just not there. Probably something to do with the gelling agents used in manufacture. Home-made cranberry jelly might be worth trying.
- Bramley Apple pulp.


