Fruit Charlotte

This is a deliciously simple, autumnal dessert that, although it can be assembled from very few, ordinary ingredients, ends up tasting so much better than the sum of its parts – the crisp, golden outside, hot and sharp insides and cool cream or hot, rich custard make this a dish of delicious contrasts. It is one of the many British desserts that evolved to use up stale bread and cooked fruit. Whilst the filling can be almost any fruit purée you have to hand, the construction needs to observe a few rules if it is going to look as impressive when served as it tastes.

Firstly, the fruit purée needs to be relatively firm and ‘dry’, with little or no visible liquid. If your cooked fruit is especially moist, then just set it in a sieve to drain – the resultant liquid can be sweetened and served as a pouring syrup or saved for use in/on other desserts. Alternatively, set it over a low heat in a wide pan, to help evaporate the excess liquid. If you think your fruit is still too soft, you could consider whisking in an egg yolk or two to help thicken it during cooking, making it more of a fruit custard.

The bread should not be plastic-wrapped and pre-sliced. The best charlottes are made when the bread can absorb some moisture from the filling in much the same way as it does in Summer Pudding, and sliced bread just doesn’t have a suitable surface for this. Not that having your bread sliced by a machine is bad – it can make it wonderfully thin and regular – just buy a whole loaf and get the bakery to cut it for you on their machine. If it’s not stale, just leave the slices you intend to use out on the counter for an hour, they’ll dry just enough. During baking, the dry outside will, thanks to the coating of butter, crisp up and turn wonderfully golden, and the inside will draw moisture from the filling and pull everything together, so that you have a firm pudding to turn out.

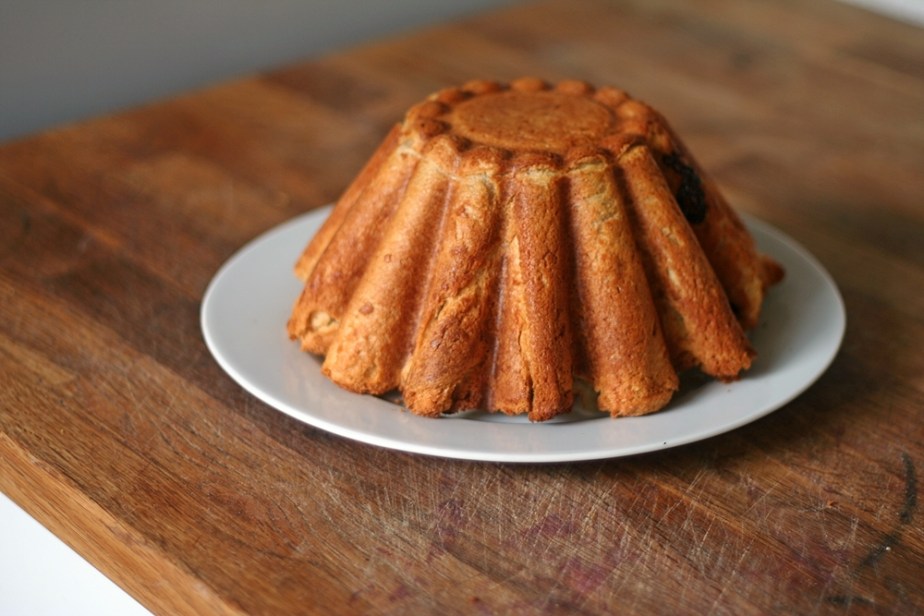
The final important consideration is the shape of the bowl in which you construct your charlotte. It needs to be both oven-proof and domed/tapering. Straight-sided charlottes are usually cold desserts such as the Charlotte Russe, which uses sponge fingers and a firmly set cream and is also thoroughly chilled before being served, which helps greatly with presentation. A traditional, domed pudding bowl, or individual pudding bowls, are ideal. Their tapering form is most conducive to maintaining an impressive shape of your hot charlotte. The fluted tins commonly marketed as brioche tins are also the ideal shape, with the added detail of fluting giving the turned-out dish a very elegant appearance.

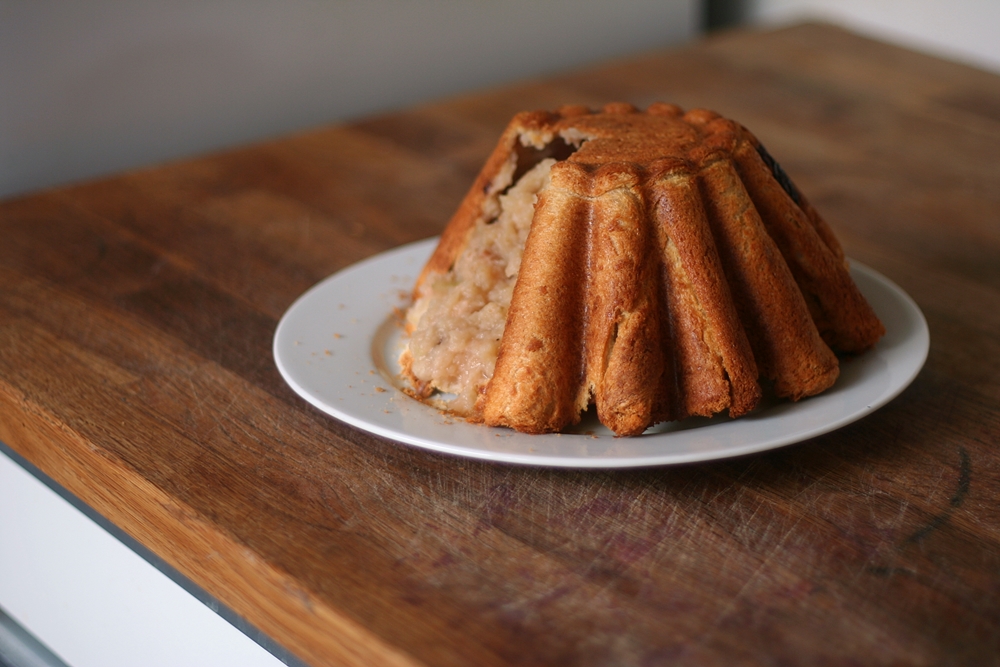
This is an adaptation of Mrs Rundell’s recipe from 1808. Her version calls for raw apples, sugar and butter and is baked slowly for 3 hours with a weight on top to help compress the apples as they shrink during cooking. This recipe is much shorter, just over one hour, but this length of time is necessary for the bread to crisp, turn golden and be sturdy enough to support the fruit filling until serving time. Higher heat and baking for a shorter time means that, when turned out, the pudding slowly sags and collapses, like a Victorian matron with her corset removed. The use of an already-cooked puree makes preparation that much quicker and the cooked pudding less prone to loss of volume.

Fruit Charlotte cut

Fruit Charlotte

I used some apples from a friend’s garden for this recipe, and added no sugar – the sharpness was a great contrast against the rich, buttery crust. I highly recommend this approach. If your fruit is especially sharp, consider using a sweet custard as an accompaniment.

750g fruit pulp
stale white bread slices
softened butter

pouring cream or custard to serve

  • Preheat the oven to 200°C/180°C fan.
  • Butter the inside of your bowl(s) generously with softened butter.
  • Cut the crusts from the bread. Cut a circle or flower shape for the bottom of your bowl and put it in first. It will make for a neat top once you turn out the pudding, and also hide the ends of all the side pieces of bread.
  • Line your bowl(s) with the crustless bread. How you choose to do this is up to you. Personally, I keep the pieced of bread whole and patch where necessary. If your bread is fresh and springy, you can make things easier for yourself by using a rolling pin to flatten them slightly. If you are using individual pudding bowls, you might want to reduce this to a width of 1.5cm, as the smaller form will need thinner slices if it is still to look dainty when turned out.  Place the slices inside the pudding at a slight angle and press into the butter. Leave the excess sticking out of the top of the bowl for now. Make sure  there are no spaces or holes for fruit to leak through. You can see on the above photo that a little apple juice has squeezed out and been caramelised by the heat of the oven. Delicious, but a flaw if you’re after an unblemished exterior to your charlotte.
  • Fill the lined mould with the fruit puree.
  • Butter slices of crustless bread for the top of the mould. Fold the ends of the bread at the sides inward and place the final pieces of bread butter-side upward over the top.
  • Spread a little butter onto a sheet of parchment and place this butter-side down over your filled bowl.
  • Add a cake tin on top together with an oven-safe weight, such as a foil-wrapped metal weight or quarry tile.
  • Bake for about an hour until the outside of the buttered bread is crisp and golden brown and the filling piping hot. For individual puddings, bake for 30-40minutes.
  • Remove the weight/tin/parchment and bake for a further 10 minutes, to allow the lid to crisp up.
  • Remove from the oven and turn out onto your serving dish.

Posset Pie

Joseph Cooper, 1654

The surfeted Groomes doe mock their charge With Snores.
I have drugg’d their Possets.

Macbeth, Act II, scene II

The broadest description of a posset that I can think of is that of a hot syllabub: a thickened drink of either milk or cream, sweetened and flavoured with any of a number of alcoholic drinks and/or fruit, served warm.

In the Middle Ages it was seen as a winter warmer and it’s ability to make one feel good meant that over the years it segued into becoming borderline medicinal. It was recommended for insomnia, indigestion, as a purgative and of benefit when fasting.

Recipes abound, and the styles are as numerous as their intended uses: custard posset, cold posset, apple posset, whipped posset, froth posset, sack posset, soap sud posset, posset without milk, posset without wine, posset without milk wine or beer.

Thus far, Joseph Cooper is the only person I have found that turns posset into a dessert. Twenty years later Hannah Woolley would include this same recipe in her own book, adding a few of her own details to the method.

Apples are the recommended fruit, but this would work well with almost any fleshy fruit pulp; apricots in summer, for example, and dark, sharp damsons in autumn.

Posset Pie

Sweet shortcrust pastry
Eggwhite for glazing

500g fruit puree
2 large yolks
200ml double cream
50ml cream sherry
1tsp ginger
1/2tsp cinnamon
1-2tbs icing sugar
4 heaped tablespoons dried white breadcrumbs

To decorate
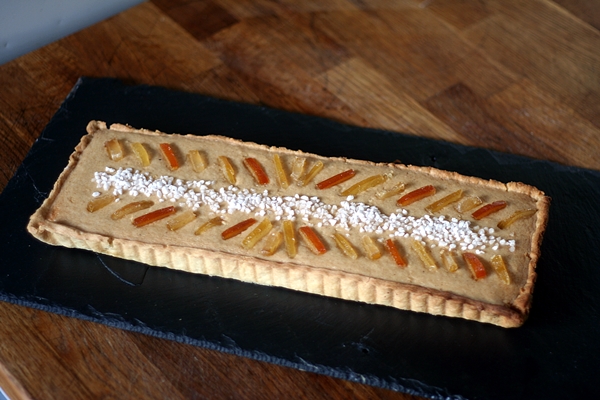
2cm matchsticks of candied orange, lemon and citron peel
sugar nibs

  • Preheat the oven to 200°C/180°C fan/gas 6.
  • Roll out the pastry and line a greased shallow tart tin. My favourite shape is long and rectangular (36 x 12 x 3cm).
  • Prick the bottom with the tines of a fork to prevent blistering and line with parchment paper and baking beads.
  • Bake for 10 minutes, then remove the parchment and baking beads and bake for a further five minutes.
  • Brush the insides of the tart with beaten egg white and bake for a further 3 minutes.
  • Turn the oven heat to 160°C/140°C fan/gas 3.
  • Mix the filling ingredients until smooth. Taste and add more sugar if liked.
  • Pour into the pastry case and smooth over.
  • Bake for 20-25 minutes until the filling is almost set. It will firm up while it cools.
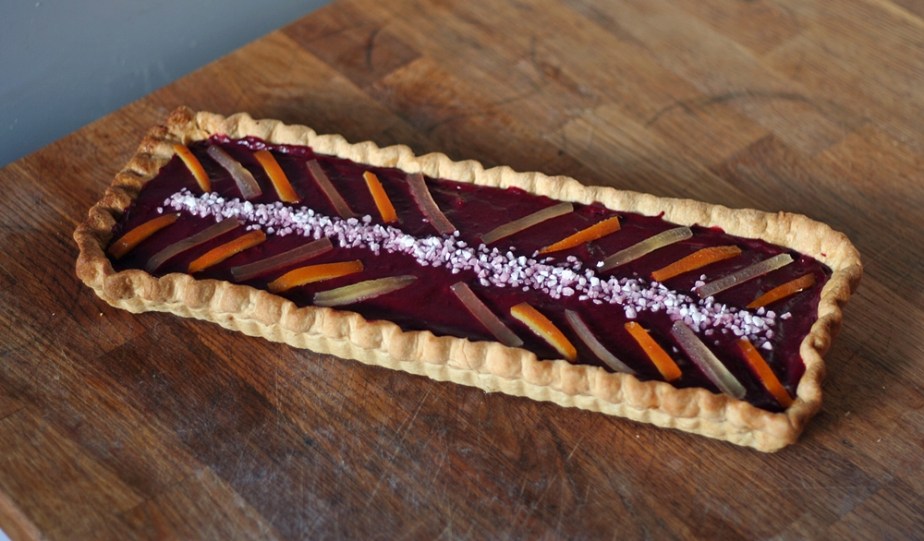
  • Arrange your candied peel and sugar nibs on the pie as decoratively as you like.
  • Serve cold.
Apple Posset Pie
Apple Posset Pie Joseph Cooper, 1654

Fruitbowl Tea Loaf

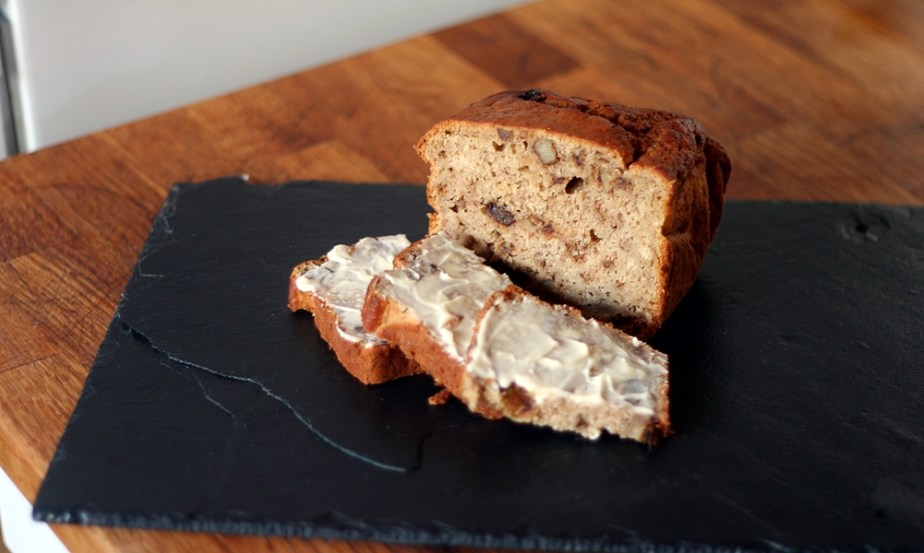
Retrieved from  an old farmhouse baking book, this recipe has dates and walnuts, which make for a delicious tea loaf, but can also make it a little dry, almost dusty, especially if the walnuts aren’t in their first flush of youth. Deliciously, the inclusion of mashed bananas helps with the moistness and the apple sauce really brightens the flavour with its freshness. Neither flavour dominates, making the loaf wonderfully flavoursome. Finally, it is brought to a rich, batter consistency by a splash-ette of lager – and indeed, Lager Loaf was the original recipe title – but that sounds too much like Lager Lout to my ears – which is far from tasty – so I feel justified in renaming it.

And it is a distinct improvement to eat spread with butter, with a cup of something hot.

Fruitbowl Tea Bread

You don’t HAVE to make this with the apple – if you have the eggs, just use two and no apple.

85g unsalted butter
1tbs golden syrup
85g soft brown or light muscovado sugar
1 sharp eating apple, e.g. Jazz or Braeburn
1 large egg
280g self-raising flour
¼ tsp bicarbonate of soda
½ tsp cream of tartar
pinch of salt
150ml lager
2 ripe bananas, peeled and mashed
125g chopped dates
50g walnuts, roughly chopped

  • Preheat the oven to 180°C, 160°C Fan.
  • Grease and line a 1kg loaf tin with parchment paper. Tear off a second piece of parchment and make a fold down the middle. This piece will be used during the baking.
  • Peel and core the apple, then grate finely into a small saucepan. Cover with a lid and heat gently until the apple has broken down into a puree. Sieve to remove any lumps. If you’re impatient, whizz it in a small food processor.
  • Gently warm the butter, syrup and sugar either in a pan or using the microwave, until melted.
  • Add the lager and apple puree, then whisk in the egg.
  • Mash the bananas. Make sure your dates and walnuts are also chopped and ready.
  • Sift the flour, bicarbonate of soda and cream of tartar into a bowl.
  • Add the liquid mixture and stir thoroughly.
  • Quickly fold through the bananas, dates and nuts and pour into the prepared tin.
  • Place into the oven and prop the second piece of parchment over the tin with the fold at the top, rather like a tent. This will prevent the top of the loaf from becoming too dark during baking.
  • Bake for 30 minutes, then remove the ‘tent’ and bake for a further 15-20 minutes.
  • Be sure to test the cake for done-ness using a cocktail stick/skewer/cake tester before removing from the oven – the moisture in the bananas and apple will make it very moist, so be sure it’s baked all the way through, especially towards the bottom.
  • Allow to cool in the tin for 10 minutes before removing to a wire rack to cool completely.
  • Serve sliced and buttered, and store in an airtight container.

Apple Bread

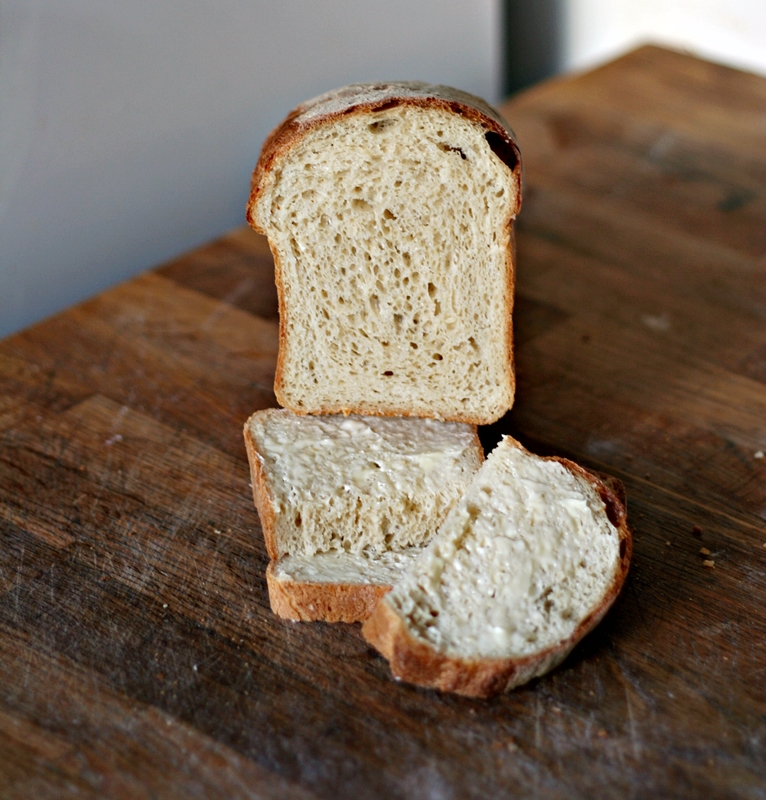
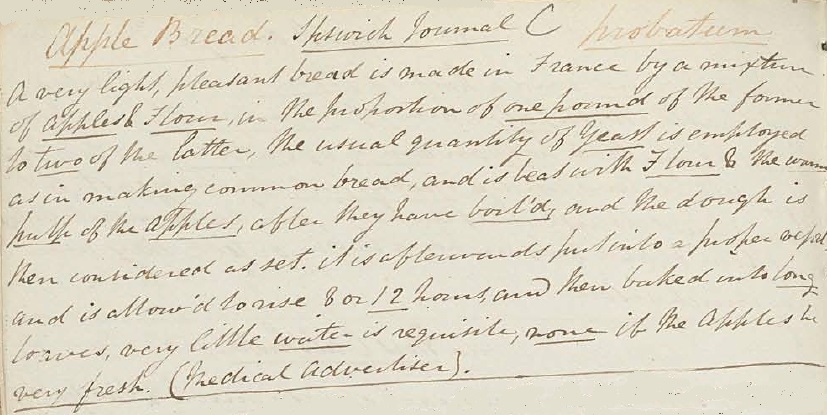
This recipe was copied from the Ipswich Journal into the manuscript book from a Norfolk household in the early 19th century. The manuscript was eventually purchased by the Wellcome Library and its contents digitised and made available online, which is where I discovered it. It was the simplicity of the recipe that appealed – just 3 ingredients: Flour, yeast, apples. I immediately mixed up a batch and was delighted with the results – a lovely open textured bread with a bite/chew similar to sourdough, but with a delicate, underlying sweetness which, when toasted, almost tasted like honey. It went brilliantly, un-buttered, with some strong cheddar and a crisp apple.

Original Recipe
Source: MS3082, Wellcome Library Collection

To continue the week of coincidences, I later found this recipe reprinted word for word in my 1950 copy of Farmhouse Fare, recipes sent in to and collected by Farmer’s Weekly magazine. Which means that someone else copied the same recipe from the Ipswich Advertiser and kept it alive in their family for 150 years to be revived in 1950. Utterly delightful!

It’s a regular in this household – I hope you enjoy it also.

Apple Bread

500g strong, white bread flour
1 sachet easy-blend yeast or 20g fresh yeast
4 Bramley Apples

  • Put the apples in a saucepan and cover with water.
  • Bring to the boil, turn down the heat and simmer for 15-20 minutes until the apples are soft and cooked. The skins might split, but as long as the water is just simmering, the apples should hold together – fast boiling water will only get you apple soup.
  • Lift the apples from the water (you might need some water later). Remove the skins and scrape the cooked apple flesh into a bowl.
  • Sieve the cooked apple to make a smooth puree. If using fresh yeast, you can crumble it into the puree and whisk until thoroughly mixed.
  • Put the flour and dry yeast into a bowl and stir to combine.
  • Add the apple puree gradually and stir to combine into a soft dough. You should need between 250-300g of apple puree. If you need more liquid, use some of the water the apples were cooked in.
  • If you have a mixer with a dough hook, work the dough for 10 minutes on the lowest speed. Otherwise, work it by hand, but be careful not to add too much flour in the kneading – you want to keep the dough nice and soft.
  • Put the dough in a bowl, cover and leave the mixture to double in size.
  • When sufficiently risen, tip the dough out of the bowl and knock back.
  • Shape into loaves and put into a 1kg greased loaf tin.
  • Cover lightly with a cloth and leave to rise for a further 30-45 minutes.
  • Preheat the oven to 200°C, 180°C Fan.
  • Bake for 30-40 minutes until golden brown and the base sounds hollow when tapped. If the bread appears cooked, but not sounding hollow, remove from the tin and return to the oven for 5-10 minutes to crisp up.
  • Cool completely on a wire rack before slicing.