Fried Bread and Marmalade

In the old days, when religious observance was a greater part of daily lives, as Lent approached, efforts were made to use up larder items in preparation for the coming period of abstemiousness. Bacon and eggs were eaten on Collop Monday, Pancakes (using the resulting bacon grease) were enjoyed on Shrove Tuesday, and Lent itself began on Ash Wednesday.

In the past few weeks I have been looking through various manuscript sources in order to find a shiny, new old pancake recipe for you to try, but, alas, my efforts have been thwarted at every turn due to the adorable (!) British quirk of different regions giving a specific dish their own local name.

I scrolled through the thousands of recipes in my spreadsheets and compiled the following list to look at in more detail:

  • Court pancakes
  • Million pancakes
  • Pancake pudding
  • Pancake wafers
  • Paper pancakes
  • Temple pancakes
  • Creeping pancakes

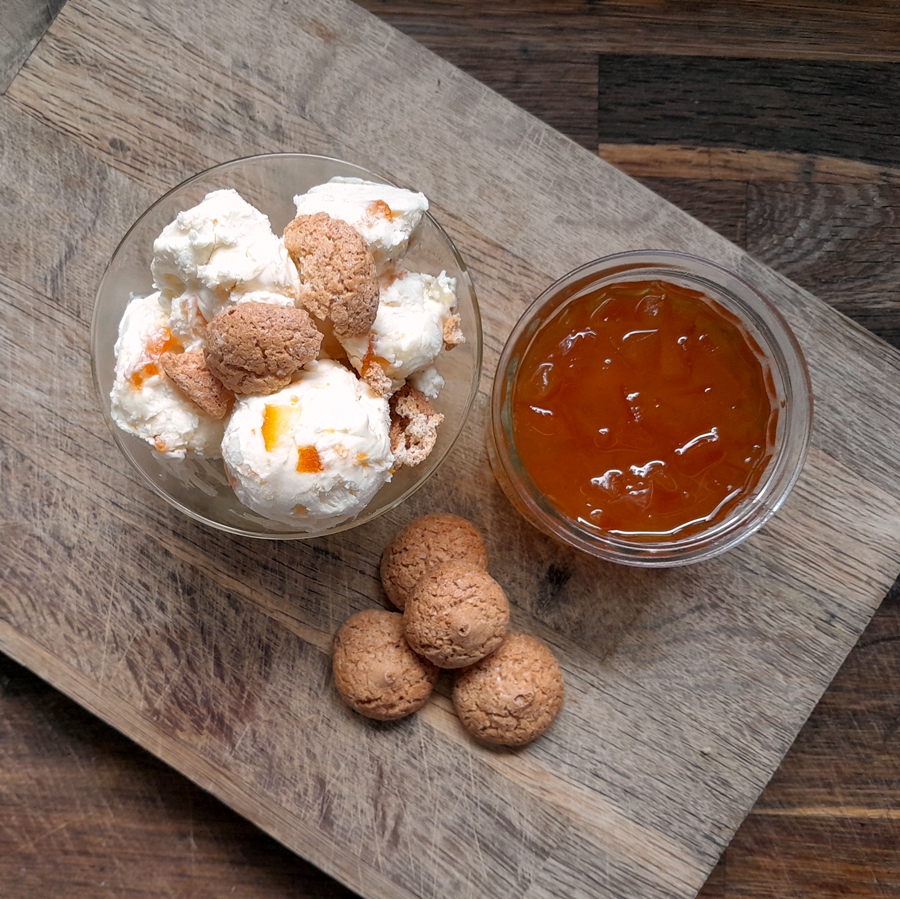
In Every. Single. Case. they turned out to be variations of the recipe most popularly known as A Quire of Pancakes: lots of small, thin, rich, cream-based pancakes stacked in a pile, with sugar strewn between each layer, and served like a cake slice (see image below).

Quire of Pancakes, 1714

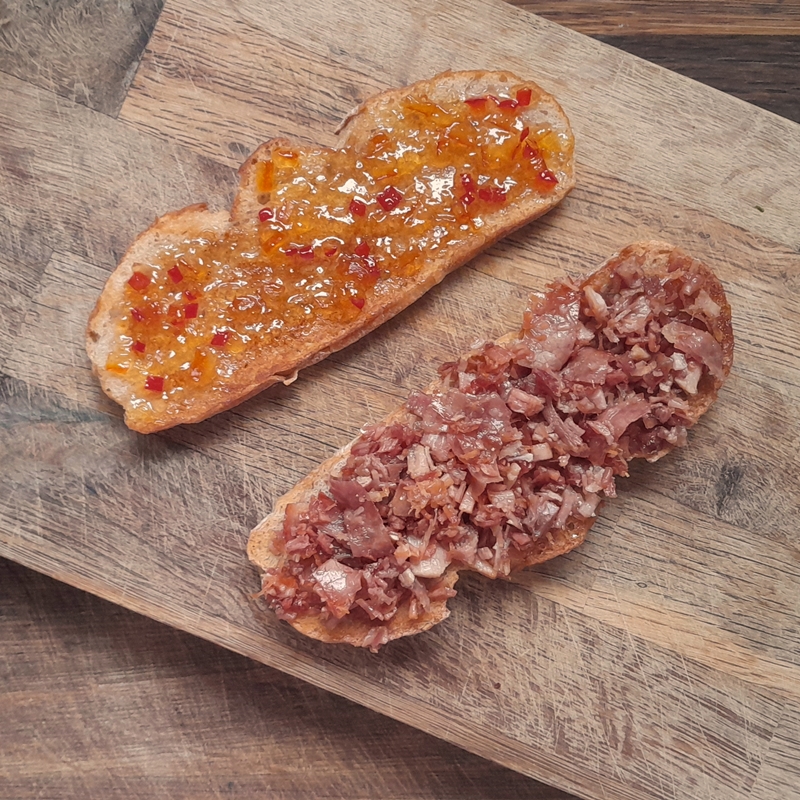
So I’ve decided to go in a completely different direction and bringing you a recipe for Collop Monday, or alternately Shrove Tuesday breakfast, and in doing so, recording for posterity a dish I know my mother ate in her childhood: Fried bread and Marmalade.

When I first heard of this as a child myself, I thought it sounded awful, but as an adult, I have come to appreciate the delicious interplay of salty, sweet, bitter and smoke.

Slices of bread were added to the pan after bacon was fried and mopped up the remaining fat and in the process become toasted from the heat of the pan. They were fishes out and spread with marmalade and handed to my mother and her siblings.

Many modern packs of bacon, especially at the lower prices, are injected with water to artificially plump up the weight. When fried, it splutters and spits and seeps a milky liquid that is visually very unappealing. Back in the day – we ‘re talking 1930s here – the bacon would have been purchased from the butcher by the slice, possibly even home-cured by the butcher himself, and the dry-brining method employed drew out moisture from, rather than injecting it into, the slabs of belly pork used for bacon. In the pan the fat would render down into a clear liquid, filled with the smoky, salty flavour of the bacon. When cold, the fat would solidify and could be kept for use, but if this were impractical (it not yet being the age of ubiquitous refrigeration in the home) to use it up at once, it was easy to mop up the fat with slices of bread, which then became imbued with this flavour bomb as an alternative to the (more expensive) butter. It is easy to overdo the bacon fat, and it doesn’t take much for the bread to become overly greasy, so marmalade was a perfect foil to combat this: the bitterness of the Seville oranges and the sweetness of the jelly providing delicious contrasts to the hot, crunchy, salty, smoky bacon fat.

Back then, this snack was born from frugal-by-necessity living. My mother grew up in a one-income household. Nothing was left to waste. But that’s not a reason not to enjoy it today. And additionally, the level at which you enjoy it is completely adaptable – from simple to complex, the components are almost infinitely customisable according to what you have in the cupboard/fridge.

  • The Bread: Whatever you have to hand, or prefer: brown, white, pre-sliced, hand-sliced, doorstep, gluten-free, rye, sourdough… you get the idea.
  • The Bacon Fat: Kinda non-negotiable. I learned recently that Bacon grease is available to buy by the tub in the USA, and in checking online for this post I am slightly horrified to find a 9lb bucket now available to buy in the UK. If you’re a fan, then go for it, but my approach here is to be much smaller in scale – get your bacon fat from cooking bacon. Dry-cure bacon will render pure bacon fat without any white residue.
  • The Marmalade: Regular listeners will be aware of my keenness at the moment to find ways to use the various marmalades I have on hand after entering The Marmalade Awards this year. I have an embarrassment of riches on that score, but any marmalade will suffice. Use whatever you have and like. In the photographs I’ve gone with the Chilli Marmalade I made this year – classic Seville marmalade with fresh red chillies – it looks so pretty with the red flecks of chilli pepper, and the spiciness pairs well with the bacon.
  • The Bacon: Optional. If you want a more substantial snack, tuck in a few slices of your favourite. Smoke, unsmoked, back bacon, streaky bacon, gammon, ham… it’s all delicious.

Fried Bread and Marmalade

Slices of bread
Bacon fat (from dry-cure bacon/gammon)
Marmalade of choice
Bacon (optional)

  • I’m going to stray a little from the traditional preparation method. As mentioned above, the traditional method is to turn the slices of bread over in the fat in the pan, until they have both absorbed the fat and become toasted. Which is fine. Except it’s difficult to get an even colour on the bread – at least so I find. Also, I dislike having greasy fingers from the bread being fried on both sides, so I’m going to suggest the following:
    • Toast the bread in a toaster/under a grill, then spread the solidified bacon fat onto the hot toast with a knife, like butter. This way the toasting of the bread is even, it stays dry on the outside for cleaner eating, and you can easily control the amount of bacon fat used. If your bacon fat is still hot in the pan, use a pastry brush to dip in and then brush over the surface of your toast.
  • Spread your choice of marmalade onto the non-dry sides of the toast.
  • Add your bacon – or not – and enjoy.

Marmalade Cake

The recipe I have for you today comes from the classic and ever-reliable Be-Ro baking booklet.


My copy dates from somewhere between 1930 and 1950 (going on the fashions worn in the illustrations), and contains tried and tested recipes both for the everyday and special occasions.

I chose this recipe for a number of reasons:

  • It tastes absolutely delicious.
  • It’s a genuine store-cupboard cake, requiring everyday ingredients.
  • It is an excellent way to use up last year’s marmalade to make way for this year’s batch(es).
  • It is an excellent way to start making use of this year’s batch of marmalade, bursting with freshness.
  • It can be varied with whatever preserves you have on hand (within reason).

It being marmalade season, I have recently been preserving up a storm and entering some marmalades in the annual Marmalade Awards competition.

The method I used was extremely small-batch, but still provided me with more than the single jar required for each entry. Now, this year I entered six categories. I have six lots of extra marmalade. So I was KEENLY in the market for some way to increase marmalade consumption.

Enter the Be-Ro booklet and its recipe for Marmalade Cake with its short list of simple ingredients: flour, fat, sugar, marmalade, eggs, milk.

I’ve increased the amounts of each ingredient to 1.5 times the original quantities, because I had almost exactly that amount of Stork baking margarine in the fridge, and the first cake was so successful I made a second with a different marmalade and used butter, which was just as nice.

A square lime marmalade cake with two pieces cut off and displayed, on a wooden cutting board.

The first cake was made with lime marmalade (see above pic) and was very delicate in flavour and the cake was soft of crumb. The second cake was made with Seville Orange marmalade (see recipe for Dundee Marmalade here), and was just as delicious, possibly even more so. The striking difference was the aroma when the cake was cut – it was like a cloud of intense orange that wafted up. Amazing. I would venture that you could also substitute the marmalade for other jams or preserves, with the caveat that it should be one of the stronger and preferably tart-flavoured fruit: apricot, plum, damson, etc. because the sharpness of the fruit is a delicious contrast to the sweetness of the crumb.

This isn’t the flashiest, most exotic bake you’ll make, but it is easy and very fine-tasting and can be whipped up in about an hour start to finish from the contents of your cupboard/fridge.

Marmalade Cake

This is for the enlarged mix, and requires a 20cm square tin.

170g butter/Stork
170g sugar
170g marmalade
340g plain flour + 1tbs baking powder OR 340g self-raising flour
3 large eggs
80ml milk

  • Heat the oven to 170°C, 150°C Fan.
  • Grease and line a 20cm square tin with baking parchment.
  • Cream the fat and sugar together until light and fluffy.
  • Add the marmalade and mix thoroughly.
  • Sift together the baking powder and flour if using. Otherwise, sift the self-raising flour.
  • Whisk together the eggs and milk.
  • Alternately add these two ingredient mixtures to the mixture in the bowl, stirring, until everything is fully combined.
  • Pour the cake mixture into the prepared tin and smooth evenly.
  • Bake for a total of 45 minutes, turning the tin around after 25 minutes to ensure even baking.
  • Allow to cool for 10 minutes in the tin, then carefully transfer to a wire rack to cool completely.
  • Store in an airtight container.

Summer Ice-creams

The brief green gooseberry season is upon us and their delicate but sharp taste is a wonderfully aromatic taste of summer. Reddish dessert gooseberries ripen later in the season, but the sharpness of the green is my preference. They’re a thorny bush, so be prepared for having multiple jabs in your hands. I picked some at a local Pick Your Own fruit farm. Top Tip: most berries conceal themselves on the undersides of branches, so always lift them up for maximum harvesting efficiency. If your local fruit farm doesn’t have PYO gooseberries (and many don’t, sadly) they can also sometimes be found in the freezer of your local Farm Shop.

After laying down a batch of my bi-annual batch of gooseberry vinegar (a doddle to make, but a year in the fermenting/clearing), I decided to make a batch of gooseberry ice-cream. As the owner of a tiny kitchen (2m x 3m), I have neither the counter/cupboard space for an ice-cream maker, nor the patience to keep stirring a semi-frozen mixture in order to break up the ice-crystals, so the ‘set it and forget it’ no-churn recipe employing sweetened condensed milk is pretty much a no-brainer in this household.

The method is practically the same as that given for Damson Ice-Cream from a couple of years ago: Mix most of a fruit puree into the cream/milk mixture, then ripple through a ribbon of the remaining puree and set in the freezer.

The means of obtaining your gooseberry puree is a little different than usual, mainly due to their water content, which will wreak icy-crystal havoc with your ice-cream if it is too high. Rather than simmer with water until they break down, the gooseberries are coddled in a closed vessel over simmering water. The result will be a clear-ish liquid (which can be poured off) and the fruit pulp, which is then used for the ice-cream. This approach preserves not only the colour, but also the flavour, as prolonged cooking and/or high heat impairs both.

The second recipe is my re-creation of an ice-cream I had several years ago in Yorkshire. It’s actually not really a summer ice-cream, because citrus isn’t really in season in July, but oranges are in the shops and marmalade is on the shelves, and I am in love with it, so here we are.

The bitterness of Seville oranges, just as the tartness of gooseberries, is the perfect pairing with this ice-cream method, because the condensed milk is SO sweet, it needs something sharp to cut through all that sugar. Interestingly, in developing this version, I did learn that there is such a thing as too much bitterness. An early version contained both the zest and juice of Seville oranges (which I keep in my freezer as frozen cubes for year-round zestiness), and while I liked the end result, it really leaned heavily into bitterness, so I had to dial it back somewhat. This version uses the zest of regular oranges and no juice, with the slivers of peel from the marmalade providing delicious pops of intense Seville bitterness, tempered with sugar.

Both of these ice-creams will need to be removed from the freezer for 20-30 minutes before serving, in order to soften.

Gooseberry Ice-Cream

I have left the gooseberries without sugar, as there is more than enough sweetness with the condensed milk. Feel free to add some sugar if you feel they need it.

500g green gooseberries

1 x 397g tin of sweetened condensed milk
600ml double cream

  • Put the gooseberries in a lidded pan without any additional water and set it inside a larger pan. Add water until the larger pan is half filled. Heat over medium high heat until the water is simmering and coddle the gooseberries until soft. if you don’t have suitable pans to do this, you can put them into a casserole with a close-fitting lid and bake in the oven at 170°C, 150°C Fan. for 20-30 minutes.
  • Tip the coddled gooseberries into a sieve over a bowl and allow the clear liquid to drain through. Set the liquid aside.
  • Rub the gooseberry pulp through the sieve until all that remains are the seeds. Discard the seeds and set the pulp aside to cool.
  • Put the condensed milk and double cream into a bowl and whisk together until light and billowly.
  • Fold through 3/4 of the gooseberry pulp until well combined.
  • Spoon the ice-cream mixture into containers and then stir through the remaining puree in a ripple.
  • Cover and freeze at least overnight before serving.
  • Waste not, want not: You can add sugar to the clear gooseberry liquid and simmer it down to a syrup to pour over your ice-cream.
  • Bonus: Add a splash of elderflower cordial to taste to the puree, but beware of adding too much liquid.

Marmalade Cheesecake Ice-Cream

There is a slight difference in the method of this ice-cream, in order to get the cream cheese fully incorporated with the other ingredients. There’s no added sugar, as the condensed milk add more than enough. The amount of marmalade you’ll need will depend very much on the whatever marmalade you are using. I used a jar of my Dundee Marmalade, which is quite peel-heavy, so I only needed one jar.  Top Tip: An efficient way to get your marmalade shreds separated from your marmalade jelly, tip your jar(s) of marmalade into a pan and warm it gently until the jelly liquefies, then pour it through a sieve over a bowl. The jelly can then be poured back into the jar(s) for use later. Cut your shreds into smaller pieces if liked.

100g of orange shreds from your favourite marmalade – about half a cup.

zest of 3 oranges
330g cream cheese, Philadelphia for preference – at room temperature
1 x 397g tin of sweetened condensed milk
600ml double cream

  • Put the orange zest and cream cheese into a bowl and whisk until smooth.
  • Pour in the condensed milk and whisk again until smooth.
  • Add the double cream and whisk until light and billowy.
  • Stir through the marmalade shreds.
  • Spoon the ice-cream mixture into containers.
  • Cover and freeze at least overnight before serving.

Serving suggestion

To emulate a regular cheesecake, serve with some crisp/crunchy biscuits – Digestive biscuits/Graham crackers are a favourite. I used amaretti in the picture because that’s what I had, and regular readers will know we don’t make special trips to the supermarket for just one ingredient.