What’s this? Two posts in one week? Yes, I’m spoiling you. But it was something I came across when looking for recipes to celebrate Mothering Sunday, and just couldn’t resist.
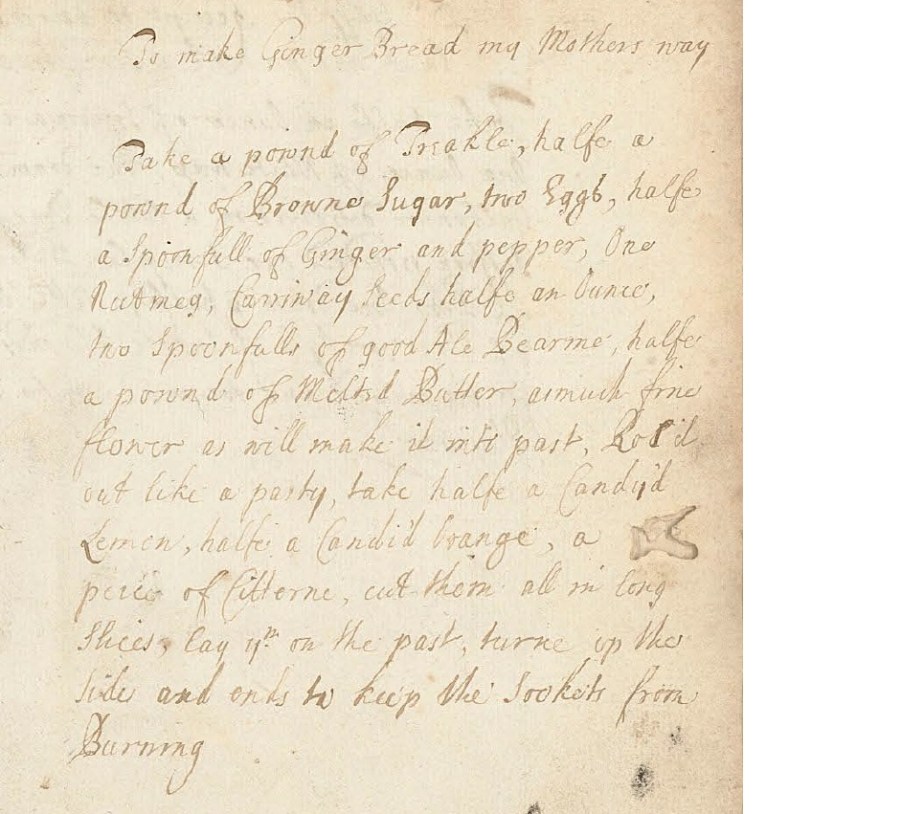
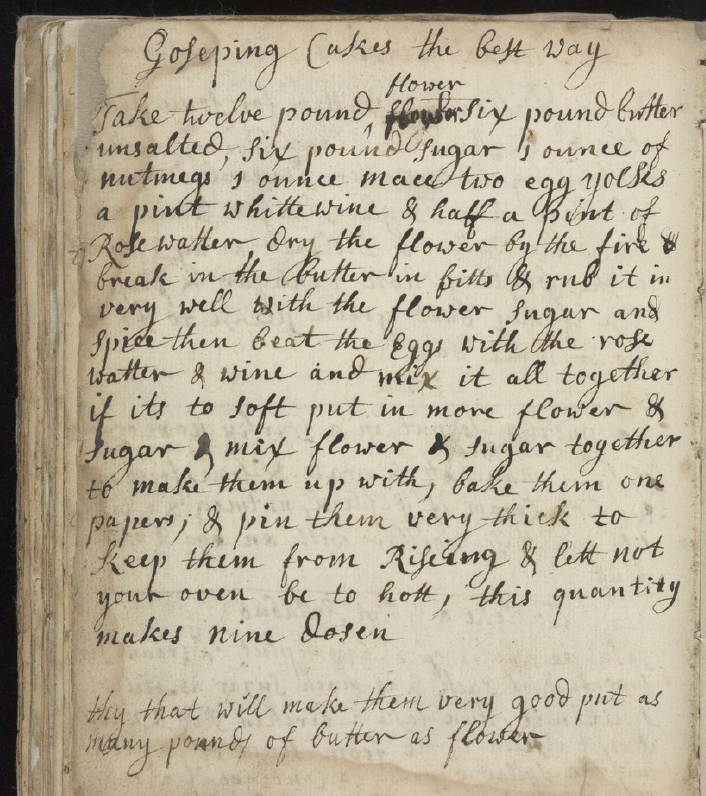
Apart from the whole ‘Mother’ connection, I like that this recipe page is rather splattered and smudged, indicating that it was well loved, and it now proudly displays its battle-worn scars from many a baking day. The manuscript has been dated as circa 1675. Whilst this particular manuscript might well have been started around then, I’m no handwriting expert (I’ve just read thousands of recipes), but I’m thinking that this recipe is written is a more modern hand, so I’ve suggested both 17th and 18th centuries as suitable source dates.
This recipe require only the slightest tweak in order to bring it to a 21st century palate, namely switching the raising agent from barm to bicarbonate of soda. As mentioned numerous times in my writings, initially I like to bake recipes as they are written, as far as is possible. I also invariably reduce the quantities of ingredients, as recipes from times past tend to be on the large side, baking as they were for entire households: you don’t want to expend great expense on large quantities of ingredients only to find you have a complete dud of a recipe on your hands.
I’ve had to guesstimate ‘spoonful’ quantities for the spices and I must have been doing something right, because the first batch I made tasted delightful. The texture was what let it down: even using an entire sachet of fast-action yeast (which I suspect is much more sprightly than traditional barm) failed to make any noticeable impression on the soft gingerbread paste, and it clunked heavily onto the counter top when I turned it out of the tin. I suspect the weightiness of the treacle was just too much for the yeast to handle. However, adding just half a teaspoon of bicarbonate of soda produced a close-textured but pleasantly spongy result.
The spices are a fantastic, if rather unusual, mixture: ginger, caraway seeds, pepper and nutmeg. The overall flavour is definitely ginger, but it is also rounded out with hints of the other spices. Don’t skimp on the caraway seeds – for one batch I made I put less than the recipe indicated because I ran out, and the difference was noticeable and not as full-bodied as the original.
My final tweak was to add a shiny glaze, to really bring out the jewel-like colours of the candied peels. You can use a variety of sweet syrups and/or honey to achieve a great shine, but I like the gelatine glaze as it gives shine without stickiness, and you can store any excess glaze in the fridge for use with other things.
Pepper Gingerbread
This is, conveniently, a one-pot bake, as everything is gradually mixed together in a single saucepan before being turned into the tin for baking. I have used a small, low-sided pan, but a long, narrow tart tin would also do. If you’re not in the mood to make your own candied peel, you can buy large piece peel online.¹
150ml treacle
75g unsalted butter
75g soft, dark-brown sugar
1 large egg – beaten
1 tbs caraway seeds
1.5 tsp ground ginger
1.5 tsp grated nutmeg
0.5 tsp ground white pepper
0.5 tsp bicarbonate of soda
250g plain flour
Topping
2 quarters of candied lemon peel – sliced thinly
2 quarters candied orange peel – sliced thinly
1 medium piece candied citron – sliced thinly
Glaze (optional)
150ml water
50g caster sugar
1 sheet leaf gelatine
- Line a shallow 18cm x 28cm baking tray with parchment paper.
- Put the treacle, butter and sugar into a small pan and set over low heat (2) until the butter is melted.
- Remove from the heat, stir, and set aside to cool to body temperature (you don’t want to cook the egg by having it too hot).
- Whisk in the beaten egg.
- Sift the spices, seeds, bicarb and flour together.
- Add to the saucepan and stir until well combined, with no flour visible at all.
- Pour the mixture into the parchment-lined pan and smooth over. The paste will be quite soft and will ‘settle’ into the pan on its own accord.
- Heat the oven to 170°C, 150°C Fan.
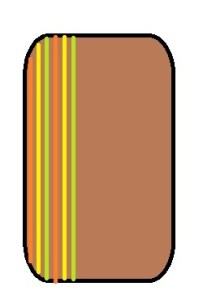
- Lay the thin strips of candied peel onto the top of the gingerbread. To reproduce the pattern in the top photograph, lay a ‘stripe’ of orange peel the length of the pan, then repeat with lemon and then again with citron. Repeat these stripes until the whole of the gingerbread is covered.
- Bake the gingerbread for 25 minutes, turning the tin around halfway through.
- Remove the gingerbread from the oven and brush with the gelatine glaze.
- Allow to cool in the tin.
Glaze
While the gingerbread is baking,
- Bloom the sheet of gelatine in water.
- Put the sugar and water into a small pan and stir over medium heat until the sugar is dissolved.
- Remove from the heat and add the bloomed gelatine. Stir until melted.
Cutting the gingerbread into bars: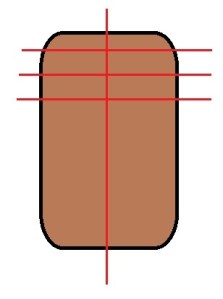
¹ Websites I have used for orange and lemon caps include Wholefoods Online and Wilton Wholefoods. Citron is rather tricky. I made some a while ago, buying the fresh fruit from My Exotic Fruits, and still have some left, but it seems that sourcing it in Europe might be the only way to buy it ready-made nowadays. You could just use orange and lemon, or make some using grapefruit/pomelo peel.