
On a recent holiday in France I had some wonderful strawberries: heady, aromatic and bursting with flavour.¹
Still a bit mesmerised, two punnets of strawberries were one of the first things I bought when we got back. Alas, compared to the French ones, they were decidedly underwhelming. I know it’s late in the season for strawberries, but even so, a great disappointment.
Since we now have the luxury of strawberries year-round, I thought I’d bring you this method of not only rescuing below-par strawberries, but also demonstrating how you can use them in a couple of recipes, as well as enjoying them in their new and improved, glow-up form.
The method is very simple, too. Cut up your strawberries and sprinkle them with a little sugar – NOT icing sugar, because it contains an anti-caking agent. Use white caster or granulated. The sugar will gradually draw out the juices from the strawberries, which will in turn absorb some of the sugar.
You can enjoy them as is, and luxuriate in their much improved flavour, or you can use them in other things. Below I have two suggestions – a strawberry scone and in a mille feuille made from stale croissants.
To Confit strawberries
I’ve gone back and forth quite a bit to come up with a term for this method and, to be honest, I’m not entirely happy with ‘confit’, because to confit something generally involves the use of heat to cook the items, which this patently doesn’t. However ‘macerating’ wasn’y really suitable either, because that involves adding liquid, and here the liquid comes from the fruit itself. If someone can find a word that fits better, do please leave a comment.
strawberries
caster or granulated sugar – 1tbs per 100g strawberries
- Remove the green stalks and leaves from the strawberries and cut each one into 6-8 pieces, depending on size.
- Put the cut strawberries into a bowl and sprinkle over the sugar.
- Turn the berries over gently so that the sugar is distributed evenly.
- Cover with plastic and set somewhere cool. I prefer to keep them at room temperature rather than chilled, at least in the initial stages as I believe it produces a better overall flavour, but keep in the fridge if you prefer.
- Gently stir occasionally.
- Allow your strawberries to macerate for up to 24 hours. The longer you leave them, the more juice will be drawn out. After about 24 hours, the strawberries will be practically floating in a light syrup and their flavour will be deliciously intense.
- You can choose when to eat/use your strawberries. For the two recipes below I used berries that had been macerating for 24 hours.
Strawberry Scones
Fresh strawberries release too much juice to be included in regular scones, but by using confit strawberries, you can get all the concentrated flavour and still maintain the integrity of your scones. This recipe is based on that of Mrs McNab (19thC farmer’s wife from Ballater, Scotland – see Great British Bakes). It makes 8 scones. It is deliberately unsweetened, as I believe the plainness of the scone dough highlights the flavour of the strawberry pieces much better than a sweet dough. You might disagree, and that’s fine. You can add 30g of sugar to the mixture before baking if you like, or sprinkle some sugar over the hot scones after baking (as in the picture).

225g plain flour
2tsp baking powder, or 1 tsp cream of tartar, ½ tsp bicarbonate of soda.
½ tsp salt
30g unsalted butter
1 large egg
60ml plain yogurt
60ml milk
100g drained, confit strawberries.
Milk for glazing
sugar to sprinkle (optional)
- Heat the oven to 220°C, 200°C Fan.
- Put the flour, powder(s), salt, butter, sugar if using, and egg into the bowl of a food processor fitted with a blade and blitz until the mixture resembles breadcrumbs.
- Tip the mixture into a bowl.
- Add the drained strawberries and fold in.
- Mix the yogurt and milk together until smooth.
- Fold in the yogurt mixture little by little, ideally with a round-ended knife. NB Do NOT slosh it in all at once. You may not need all of the liquid, especially if the strawberries are juicy. You want just enough liquid to bring the dough together.
- NB The faster you do the shaping/cutting/getting the scones in the oven, the more they will rise.
- Turn the dough out onto a floured surface and pat into a circle about 4cm thick. NB Don’t roll it with a rolling pin, you’ll just squash out all the lift from the raising agents.
- Using a dough scraper or thin-bladed knife, cut the disk of dough into eight triangles. They will look small, but they will rise splendidly in the oven.
- Transfer the triangles to a parchment covered baking sheet and brush over with milk to glaze.
- Bake for 15 minutes, turning the baking sheet around after 10 minutes to ensure even colouring.
- Remove from the oven and sprinkle caster sugar over the hot scones if liked.
- Transfer to a wire rack to cool.
- Enjoy warm as is, or with butter or cream.
Strawberry Croissant Mille Feuille
You know when you have stale croissants lying around?
…
*crickets*
…
Of course not. No-one does.
HOWEVER!
The thought “What if…” did cross my mind over the aforementioned holidays, and that led me to thinking about how they might be used in a new and exciting way. The idea is related to the puff pastry more traditionally used insofar as I brought back some delicious French butter with the intention of making a batch, and now I’m procrastinating like mad because, although delicious, it’s SUCH A FAFF™! Bonus: You can use gluten-free croissants (Schar is one brand I have tried – find them in the freezer section of your local supermarket).
Using a croissant reduces the Faff to almost non-existant levels and provides another opportunity to use the strawberries prepares above – this time using the juice as well. Slicing, toasting and then bruléeing the croissants will give both crunch and shine. The last two things needed for our croissant mille feuille are Brulée Sugar and some whipped cream.
To thicken liquid with Arrowroot
Why arrowroot, you may be asking? Well, it thickens and turns clear when heated, but unlike cornflour, when cooled it does not go ‘gloopy’ as such, rather it forms a loose jelly-like texture that clings wonderfully to the fruit (see top photo) making it bright and glossy, and doesn’t form a skin.
For each 80ml of liquid/syrup, use 1tsp arrowroot, or 1 tablespoon per 250ml.
- Mix your arrowroot with an equal quantity of cold water until smooth.
- Add the arrowroot slurry to your syrup and heat gently, stirring all the while.
- NB Do not boil the mixture. High heat will break down the thickening properties. Remove from the heat when thickened and clear.
- Stir in your strawberries and chill until required.
To Assemble
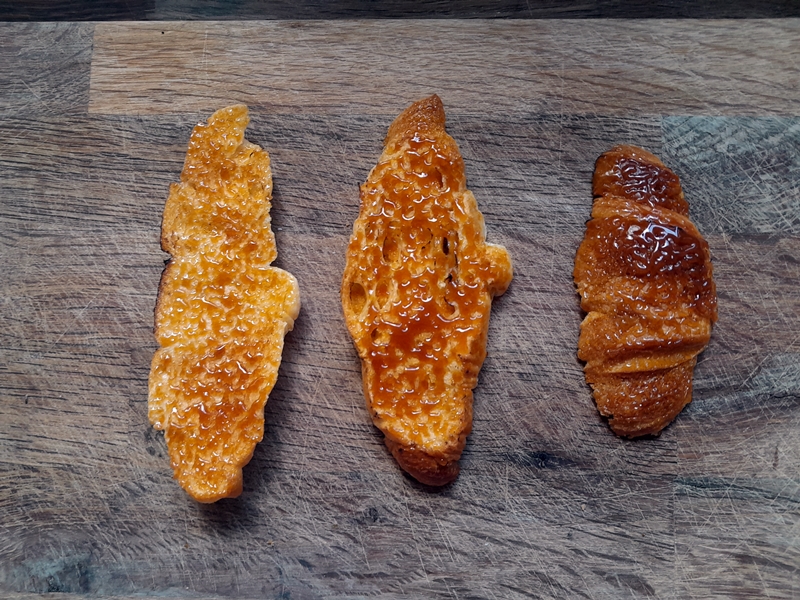
- Slice your croissant(s) into three, horizontally.
- Toast the slices lightly on both sides. Be careful, they will take less time to toast than regular bread, due to the higher fat content.
- Dust the slices thickly with brulée sugar, then either grill them or use a blow torch to melt the sugar. The sugar will melt quickly, so keep an eye. Allow to cool, so that the sugar hardens.
- To serve: pipe a rim of cream around the edge of the bottom two layers, and fill the middle with your strawberries in thickened juice.
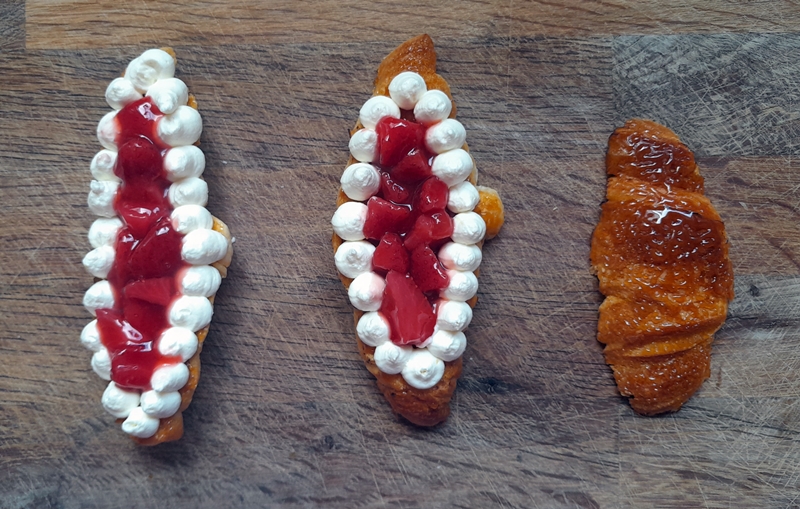
- Stack the layers together and serve.

¹ From the Calais Cité Europe Carrefour near the Tunnel, which I can highly recommend for all those last minute foodie purchases on your way home. If you’re interested in growing your own, the variety I recommend is Charlotte.


