Spiced Apple Rice Pudding

A new variety of rice arrived in Carolina in the 17th century that was to become incredibly popular for almost 200 years. However, it’s popularity dwindled in the 19th century, first with the abolition of slavery and secondly when the waterlogged lands of the Carolinas proved unsuitable for the heavy harvesting machines developed as part of the mechanisation of farming. The grain all but disappeared, but Carolina Gold has now seen a resurgence thanks mainly to the work of one man, Glenn Roberts, founder of Anson Mills. You can read about him here.

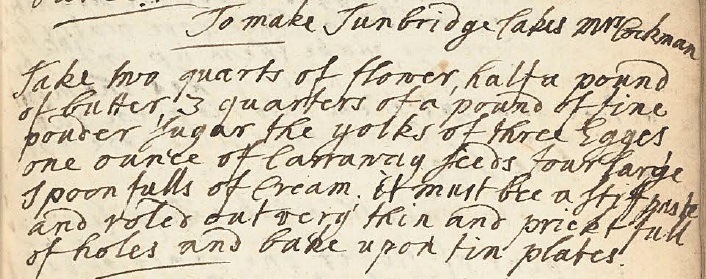
This recipe caught my eye as I was transcribing some newly (to me) digitised manuscripts at the Wellcome Library. Although MS1810 is inscribed and dated on the inside cover with “J. Hodgkin. Oct. 2. 1913”, the recipes within have been dated to the middle of the eighteenth century.

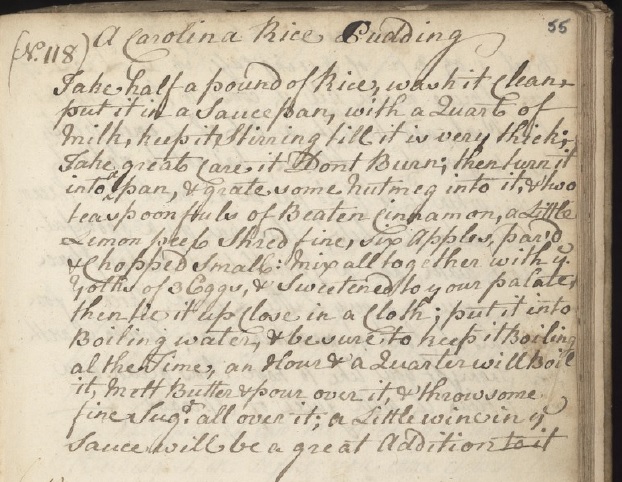
Carolina Rice Pudding, MS1810, Wellcome Collection.

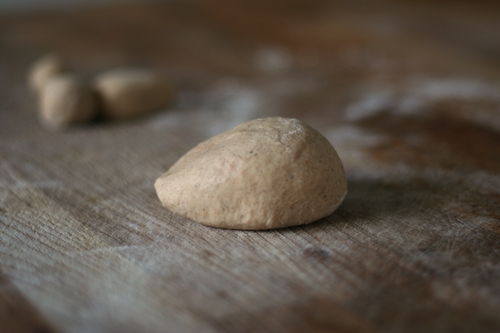
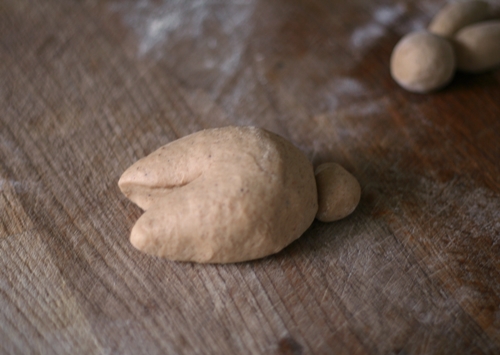
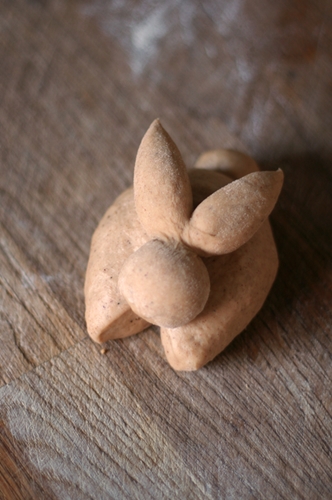
As a child, I was a huge fan of the classic rice pudding, with my favourite bit being the darkly caramelised skin that would form on the top. The cottage that we lived in for a while had a Rayburn – a smaller, low-budget version of an Aga. Since it was on all the time, it was no bother to throw some rice, sugar, milk and butter in a dish and pop it in the low-heat oven and let it do it’s own thing. Nowadays, preheating and using the oven for over an hour for a pudding is a little more effort and also more expensive. Consequently, alternative methods have been developed in order for us to continue to enjoy this classic and simple dish. Slow cookers are very useful, as are the various stove-top methods. For this recipe, I opted to steam the rice in individual-sized pudding dishes. I’ve managed to acquire some fancy-shaped ones, thanks to ebay, but you can also use classic, smooth-sided pudding bowls.

As much as I love traditional rice pudding, it is very carbohydrate-heavy, and it’s a short hop and a skip from that warm, fuzzy, comfort feeling to carb-coma. This recipe unwittingly addresses that – deliciously. The inclusion of apple and spices makes for a creamy cross between apple pie and rice pudding. By using Bramley apples, the pudding becomes positively light, as the cooked apples disappear into a froth of freshness. Dessert/eating apples can also be used, but the relatively short cooking time means they don’t break down as completely as the Bramleys do. But that might be just the bite you’re looking for, so have at it. Alternately, make a large pudding and steam/boil for an hour.

When eaten hot, they need no further adornment, but that doesn’t mean you can’t ‘gild the lily’ as it were. Fresh double cream, as in the photo, is simple, delicious, and being cold, is a fabulous contrast against the heat of the rice and apples. Caramel sauce, home-made or spooned out of a tin of caramel condensed milk, steers them towards toffee apple territory. A drizzle of more evaporated milk can add creaminess without the calories of cream.

Spiced Apple Rice Pudding

The recipe predates pasturisation, so would originally have been made with raw milk, much richer than our modern-day whole milk. I’ve tweaked the original and replaced (approximately) half the milk with evaporated milk.  Next variation I plan on trying is all condensed milk and dark brown sugar, for a real caramel-y treat.

If you have a sweet tooth, you might want to add more sugar. Taste the rice mixture before filling your moulds and decide.

Makes 4 individual puddings.

60g short-grain, pudding rice
1 x 170ml tin evaporated milk
130ml whole milk
½ tsp ground nutmeg
½ tsp ground cinnamon
50g soft, light-brown sugar
1 x 250g Bramley apple
zest of ½ a lemon
2 large yolks

4 individual pudding moulds
butter for greasing
foil to cover
steamer saucepan

  • Put the milks and the rice into a saucepan and stir over medium-low heat until the rice is mostly cooked and the mixture has thickened (15 minutes or so).
  • Remove from the heat and stir through the spices and the sugar.
  • Peel, core and chop the apple finely. I find a food processor is best for this, as a couple of pulses can reduce it to fine pieces without pureeing them.
  • Add the chopped apple, and lemon zest to the rice mixture and stir well. This will have cooled the rice a little, so you can now also beat in the yolks.
  • Butter your pudding moulds well. Be thorough, as this is key in getting your puddings to turn out once cooked.
  • Fill your pudding moulds with the rice and apple mixture.
  • Tear off some foil and divide it into four. Make a fold in piece of foil and then cover your puddings, scrunching the foil round the sides to form a seal. The fold will allow for the rice expanding, whilst preventing any water getting in.
  • Arrange the covered puddings in your steamer pan and cover with the saucepan lid.
  • Bring some water to a boil and put your steamer pan on for 30 minutes. Make sure your water doesn’t boil away. A brisk simmer is all that is needed, not a raging, rolling boil.
  • When your puddings are cooked, remove from the pan and peel off the foil. Gently ease the edges of your puddings away from the sides of the mould, then turn them out onto your serving dish.
  • Enjoy warm or cold, with sauce if liked.

Advertisement

Tunbridge Cakes

Here’s another recipe resurrection, but I’ll give you fair warning, it’s a little caraway-heavy. If you’re not a fan of the taste of caraway, then you’re not going to have a fun time.

The solution to that, of course, would be to substitute a different flavouring for the caraway – easy-peasy – aniseed or cumin if you want to keep it seedy, or lemon/orange zest to make it fresh but really, anything that appeals is fine.

ANYHOO – back to the cakes.

Despite the name, Tunbridge Cakes are actually a biscuit. In the mid nineteenth century, Alfred Romary set up a biscuit factory in the town and the biscuits were manufactured for over a hundred years. Queen Victoria was so delighted with them she awarded a royal warrant and the royal connection continued until the final batch was baked for the wedding of Prince Charles and Lady Diana Spencer in 1981.

The advertisements for the biscuits described them as being “As thin as lace, of a flavour so delicate as to be indefinable. The clubs serve them with port, but they are also excellent with ices or at afternoon tea. Many people prefer them to sweets and chocolate. In two flavours, Sweet and Ginger.” Interestingly, there’s no mention of caraway, nor does it appear on the ingredients list on the tins, which mention only flour, butter, shortening, sugar and salt. George Read’s “The complete biscuit and gingerbread baker’s assistant” (1854) makes a distinction between ‘Water Cakes with Caraways’ and ‘Tunbridge Water Cakes’, though whether these bear any resemblance to the Romary biscuits is unclear.

Tunbridge Cakes actually go back much further than mere Victorian times. Recipe books from the early half of the nineteenth century contain several mentions of Tunbridge Cakes, although, on closer examination. they all appear to be plagiarised copies of Mrs Eliza Rundell’s 1806 recipe. The earliest printed recipe I could find just managed to sidle into the eighteenth century – John Perkins’ 1796 recipe for Tunbridge Wafer Cakes. However, in my favourite recipe collection, that of the manuscripts of The Wellcome Library, I found not one but four recipes more than one hundred years older than any I could find in print.

Sample Recipe
Source: MSMSL2, Wellcome Library Collection

Since the recipes were so similar, with only slight variations in proportions of flour, butter, sugar, eggs and seeds, baking a batch of each was the only way they could be fairly compared. I managed to scale down the recipes to a common quantity of flour, and then mixed and baked a batch of each.

It was immediately apparent that two of the batches stood out as being superior, but for different reasons. Batch A was incredibly light and delicate, friable and crumbly in texture, whilst the flavour of Batch B had that elusive je ne sais quoi deliciousness that was difficult to place, without knowing what the ingredients were. My dilemma was: I couldn’t decide which I liked better. Batch B was very heavy on the caraway seeds, but the background spices kept me coming back to nibble. The delicate texture of Batch A was a delight.

In the end I added the extra flavourings from Batch B to the mix of Batch A and baked a hybrid that seemed to being the best of both batches. If you want to try the original recipe, simply omit the optional flavourings in the ingredients listed below.

“Yes, but even after all the yaddah, yaddah, yaddah, they still don’t look very interesting” I hear you say. I know. They’ve not got much wow factor to look at, and if you’ve read this far, you might even be wondering why you should bother with them at all. So allow me to try and convince you. Firstly, their taste – the most basic quality for a recipe – they are delicious, and this should be reason enough. If you need further convincing,  it would be their delicate texture: crisp, crumbly and friable. And lastly, and for me this is their most enchanting quality, their age. Late 17th century. To put this in context, contemporaneous events include the English civil war, Roundheads & Cavaliers, Oliver Cromwell, the Great Fire of London, Peter The Great crowned Czar of Russia and the Salem witch trials are conducted in Massachusetts. And this is a delicious biscuit from those times. As Sue Perkins so eloquently put it in her Foreword for my first book, it’s taste-bud time travel!

Apart from the flavourings, the other key aspect of these biscuits is their thinness. And I mean thin. Really, really thin. Like 2mm. Even though the quantity of dough is small, I strongly suggest working with just half of it at a time, so that you can really concentrate on getting the dough as thin as possible. It will become translucent when rolled thinly enough. The biscuits will then take only minutes to bake.

Tunbridge Cakes

Based on recipes in The Wellcome Library 17th century manuscripts, dated 1650-1700

113g plain flour
23g unsalted butter
34g powdered sugar
1 large egg yolk
½tsp caraway seeds
½tsp ground ginger – optional
¼tsp salt – optional
50-70ml double cream to mix

  • Put the flour, butter, sugar and egg yolk into a food processor and blitz together to mix.
  • Tip mixture into a bowl and add the caraway seeds, ginger and salt, if using.
  • Stir together.
  • Gradually add the cream until the mixture comes together into a stiff paste.,
  • Tip the paste out of the bowl and knead smooth. The texture should be like a firm shortcrust pastry.
  • Wrap in plastic and chill for 1 hour.
  • Preheat the oven to 180°C, 160°C Fan.
  • Retrieve the paste from the fridge, divide in half and put one half back into the fridge to stay cool.
  • Lightly flour the work surface and a rolling pin and roll out the dough extremely thinly, until translucent and the work surface is visible through it.
  • Using a fork, dock (i.e. poke holes in) the whole surface of the paste. This is a little time consuming, but infinitely better than trying to dock the biscuits once they have been cut out.
  • Cut out biscuits using a plain, 8cm cutter.
  • Transfer the biscuits to baking sheets lined with parchment paper.
  • Bake for 4-6 minutes, until the edges are just beginning to brown. Check after 3 minutes and turn the baking sheet around if the biscuits are colouring unevenly.
  • Remove the biscuits from the baking sheet and cool on a wire rack.
  • Store in an airtight container.

Honey Bunnies

The recipe for this dough comes from one of the many digital manuscripts made available by The Wellcome Library, and dates from 1699. The original was a bit sparse in some of the instructions (“add honey to sweeten” “what spice you will”), but I’ve experimented and come up with a version that is rich, not too sweet and delicately spiced. I specifically wanted a recipe that did not contain fruit, but feel free to throw some in if you like. Additionally, mix it up with your own spice blends.

Bun recipe from MS.3107, p28, dated circa1699,  Wellcome Collection.
Bun recipe from MS.3107, p28, dated circa1699, Wellcome Collection.

Honey Bunnies

Makes 12 bunny buns

450g strong, white flour – plus extra for kneading.
1 sachet easy-blend yeast
2tsp ground cinnamon
2tsp ground nutmeg
1tsp ground allspice
250ml whole milk
113g honey
113g unsalted butter
2 large eggs

  • Put the honey, butter and milk into a small pan and warm gently until the butter has melted and the honey dissolved.
  • Whisk the eggs in a bowl.
  • When the milk mixture has cooled to blood temperature, pour into the whisked eggs, stirring briskly.
  • Add the remaining ingredients to a large bowl and stir to combine.
  • Make a well in the centre and pour in the wet ingredients.
  • Stir together until the mixture comes together in a soft dough. Important: The texture of the dough depends on the moisture content of the ingredients, including that of the flour, eggs, butter and honey. It is probably going to look too wet. Don’t panic. Knead in extra flour to bring it back to a consistency with which you’re happy. It is better to have it slightly too soft, than too dry.
  • Knead for 10 minutes until smooth.
  • Cover and set to rise until doubled in size. The butter and the honey will mean that it will take longer to rise than regular bread dough, so think more in terms of 2-3 hours than just a single hour.
  • When risen, tip out from the bowl and press out the air.
  • Fold the dough together loosely and weigh it.
  • Cut into 12 portions. Using a digital scale will give you the greatest accuracy and therefore a more even batch overall.
  • Shape into buns. To help you shape the dough into bunnies, I’ve prepared a photographic how-to:

dough tail head
Divide each portion of dough into 3 – about 5g for the tail, 1/3 for the head/ears, and 2/3 for the body. Roll all three into smooth balls. Roll the medium ball into a sausage shape as above.

forming ears
Hold your hand as if you were going to do a karate chop, and roll the bottom edge of it back and forth over the sausage of dough, about 1/3 of the way from the left. The smaller portion of dough will form the head, and the remainder the ears.

Shape the 'ears' portion by flattening it slightly and adding a point at the end. It will be roughly leaf-shaped, whilst the 'head' portion remains rounded.
Shape the ‘ears’ portion by flattening it slightly and adding a point at the end. It will be roughly leaf-shaped, whilst the ‘head’ portion remains rounded.

Using a sharp knife or the edge of a scraper, divide the ears by cutting down the middle of the dough.

Shape the body. I pondered long and hard how to describe the shaping of this piece of dough, until I had a brainwave: make it into the shape of a computer mouse. Vaguely oval, with the back end higher and rounded and the front sloping downwards.

Using a little dab of water, attach the tail. Shape the two front paws by cutting approx. 1/3 of the length of the dough, dividing the front part into 2, just like with the ears.

Raw honey dough bunny
Add another dab of water to moisten and lay the head/ears onto the body.

  • Set the buns onto a baking sheet lined with baking parchment while the oven heats up.
  • Heat the oven to 180°C, 160°C Fan.
  • I opted not to glaze the dough, but if you prefer to, brush with milk and/or egg yolk.
  • Bake for 20 minutes, turning the baking tray around 180 degrees after 10 minutes to ensure even baking.
  • Leave cooked buns on the baking sheet and cover with a clean cloth to cool. This will help to keep the crust soft.
  • Eat warm, either as is or with butter.

Coconut Gingerbread Cakes

Gingerbread is such a classic teatime treat – and I’m a huge fan of classics – it’s just that I don’t usually feel very inspired when I hear the word ‘gingerbread’. I think of a treacle-dark cake, rich, sticky and aromatic with ginger – sounds delicious, no? – but the main thing that springs to mind is something akin to a brick slab.

It probably goes back to the large, family bakes of my childhood, where the cake-of-the-week was kept wrapped in foil in a tin and slowly chiseled away at during the week until it was all gone. There wouldn’t be another cake until this cake had been eaten, and it used to lurk in the tin in all its brickiness, standing between me and any other baked treat. The chances were high that it would eventually be replaced with something equally heavy and fruity – but that new cake’s attraction would be, initially at any rate, mostly due to the fact that it wasn’t the gingerbread.

The image of heaviness and brick-like shape has lurked in my culinary memory ever since – which is a shame because what it SHOULD bring to mind is crisp winter nights, spiciness and fireworks, treacle-richness and bonfires. So I thought I should try and rehabilitate it, and bring it up to date. Ironically, I achieved this by referring to a recipe over 165 years old, from Miss Eliza Acton.

Heroines of Cooking: Elizabeth ‘Eliza’ Acton (1799 – 1859)

Originally a poet, Eliza Acton is considered by many to be the first to write a cookery book as we would recognise it today. Her Modern Cookery for Private Families (1845) was the first to separate a list of ingredients from the methodology, and was aimed specifically at small households. Additionally, the author’s observations on potential problems and recommendations for subtle variations were included, illustrating Eliza’s personal experience with the recipes, unlike many of her contemporaries and cookery authors that were to follow. It was an immediate success and remained in print for almost 60 years. She was to write only one other book The English Bread Book (1857), in which her strong views against the adulteration and processing of food would still be being echoed by Doris Grant almost a century later.

After several experimental baking batches, here is Eliza’s recipe for Coconut Gingerbread Cakes, scaled down to a manageable quantity. Baked in a mini muffin tin, the recipe makes approximately 24 bite -sized cakes with all the dark richness of traditional gingerbread, with the added coconut giving both a lighter texture and more complex flavour. Fresh coconut is a little time consuming to prepare, but very much worth the effort.

Coconut Gingerbread Cakes

Makes 24

75g plain flour
75g ground rice
2 tsp ground ginger
grated rind of 1 lemon
110g treacle
40g butter
40g dark brown soft sugar
80g fresh grated coconut

  • Mix flour, ground rice, ginger and lemon rind in a bowl and set aside.
  • Put the treacle, sugar and butter into a saucepan and heat gently until the butter is melted and the sugar dissolved. Remove from the heat.
  • Add the dry ingredients to the warm treacle mixture and stir to combined. Stir in the coconut and then set mixture aside to cool.
  • Heat oven to 120°C, 100°C Fan.
  • Divide cooled mixture into 20g pieces, roll into a ball and drop into greased mini-muffin cups.
  • Bake for 30 minutes. Cool on a wire rack.
  • Keeps very well in an airtight box/tin.