

Here’s another recipe resurrection, but I’ll give you fair warning, it’s a little caraway-heavy. If you’re not a fan of the taste of caraway, then you’re not going to have a fun time.
The solution to that, of course, would be to substitute a different flavouring for the caraway – easy-peasy – aniseed or cumin if you want to keep it seedy, or lemon/orange zest to make it fresh but really, anything that appeals is fine.
ANYHOO – back to the cakes.
Despite the name, Tunbridge Cakes are actually a biscuit. In the mid nineteenth century, Alfred Romary set up a biscuit factory in the town and the biscuits were manufactured for over a hundred years. Queen Victoria was so delighted with them she awarded a royal warrant and the royal connection continued until the final batch was baked for the wedding of Prince Charles and Lady Diana Spencer in 1981.
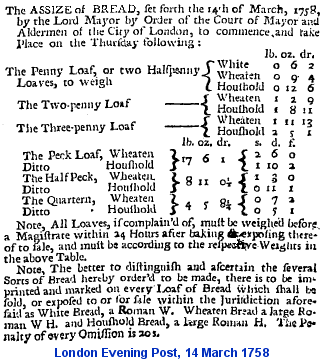
The advertisements for the biscuits described them as being “As thin as lace, of a flavour so delicate as to be indefinable. The clubs serve them with port, but they are also excellent with ices or at afternoon tea. Many people prefer them to sweets and chocolate. In two flavours, Sweet and Ginger.” Interestingly, there’s no mention of caraway, nor does it appear on the ingredients list on the tins, which mention only flour, butter, shortening, sugar and salt. George Read’s “The complete biscuit and gingerbread baker’s assistant” (1854) makes a distinction between ‘Water Cakes with Caraways’ and ‘Tunbridge Water Cakes’, though whether these bear any resemblance to the Romary biscuits is unclear.
Tunbridge Cakes actually go back much further than mere Victorian times. Recipe books from the early half of the nineteenth century contain several mentions of Tunbridge Cakes, although, on closer examination. they all appear to be plagiarised copies of Mrs Eliza Rundell’s 1806 recipe. The earliest printed recipe I could find just managed to sidle into the eighteenth century – John Perkins’ 1796 recipe for Tunbridge Wafer Cakes. However, in my favourite recipe collection, that of the manuscripts of The Wellcome Library, I found not one but four recipes more than one hundred years older than any I could find in print.
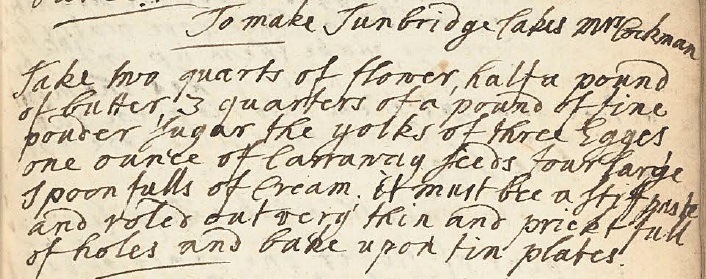
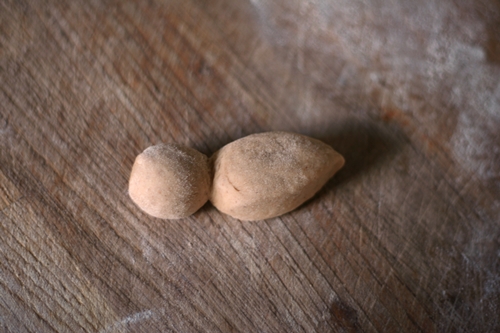
Since the recipes were so similar, with only slight variations in proportions of flour, butter, sugar, eggs and seeds, baking a batch of each was the only way they could be fairly compared. I managed to scale down the recipes to a common quantity of flour, and then mixed and baked a batch of each.
It was immediately apparent that two of the batches stood out as being superior, but for different reasons. Batch A was incredibly light and delicate, friable and crumbly in texture, whilst the flavour of Batch B had that elusive je ne sais quoi deliciousness that was difficult to place, without knowing what the ingredients were. My dilemma was: I couldn’t decide which I liked better. Batch B was very heavy on the caraway seeds, but the background spices kept me coming back to nibble. The delicate texture of Batch A was a delight.
In the end I added the extra flavourings from Batch B to the mix of Batch A and baked a hybrid that seemed to being the best of both batches. If you want to try the original recipe, simply omit the optional flavourings in the ingredients listed below.
“Yes, but even after all the yaddah, yaddah, yaddah, they still don’t look very interesting” I hear you say. I know. They’ve not got much wow factor to look at, and if you’ve read this far, you might even be wondering why you should bother with them at all. So allow me to try and convince you. Firstly, their taste – the most basic quality for a recipe – they are delicious, and this should be reason enough. If you need further convincing, it would be their delicate texture: crisp, crumbly and friable. And lastly, and for me this is their most enchanting quality, their age. Late 17th century. To put this in context, contemporaneous events include the English civil war, Roundheads & Cavaliers, Oliver Cromwell, the Great Fire of London, Peter The Great crowned Czar of Russia and the Salem witch trials are conducted in Massachusetts. And this is a delicious biscuit from those times. As Sue Perkins so eloquently put it in her Foreword for my first book, it’s taste-bud time travel!
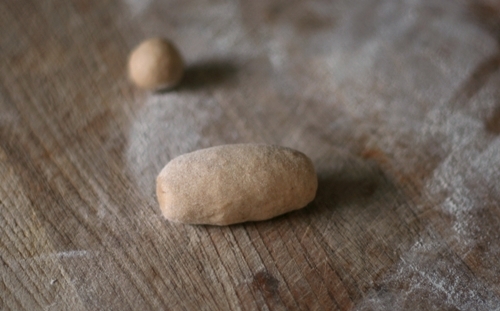
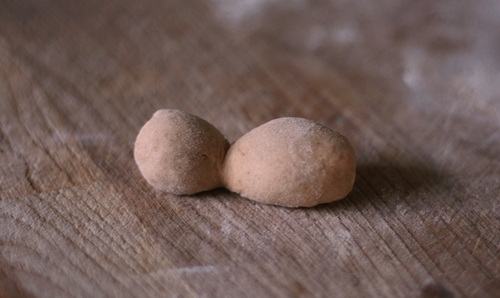
Apart from the flavourings, the other key aspect of these biscuits is their thinness. And I mean thin. Really, really thin. Like 2mm. Even though the quantity of dough is small, I strongly suggest working with just half of it at a time, so that you can really concentrate on getting the dough as thin as possible. It will become translucent when rolled thinly enough. The biscuits will then take only minutes to bake.
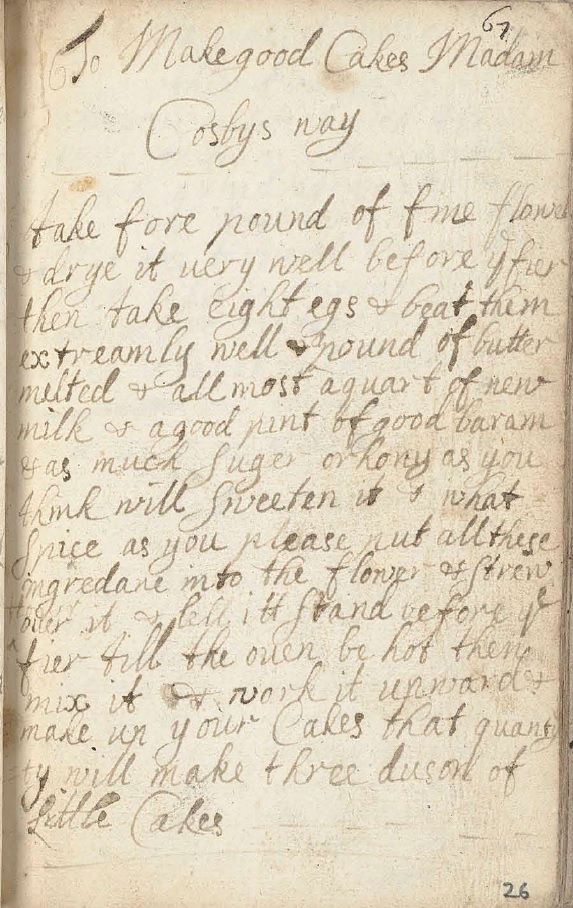
Tunbridge Cakes
Based on recipes in The Wellcome Library 17th century manuscripts, dated 1650-1700
113g plain flour
23g unsalted butter
34g powdered sugar
1 large egg yolk
½tsp caraway seeds
½tsp ground ginger – optional
¼tsp salt – optional
50-70ml double cream to mix
- Put the flour, butter, sugar and egg yolk into a food processor and blitz together to mix.
- Tip mixture into a bowl and add the caraway seeds, ginger and salt, if using.
- Stir together.
- Gradually add the cream until the mixture comes together into a stiff paste.,
- Tip the paste out of the bowl and knead smooth. The texture should be like a firm shortcrust pastry.
- Wrap in plastic and chill for 1 hour.
- Preheat the oven to 180°C, 160°C Fan.
- Retrieve the paste from the fridge, divide in half and put one half back into the fridge to stay cool.
- Lightly flour the work surface and a rolling pin and roll out the dough extremely thinly, until translucent and the work surface is visible through it.
- Using a fork, dock (i.e. poke holes in) the whole surface of the paste. This is a little time consuming, but infinitely better than trying to dock the biscuits once they have been cut out.
- Cut out biscuits using a plain, 8cm cutter.
- Transfer the biscuits to baking sheets lined with parchment paper.
- Bake for 4-6 minutes, until the edges are just beginning to brown. Check after 3 minutes and turn the baking sheet around if the biscuits are colouring unevenly.
- Remove the biscuits from the baking sheet and cool on a wire rack.
- Store in an airtight container.


