
The deliciousness I have for you this week is something of a Lego™ recipe in that it started with A New Thing, which was exciting and delicious, but for which I had no use for at the time. However, if you then clip it together with two other things, Voila! A NEW New thing that VERY usable anytime, but especially as a delicious-mouth-filler-round-about-mid-morning-with-some-hot-strong-coffee-thankyousoverymuch.
OK, enough code-talking. The New Thing to which I refer is something that I found on the internet which is Whipped Caramel. A simple and straightforward combination of sugar, cream and butter which is whipped as it cools to incorporate air into the mixture, thus making it light and creamy. It holds it’s shape very well, making it an indulgent means of filling and topping cakes, large and small.
However, I must confess to taking issue with the name, because it’s not so much caramel as butterscotch. Because, and I don’t feel this is too much of an exaggeration, it has butter in it. I also think it has something to do with the incorporation of the air. It’s almost as if it tastes lighter. Anyway, I only mention this because if you’re expecting a caramel from a recipe and you end up with a butterscotch, it might throw a spanner in your recipe works. A delicious spanner, but a spanner nonetheless.
So there I was, with some delicious whipped butterscotch, and nothing to use it on, so I popped it in the fridge, reasoning that, if nothing else, I could determine how long it would last.
Well, as luck would have it, my daughter came home from school the very next day with news that the school’s Macmillan Coffee Morning was scheduled for the end of the week and she needed ALL the bakes. Also lucky was the fact that I’d just finished my mammoth shortbread testing session, so it was just a matter of thinking what to top it off with, found I had some white chocolate in the cupboard, and the Coffee Morning was saved!
I was pleased with the way that the white chocolate finished it all off, and the overall result is very similar to Millionaire’s Shortbread (Sidebar: the difference between Millionaire’s and Billionaire’s Shortbread is, apparently, Billionaire’s Shortbread has a little salt in the caramel – who knew!?) to look at. The butterscotch and white chocolate gives it a flavour combination which is both decidedly different, and rather moreish. Teamed with your favourite 1:2:4 shortbread, and you have a customised treat fit for bake sales, gifting or even just hiding away for your own special treat.
The only changes I’ve made to the Whipped Caramel are a couple of suggestions for the method, which, due to the somewhat Faffy™ approach, will markedly reduce your chances of failure.
I am suggesting making a large batch here, mainly due to the Faff™ Factor, because you don’t want to end up having to go through it all again because it has been inhaled by your nearest and dearest. That said, you could make a batch of the caramel and just a regular batch of shortbread, and keep the extra in the fridge for later (it will keep a week at least).
Butterscotch Shortbread
There are three elements to this recipe: the shortbread, the whipped butterscotch and the white chocolate topping. I recommend that they are made in that order, or if you want to spread out the tasks, make the whipped butterscotch the day before.
The Shortbread
- Make a batch of 1:2:4 shortbread.
- For a small batch, that uses only half the quantity of whipped caramel, use a tin of size 18cm x 25cm.
- For the large amount of butterscotch shortbread, I used a double batch of shortbread and a tin of dimensions 30cm x 22cm and bake for a total of 40 minutes, turning the tin around halfway through.
- Take the cooked shortbread out of the oven and cut it to the size pieces you wish to serve your butterscotch shortbread. I cut fingers of dimensions approximately 3cm by 10cm. NB The finished shortbread is very rich, so smaller is better – with hindsight, a more reasonable size would have been 5cm x 3cm. Remember, you can always go back for another piece, but a too-large piece… well, let’s just say it IS possible to have too much of a good thing.
- Set the shortbread aside to cool, either in the cooling oven or on the worktop.
The Whipped Butterscotch
375g caster sugar
100ml water
100g unsalted butter cut into cubes
300ml double cream[1]
- Add the sugar and water to a pan. A broad (frying) pan will help with moisture evaporation more than a saucepan. A non-stick pan for preference.
- Stir the sugar and water together over low heat until dissolved. It is possible to skip using the water and just melt the sugar, but you then run the risk of burning the sugar, and once burnt, there’s no disguising the bitterness. And I know this because I did it myself. I was melting the sugar without water, and I thought I’d smelled a touch of burn, but ploughed on regardless. After going through all the whipping and cooling and more whipping, it was very disappointing to be able to taste the burn in the finished butterscotch. So making a syrup and evaporating the water is worth it for peace of mind and guaranteed success, and doesn’t lengthen the process by much.
- Simmer the syrup to evaporate the water, and allow it to bubble until it has reached a golden caramel colour. Once all the water has evaporated, it will caramelise quickly, so keep a beady eye on it.
- When the caramel has darkened to your liking, add in the butter and whisk it as it melts.
- Add the cream and continue whisking over heat until combined – about 2 minutes.
- Pour the butterscotch into a bowl and cool in the fridge for 20 minutes. It won’t be cold, but it will be much cooler than it was, and quicker than waiting for it to cool on the side.
- Using a hand whisk, or a stand mixer, whisk the butterscotch for 1-2 minutes. The aim is to incorporate as much air into the butterscotch as it cools. It will thicken as it cools and the colour will become lighter.
- Put the butterscotch bowl into the freezer and chill for 10 minutes, then whisk again. Each time you whisk, the butterscotch will thicken and get lighter again.
- You can now use your whipped butterscotch, or keep it in the fridge until required.
To Assemble
400g white chocolate
- If you’ve stored your whipped butterscotch in the fridge, you might want to give it an extra whisk, to make it easier to spread.
- Spread the butterscotch over your shortbread in as thick a layer as you wish. I recommend erring on the side of caution, as it is very rich. Smooth over the surface and chill in the fridge while the chocolate is prepared. If you don’t use all your whipped butterscotch, you can store it in the fridge in a covered container. When needed, just whisk it briefly to get it to a suitable softness.
- Break the chocolate into squares and melt – either over hot water or in 30 second intervals in the microwave. Stir the chocolate until fully melted, and then for 1-2 more minutes in order to cool it down: too hot, and it will start to melt the butterscotch and you won’t get a clean finish. Then again, a few swirls of butterscotch in the chocolate isn’t the end of the world by any means.
- Take the shortbread and butterscotch slab out of the fridge and pour over the melted chocolate. Smooth it to an even layer using an offset spatula.
- Return the tin to the fridge to set completely.
To Divide
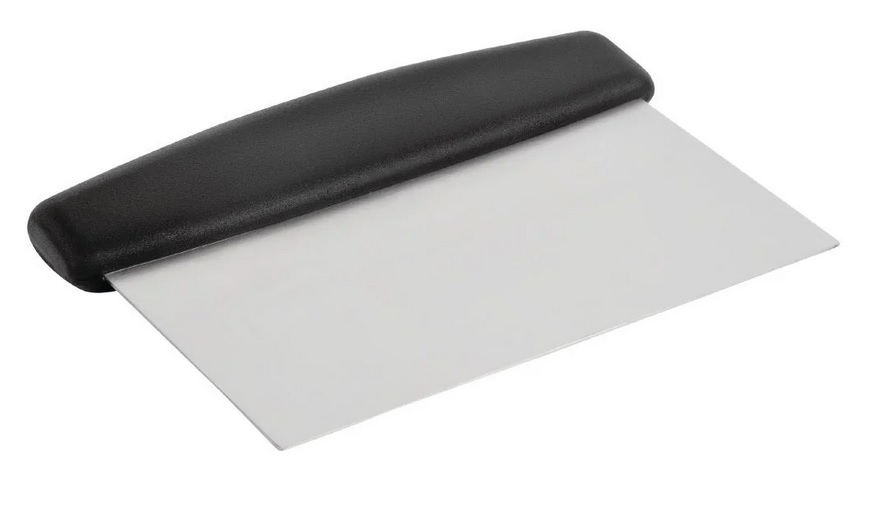
Regular listeners will be aware of how much I love a clean, sharp slice. Even the humblest of recipes can become eye-catching with the cunning wielding of a sharp blade.
That said, I’ve found one of the best blades is one of these dough scrapers. The blade itself isn’t sharp, but it is super thin and can make an excellent and clean cut.
Here is how to ensure your slab of butterscotch shortbread emerges in sharp and clean slices.
- Remove your slab of butterscotch shortbread from the fridge and set it on the countertop.
- Take a clean cloth or a double layer of kitchen roll and lay it on top of the set chocolate.
- Lay a cutting board on top of that, and carefully turn the whole slab over, so that once the baking parchment is removed, the shortbread is uppermost.
- The lines from cutting the shortbread earlier after it was baked should be visible.
- Slide your dough blade into the cuts in the shortbread, then press down sharply to cut through both the butterscotch and the chocolate in one clean movement.
- Make sure you have cut – or rather re-cut – through all of the pieces before transferring your butterscotch shortbread to an airtight container. Use a piece of parchment between layers to keep crumbs off your pristine chocolate finish.
- NB I recommend storing your butterscotch shortbread in an airtight container in the fridge, or failing that, somewhere cool, in order to preserve the clean, sharp edges of the butterscotch. Allow it to come to room temperature before serving.
[1] You can also use whipping cream, which will give a softer textured butterscotch, that might be more suitable for frosting/filling cakes/cupcakes.

