
The autumn months are almost upon us and it truly is the season of mellow fruitfulness.
First among equals is the damson, a fruit I have been familiar with my whole life. Damsons are small, oval, wild plums with a signature ‘bloom’. They are different to bullaces, a different wild plum which is more round and apple-shaped. It was only a few years ago that I learned that damsons aren’t universally known, rather they are concentrated in just a few counties, namely Shropshire, Worcestershire, Buckinghamshire, Cheshire and Westmorland.
Damsons are really tart – there’s no possibility of enjoying them raw – and make fabulous jams and chutneys. I particularly enjoy them in sweet dishes, because their sourness and tartness are a great foil against sugar and sweetness.
And so to this recipe. This is a fabulously simple recipe which makes beautifully soft and creamy ice-cream with just two main ingredients, plus flavouring, without the need for an ice-cream maker. This last point is especially useful if, like me, you lack worktop space. There is no need to repeatedly remove it from the freezer and stir to remove ice crystals, because they never form. You can literally mix it in minutes and freeze overnight and enjoy perfectly smooth, delicious ice-cream immediately.
The ice-cream recipes over on TimeToCookOnline include salted caramel and malt, both of which can be made with storecupboard ingredients, but I fancied adapting this recipe to use fresh fruit, and my freezer provided the ingredients. I had a bag of damsons that had been languishing there for probably three years, so their time to shine was long overdue.
The method can be used for any frozen, or indeed fresh, fruit. Most importantly, it is necessary to get rid of as much water from the fruit as possible, as it will form ice-crystals when frozen and ruin the smoothness of your ice-cream. The majority of this post will be on how you can achieve this, plus a short-cut or two.
Fruit Puree Method – Damsons
The flesh of a damson clings tightly to the stone, so the best way to separate the two is by cooking. Sweetened, stewed damsons were a regular simple pudding on the table during my childhood. One had to spoon the cooked fruit into your mouth, then discretely return the stone to the spoon and lay it on the rim of your dish. For ice-cream purposes, though, a puree is what is required.
- Put 1kg (or more if liked) of damsons, fresh and rinsed or frozen, into a saucepan.
- Add 3-4 tablespoons of water and cover with a lid.
- Turn the heat to low and let the fruit gently steam/stew until soft.
- Pour the fruit into a sieve over a large bowl and stir with a wooden spoon to separate the fruit pulp from the stones and skins. Use the back of a knife to regularly scrape the pulp from the underside of the sieve. Be warned, damson juice will stain, so wear an apron and wipe up any spills promptly, especially if you have a wooden worktop.
- When all that remains in the sieve is stones and skins (which can be discarded), measure the fruit puree and add HALF the volume of puree in granulated sugar. e.g 4 cups of juice will need 2 cups of sugar.
- Return the puree to the pan, add the sugar and stir to dissolve.
- Simmer over a low-medium heat until it has reduced and thickened. This may take a while, depending on the volume of puree you’re working with. There’s a lot of pectin in damsons, so if you spoon a little onto a cold plate and it sets, it’s done.
- What you should be left with is something of the consistency of runny honey.
Sugar Absorption Method – Fresh Apricots
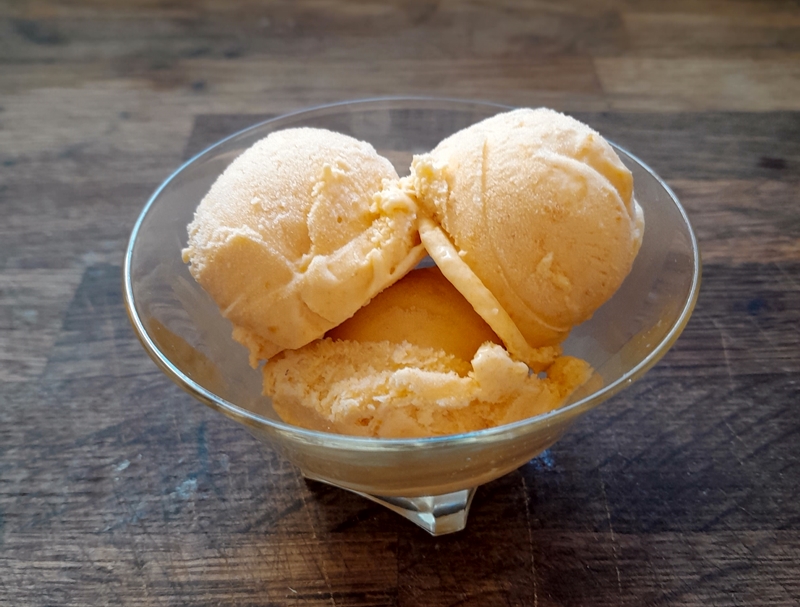
This method is an adaptation of a jam-making method used by ‘The Jam Fairy’ Christine Ferber. I used it with fresh apricots which I spotted recently at a bargain £1 a punnet. It takes a little longer, but preserves the fresh flavour of the fruit.
- Slice the apricots and remove the stones.
- Score the inner flesh with a sharp knife, being careful not to cut too deeply – the skin should remain intact.
- Lay your apricot halves side by side in a bowl in layers, flesh-side up.
- When you can fit no more into the layer, cover generously with granulated sugar to a depth of about 1cm.
- Continue layering and covering with sugar until all your fruit is in the bowl.
- Cover with plastic wrap and set aside for 8-10 hours, or overnight. The sugar will draw out the juices in the apricots and in turn be drawn into the flesh of the fruit.
- Tip the fruit and sugar mixture into a saucepan and heat very gently until all the sugar granules have dissolved. Stir occasionally.
- When all the sugar is dissolved, bring the syrup to a boil, turn off the heat and cover the pan. Leave to stand until cool.
- Drain the fruit from the syrup.
- Remove the skins of the fruit. The heat of the syrup will have softened the skins as well as separating them from the apricot flesh. If you lift up each apricot half by pinching the skin at the back, it should pull away quite easily. It is likely to remain attached at the edges, in which case you can help things along by scraping the flesh away with a teaspoon. Put the flesh into a separate bowl. Discard the skins. You can keep the apricot flavoured syrup to use as a glaze for fruit tarts, buns etc.
- Puree the flesh.
- Taste, and add a little lemon juice to taste to sharpen the flavour, if liked.
Storecupboard Hacks
Tinned fruit in syrup has already been processed, so you could drain some tinned apricots/peaches/pears etc and puree the fruit. The flavour won’t be quite as fresh-tasting, but it’s much quicker and you can be feet up, waiting for your ice-cream to freeze in about 15 minutes.
Even quicker, you could substitute jam for the fruit. Use a good quality brand such as Bon Maman, which has compotes and conserves in a range of delicious flavours. How much you’ll need will depend on personal preferences, but I suggest starting with 300g and seeing how that goes. Warm the compote/conserve gently, then puree. You can always stir in extra as a ‘ripple’.
Damson Ice-cream
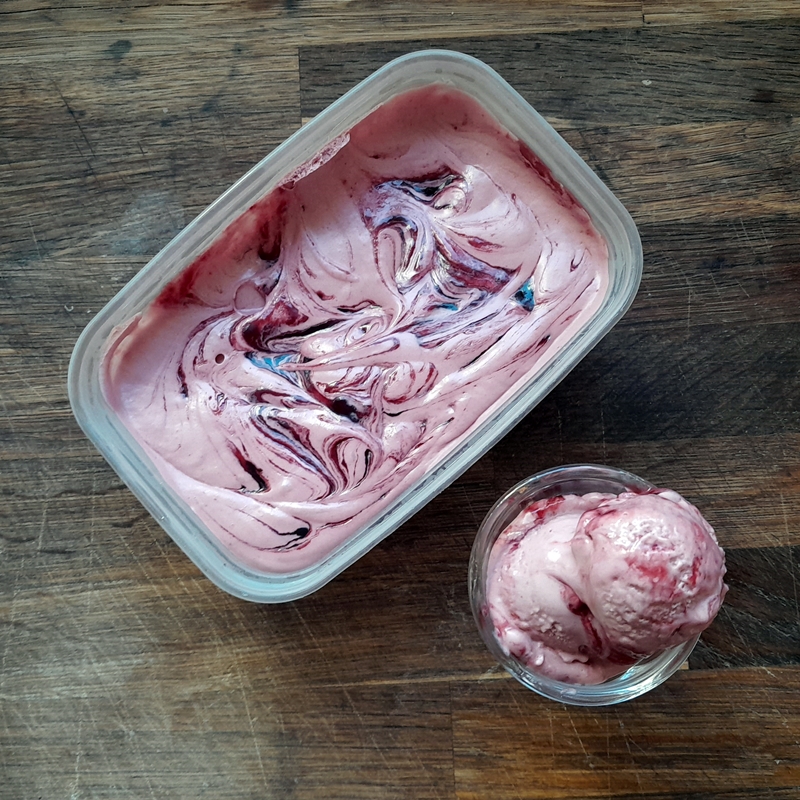
This damson ice-cream is the best ice-cream I have ever tasted. EVER. The intense sour/tartness of the fruit is a perfect foil to the intense sweetness of the condensed milk, and the result is smooth and rich and velvety, with a huge zing of ‘rippled’ damson. Gooseberries (perhaps with a dash of elderflower cordial) and rhubarb would also work well.
Despite the title, you can use this method to make any fruit ice-cream that takes your fancy. Because it was slightly runny, but intense in flavour, I used just 350ml of damson puree in the ice-cream, and another 150ml as ‘ripple’. The apricot puree was thicker, so I mixed in a full 500ml.
600ml chilled double cream
1 x 397g tin of sweetened condensed milk
500ml sweetened damson puree – divided
- Put the cream and the condensed milk into the bowl of a mixer.
- Add 350ml damson puree.
- Whip the ingredients with a balloon whisk attachment until light and fluffy.
- Pour into a suitable plastic container.
- Add dollops of the remaining puree and swirl through with a knife.
- Cover and freeze overnight.

