Almacks

Almacks (also Almack’s and Almack) is one of many recipes that have originated from people copying dishes they have enjoyed whilst eating out. Almack’s was a Georgian/Regency London club where the great and the good could socialise during ‘the season’, Pontacks is another such establishment, now equally long gone, whose reputation remains only in the names of recipes they have inspired.

By the end of the 18th century, being presented at the Royal court was deemed old fashioned for the up and coming ladies in society, so Almacks provided a setting whereby  socialising and marriage alliances could be conducted amongst the ‘Ton’. As an example of the importance of Almack’s in the social life of the capital, when Lady Caroline Lamb published ‘Glenarvon’, with a thinly-fictionalised Lord Byron as the main character, Sarah Villiers, Lady Jersey, was so incensed at the way she had been satirised, she barred Lady Caroline from Almacks in 1816, thereby making her a social outcast *gasps and clutches pearls*. Although Lady Caroline eventually managed to regain membership three years later, thanks mainly to the assistance of her cousin, Emily Lamb (Countess Cowper), her reputation never recovered.

Almacks provided refreshments to its member and this thick fruit ‘cheese’ would have been ideal as it has great keeping qualities and is easy to serve at short notice. It can be eaten a number of ways: as a sweet, with cream or as a savoury, with biscuits and cheese. It is also versatile in its preparation as it can be varied by type of apple, pear and plum, thus giving it subtle changes in flavour with each batch. It is an ideal way to use up gluts of fruit, or to waste-not-want-not with windfalls.

Almack recipe (1785-1825) from MS1827, Wellcome Collection.

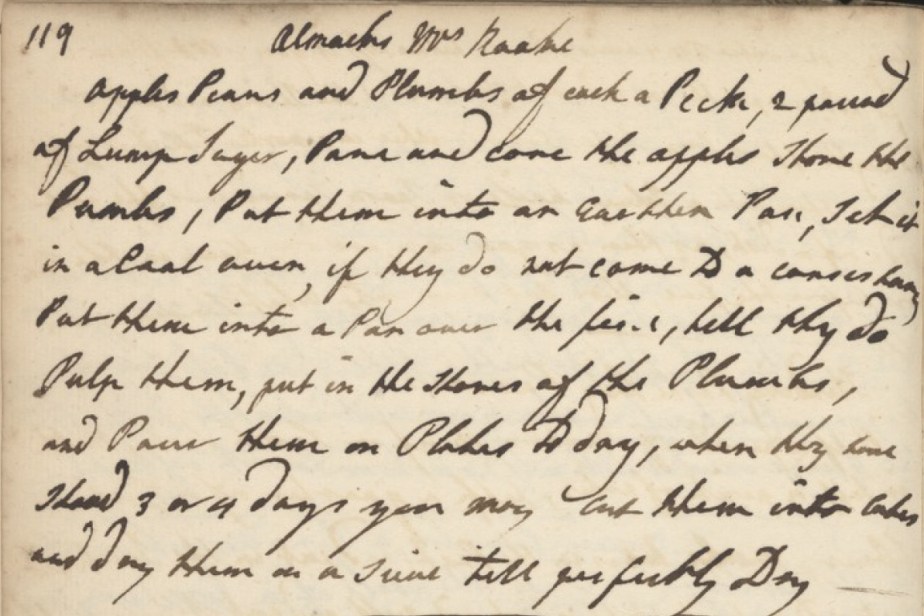
This is the earliest recipe I have found, coming from a household manuscript dated 1785-1825. The quantities are huge, even allowing for a loss of volume during the cooking. A peck of apples is roughly 6 kg, so it calls for a total of 18kg of prepared fruit, although it’s probably going to be closer to 20 kg by the time you factor in weight loss due to peeling/coring/chopping.

Almack recipe, (1800-1822) from MS1830, Wellcome Collection

This is a recipe with slightly more reasonable quantities – 3 quarts of each fruit = 7.5kg, but in the end I thought the recipe from Elizabeth Pease (below) was both the simplest and most reasonable in terms of batch size.

Elizabeth Pease’s recipe for Almacks (1802-1871) in MS3824, Wellcome Collection.

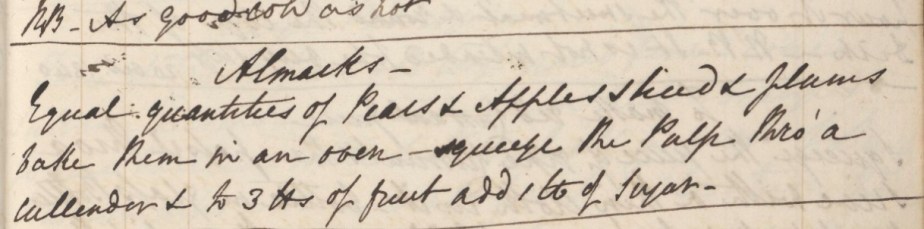
Admittedly, it does take a few things for granted such as expecting readers to know the method and how to prepare the fruit, but I’ll be filling you in on those in the recipe below.

So how much Almacks you make is really up to you and what you have to hand. As a guide, I used 750g of prepared apples and pears and 800g damsons (to allow for the stones) and it made 8 generous portions as seen in the photo above, and about 400g in a box for more casual use. The damsons add a real tang to the paste, and the low quantity of sugar means it sits right on the edge between sweet and savoury. Serve (small) portions with a drizzle of cream and a biscuit (ratafias, macaroons, etc) for crunch as a dessert, or with your favourite cheese and crackers.

Almacks

I’ve reduced the quantities, so you can make a small batch to try, but you can scale it up quite easily if you have it in mind to pot and gift it for Christmas.

500g peeled, cored and chopped apples
500g peeled, cored and chopped pears
500g plums/damsons, stones removed if possible
500g demerera sugar.

  • Cook the fruit. You want it soft enough so that it can be sieved easily. This can be done a couple of ways:
    • layer the fruit and sugar into a large casserole  (preferably ceramic or enamelled) and put it in the oven, uncovered, at 150°C, 130°C Fan for 45 minutes to an hour, stirring every 15 minutes to make sure the fruit floating on top of the juice doesn’t dry out.
    • Put the fruit and sugar into a slow cooker and cook on high for 4 hours. This method generates more juice, as it won’t evaporate as much as it does in the oven, but it has the advantage of being able to be left unattended for an extended period of time.
  • Sieve the cooked fruit until nothing is left but skin and (possibly) damson pits.
  • Simmer the puree in a preserving pan until no excess liquid is visible when you draw a spoon across the pan, and it’s just fruit puree. This will take rather a long time, if you used the slow-cooker method, due to the extra juice.
  • You MUST stir the pan, otherwise the puree will burn. Towards the end, it will turn into fruit LAVA< so have a towel cover your arm handy, to avoid the hot splashes.
  • When your puree is ready, spoon it into moulds or hot, sterilised jars as you would for jam. Silicone moulds are great, especially if you’re making Almacks to serve at a special meal – although you don’t need a special occasion to serve some delicious fruit cheese in a pretty shape. The flexibility of the silicone makes it very simple to turn out the paste, once cold.
Advertisement

Buttered Oranges

For the past several years I have been making a searchable index of the digitised household books held at The Wellcome Library. In doing so, I’ve read over 300 manuscripts and logged more than 32,000 food and drink recipes and have a ‘To Do list of interesting recipes as long as my arm.

‘Buttering’ was exceedingly popular in times past, and was applied to numerous dishes: crab, chickens, rolls, loaves, turnips, rice, salmon… For the most part, this consists of a healthy slathering of butter over the dish in question. Buttered Oranges, however, stands apart, since it’s not a pairing that seems obvious. So it was that this year, in the midst of a Seville orange flurry of kitchen activity, I grabbed a net of sweet oranges and determined that Buttered Oranges would be promoted to the top of the To Do list with immediate effect.

Buttered Orange recipe
Buttered Orange recipe, circa 1750, MS1357, Wellcome Library Collection

I re-read all of the recipes from the collection that I could find, and they were all pretty similar. I selected this one because of the novel presentation suggestion, which is to serve the buttered oranges in candied orange peels. Completely optional, of course, but it does make for an eye-catching dessert.

Which hopefully makes up for what might possibly be a bit of a let-down, because it turns out that Buttered Oranges is pretty much what we today would call a fruit curd: juice and zest, sweetened and thickened with eggs with a generous, but not excessive, quantity of butter melted in.

After experimentation, I found the best way to present this dessert was to make each element separately and then assemble before serving. I felt the original recipe’s instruction to bake the filled oranges until set was a little too risky and prone to mishap to risk all the preparation, but don’t let that deter you from trying it for yourself – I would just advise against a spur of the moment decision during an important social occasion.

Preparing the peels

I chose blood oranges to serve the curd in, as they were a beautiful colour and relatively small, thus being perfect for serving elegant portions of this rich dessert.

1 orange per person
1kg caster sugar
1 litre water

Before you start, you should make a decision on how you will be preparing the peels. The original recipe says to zest the oranges, slice off the top, hollow out the flesh, then simmer in water until tender, then finish in syrup. This gives the skins a pale, almost pastel colouring, which is delightful, and means the whole of the orange is put to good use but also makes them rather fragile during the cooking. One solution would be to tie them lightly in muslin or cheesecloth, to protect them, or alternately, use un-zested oranges, which will have a darker colour, but are also much more robust and less likely to split during the cooking. The results of both are illustrated in the photograph at the top, the zested peels on the right, the un-zested on the left. If you choose to use un-zested oranges, then you will need twice as many oranges overall.

  • If you’re zesting the oranges, do that now and reserve the zest for later.
  • Slice a lid off the top of each orange, and scoop out the insides using a combination of sharp knife and teaspoon. Reserve the flesh and juice for later.
  • Make sure there’s no orange flesh or fibres left inside.
  • Place the hollowed oranges and their lids into a saucepan of cold water, making sure the water fills the cavities.
  • Slowly bring the water to a boil, then turn the heat down and simmer until tender. This will take about 1.5-2 hours.
  • Change the water and scrub the pan every 30 minutes to remove the bitter oil.
  • When the peels are tender enough to be pierced by a toothpick, make a syrup by dissolving the sugar in the water over a low heat.
  • Add the peels and allow to simmer gently until the peel appears translucent.
  • Remove from the heat. The peels can remain in the syrup until required.

Buttered Oranges

As already mentioned, this is a variation of Orange Curd, so if you already have a favourite recipe, then by all means use that instead.

2 large eggs
the zest and juice from at least 4 oranges
the juice of 1 lemon
Sugar to taste
50g unsalted butter

  • Add the strained juices and zest to the eggs and whisk thoroughly.
  • Add the butter and whisk over a gentle heat until thickened.
  • Add sugar to taste.
  • To serve, you can either pour the curd into your oranges warm, or fill them and allow them to cool before serving.
  • I recommend serving some kind of biscuit or shortbread alongside to dip!

Damson Preserves

Here’s a trio of preserves that champion one of my favourite sorts of food – free stuff!

Damsons grow wild in the hedgerows and along the canal banks and lanes of Herefordshire, Worcestershire and Shropshire, and the only cost is your time to pick them. They are tart, wild plums, about the size and shape of a large grape, with a soft, hazy-blue bloom to the skin. NB The size/shape is key to identifying true damsons – if the fruit is round and apple-shaped, it is a different wild plum known as a bullace.

I had an especially impressive haul of damsons this year, from three difference sources, so aside from the obligatory Damson Gin, I had enough to make batches of the above preserves for the first time, the recipes for which I have had bookmarked for years. Whatever your toothsome preference, there should be something for everyone here.

If you’re unable to find damsons, then all of these recipes will work with any kind of small, tart plums.

Damson Conserve

MS1795
From MS1795, circa 1685, Wellcome Library Collection

First up is the oldest of the three recipes, found in a household manuscript book at the Wellcome Library. Sadly for those of us interested in people as much as recipes, it is anonymous,  and dates from around 1685. It caught my eye because of the slightly unusual method it employs. Usually, the vigorous boiling in the making of damson jam renders the delicate fruit into a pulp, but the method in this recipe is strikingly similar to that employed by the modern queen of jam-making, la fée des confitures, Christine Ferber. Sugar is used to both draw out the juices of the fruit, and to infuse the delicate flesh, so that it can all the better withstand the cooking process. The result is beautifully whole damsons in a richly flavoured syrup.

You can make any quantity you like, by scaling up the recipe to suit the quantity of fruit you have. I have altered the recipe slightly, based on my experience of working with Madam Ferber’s recipes.

1lb damsons
1lb granulated sugar
120ml water

  • Remove the stalks and with a sharp knife, cut the skin of the damsons around “in the crease” as the recipe puts it.
  • Sprinkle a layer of sugar in a pan and set the damsons into the sugar, to draw out the juice.
  • Sprinkle the remainder of sugar over the top.
  • Pour over the water.
  • Cover and leave overnight.
  • Next day, heat very gently until the sugar has melted.
  • Lift the fruit out of the syrup and bring it to a boil.
  • Return the fruit to the now hot syrup and allow to steep overnight.
  • On Day 3, lift the fruit out of the syrup and bring it to a boil again.
  • Return the fruit and simmer for 5 minutes.
  • Transfer to warmed pots and seal while hot.

Miss Milward’s Pickled Damsons

19th century

Alison Uttley’s fictionalised autobiographical book The Country Child was one of my favourites growing up, and it remains so to this day. The book details her childhood growing up on a Derbyshire farm in the late nineteenth century – I highly recommend it.

Ms Uttley came across her mother’s recipe book whilst researching Country Hoard, and in response to encouragement from her published, produced Recipes from an Old Farmhouse in 1966. This recipe was made in vast quantities, to ensure there was a ready supply for the many mouths fed at the farm.

Almost equally sweet and sharp, they are equally good served alongside cold meats and cheeses, as spooned over ice cream.

You can halve or even quarter this recipe if liked.

3.2kg damsons
1.8kg white, granulated sugar
2 x 5cm cinnamon sticks
20g whole cloves
malt vinegar to cover

  • Layer the damsons and sugar in a casserole.
  • Add the spices and vinegar enough to just submerge the fruit, and cover with a lid.
  • Place in the oven and turn the heat to 120°C, 100°C Fan.
  • Bake gently for 1 hour to draw out the juices.
  • Set aside to cool.
  • When cold, drain the fruit from the syrup.
  • Heat the syrup until boiling, then pour over the fruit and allow to stand until the next day.
  • Repeat this draining/boiling each day for the next 7 days (for a total of 8 days).
  • Allow the damsons to stand in the syrupy pickle for seven  more days.
  • Spoon the damsons into warmed pots, boil the syrup and pour over the fruit.
  • Seal at once.
  • Cherries may also be pickled in this way.

Mrs Musson’s Baroda Chutney

This recipe, from Melton Mowbray in Leicestershire, won first prize in the Farmer and Stockbreeder Competition in 1950, and it is my new, favourite chutney. It can be found in a delightful little book entitled “Cook it the Farmhouse Way” by Barbara Wilcox. A digitised copy of the book can be borrowed for 2 weeks from The Internet Archive – click here.

The damsons give it a beautiful, rich colour, and the chutney can be eaten immediately. It is fantastic with both cold meats and cheeses.

1.35kg apples – peeled and cored
1.35kg marrow – peeled and chopped roughly
1.35kg tomatoes
900g damsons, counted
1.125kg onions – peeled
225g shallots
170g garlic
140g salt
1tsp dried chilli flakes
900g sugar
115g mustard seed – yellow or black
50g fresh ginger – sliced thin
15g whole cloves
1.7 litres malt vinegar

  • Chop the apples, marrow, tomatoes, onions, shallots and garlic. You can do this by hand or, as I did, by pulsing them 2 or 3 times in a food processor. You want  your resulting chutney to be fine enough to spread in a sandwich without any unseemly large pieces.
  • Put into a large bowl with the damsons, salt, chillies and sugar.
  • Mix thoroughly, then cover with cling film and leave overnight.
  • The next day, tie the spices and the sliced ginger in a muslin bag and add to the vegetables, together with the vinegar.
  • Mix thoroughly then pour everything into a preserving pan.
  • Bring slowly to the boil, stirring frequently, then turn the heat down and simmer until no excess moisture is visible – 4-6 hours – stirring regularly. Alternatively, you can cook this, uncovered, in a slow cooker. It requires less stirring, although the cooking time then increases to about 10 hours.
  • Remove the muslin bag of spices and fish out the damsons stones (optional – but you might want to write a reminder on the label if you keep them in). If you counted your damsons before cooking, you can easily keep track of how many stones you need to retrieve.
  • Pot and seal at once.

Hot-Pickled Herring

This recipe is something of a contradiction because, despite the name, it is eaten cold.

The slow poaching in a lightly flavoured vinegar neutralises the oiliness of the herring to a certain extent, and the herbs and onion make for a fine, delicate flavour.

This method is also much quicker than the traditional method of sousing herring, which involves both brining and marinading in spiced vinegar over several days. You can put this dish into the oven at 6pm, cook and then leave to cool in the oven overnight and it is ready to eat the following day. This method also has the advantage of dissolving all the tiny pin bones that abound in herring, leaving just the backbone to lift free when served.

The recommended dressing is for oil and vinegar, but a little crème fraiche or even the strained cooking liquid are also enjoyable.

Pickled Herring Recipe
Source: MS1795, Wellcome Library Collection

Hot Pickled Herring

1 herring or 2 herring fillets per person
1tsp salt
1tsp black pepper
100g butter
1 large bunch of thyme.
2 onions, sliced thinly into rings
1 litre white wine vinegar to cover

  • Cut off the herring heads and tails if necessary. Rinse and pat dry.
  • Sprinkle the herring wth salt and pepper.
  • Slice the butter thinly and lay half in the bottom of an oven-proof dish.
  • Arrange a layer of onion and thyme sprigs and lay the herrings on top.
  • Repeat the layers of butter, onion/thyme and herring until the dish is full (or ingredients are finished).
  • Pour over sufficient white wine vinegar to cover the herring, then cover the dish with a double layer of cooking foil, tied tightly with string.
  • Preheat the oven to 200°C/180°C fan/gas 6.
  • Bake for 4 hours, then remove and set aside to cool completely.
  • Serve cold.

Potted Prawn, Shrimp or Crayfish

This recipe was chosen for it’s multi-purposeness , because you can use this method for any of the above-mentioned seafood, or perhaps even a mixture of two or three.

Potting used to be a means of preserving, the clarified butter being used to make the contents impervious to air-borne microbes, etc. Properly potted food could last days, if not weeks, without the need for refrigeration. When required, the butter was removed and the potted food used for whatever purpose the cook had in mind.

Nowadays, potted food is consumed in much the same way as a pate, spread on crisp toast or crackers. In this adaptation, the butter used to bind the seafood is delicately infused with spices before being combined with the fish and seasoning.

Potted Shrimp, Prawn or Crayfish

100g clarified, unsalted butter
1 blade mace
2 cloves
1 slice nutmeg
270g cooked brown shrimp, prawns or crayfish
black pepper
salt
Extra clarified butter to seal

  • Put the clarified butter and spices into a small pan and heat over a very low flame for 10 minutes.
  • Remove from the heat and allow to infuse for a further 20 minutes.
  • Remove the spices and combined with the seafood. NB British brown shrimp are tiny and perfect for spooning onto a finger of toast, so you might prefer to omit the next stage, and just season and pot them directly. Prawns and crayfish are larger and thus require chopping to make them easier to
    pot as well as easier to spread when served.
  • If you opt for chopping up the seafood, pour the mixture int a food processor and blitz intermittently until combined.
  • Taste and add salt and pepper as required.
  • Spoon into small pots or ramekins.
  • Pour over a thin layer of clarified butter to seal.
  • Chill in the fridge until required.
  • Serve with hot buttered toast

Apricot Jam

I’m a big fan of the sharp-sweet tang of apricots, and with a respectable amount of pectin, there’s no need to Faff About™ adding any extra. The small quantity lemon juice helps anyway, both in the set and in sharpening the flavour of the apricots.

This method, gleaned from several hand-written 17th century manuscripts, is slightly longer than your regular jam-making session might be, but it is seriously low on effort. Start-to-finish, it’s about 24 hours, but of that, there’s maybe only 1 hour of actually doing anything – bonus!

The result is so vibrant, so delicious, you’ll wish you’d made more – however many jars you make. I bought 6 x 350g punnets – and made six jars. One jar of finished jam for every 350g of raw fruit is also a handy way to work out how many jars your going to need. As a precaution, I always have one jar extra, all cleaned, heated and ready to go, in case of an overabundance. I’ve scaled the quantities down to use just 1 kg of fresh, pitted fruits (so 3 punnets from the shop), so it’s a little easier to scale up/down.

This method involves first macerating (or soaking) the fruit in sugar for several hours (or even overnight). The sugar draws out the juice from the fruit, and in turn a little of the sugar is absorbed. This absorption of sugar will help to firm up the fruit and keep it from disintegrating during the necessary boiling later on.

That being said, this is not a solid jam that has to be crowbar’d out of the jar (a particular dislike of mine). It’s definitely leaning more towards the conserve, although having sliced the fruit to manageable bite-sizes, I think that disqualifies it from the traditional definition of conserve (i.e. whole fruit in syrup).

ANYHOO….

Here’s how it goes:

Apricot Jam

3 x 350g punnets of Bergeron (for preference, but not compulsory) apricots, to give 1kg of prepared fruit
800g granulated sugar
Juice of 2-3 lemons
Day 1

  • Rinse the apricots and cut into halves, top to bottom, and remove the stone.
  • Layer the apricot halves, sugar and the juice of 2 of the lemons in a large bowl ensuring the cut surfaces of the apricots are covered with sugar.
  • Cover the bowl with cling film and set aside for 8-10 hours, or overnight.
  • Mop brow and declare loudly to any interested parties “This jam-making is EXHAUSTING! I must have a REST and watch a FILM”.
  • Put feet up.

8 hours later, or next morning if you started at night

  • Gently slide the apricot mixture (which will probably be quite runny by now) into a preserving pan and warm gently, until all the sugar is melted.
  • Try and avoid stirring, as the fruit will still be very fragile and might begin to break apart with too much spoon action.
  • When all the sugar is melted, bring the mixture to a boil.
  • As soon as it boils, remove the pan from the heat and gently pour the fruit mixture back into the bowl.
  • Re-cover with cling film and set aside overnight.
  • Mop brow and put feet up as above.

12-14 hours later

Here’s where things might get a little too Faffy™ for your liking, feel free to skip the next part if you prefer a slightly more rustic jam.

  • Removing the skins
    • Strain the fruit from the syrup. I prefer to lift the aricot gently with a skimmer, to avoid squishingthem too much, but you can pour it through a sieve if you like.
    • By this time, after their overnight soaking, the skins should be wrinkled and easy to separate from the flesh of the apricots. I usually start by picking up an apricot half by the skin in my left hand and then using a small, sharp knife to ease the flesh away. Sometimes the cut edge of the apricot next to the skin has hardened and needs a little encouragement to come free. If your apricots have a slightly thicker skin, this may not be as easy as described. In this case, give up.. Persevering will only mash the apricots to mush.
    • Discard skins.
  • Using some sharp scissors, cut the now skin-free apricots into strips about 0.5-1cm wide. Again, feel free to skip this if so inclined. It just makes the jam easier to spread. Set fruit aside for now.
  • Once the fruit is prepared, it’s time to boil the syrup to setting point.
  • But before you start heating it, taste. I like a particularly sharp jam, so I tend to add the juice of another lemon at this stage if necessary. Taste the syrup and make your own decision.
  • Also, put 2 saucers in the freezer. These will be used later to test whether your jam has reached setting point.
  • Pour all the syrup into the preserving pan and bring to a simmering boil. Keep an eye on it, as too high a heat may cause it to boil over.
  • Skim the froth from the top of the simmering syrup – removing this will help give your finished jam that jewel-like clarity. Don’t throw the foam away, it’s still delicious, just bubbly. Enjoy on toast with some salty feta or goats cheese – NOM!
  • Setting point is reached at 105°C, when the excess water has evaporated – there will be a distinct lack of steam coming from the pan, but use a thermometer to double-check.
  • Add the apricots, sliding them gently into the syrup. It will immediately go off the boil, and as there will be quite a lot of syrup clinging to the apricots themselves, it will take several minutes to come back to setting point.
  • Use this time to wash your jam jars, rinse and arrange onto a baking sheet, together with their lids.
  • Put the jars into a cold oven, and turn the heat to 100°C, 80°C Fan.
  • When the jam has reached setting point for the second time, draw the pan to one side away from the heat and test the jam by putting a teaspoon onto one of the cold saucers from the freezer. Return the plate to the freezer for a minute or two then remove and slowly push a finger through the cooled jam. If the surface wrinkles, then the jam is done. If not, return to the heat for a few more minutes and test again.
  • Once the jam is set to your satisfaction, turn off the heat and leave it to cool a little. You want it to be cool enough to begin to form a thin skin on the surface. This means that it is starting to set, and you should put it in jars. Depending on how big a batch you’re making, this could be as long as 20 minutes. Have a cuppa while waiting!
  • Stir the jam gently, to distribute the fruit throughout the syrup. Now that the jam has cooled a little, the fruit will stay suspended evenly. Stirring when the jam is too hot will do nothing, and pouring too-hot jam into jars will just make all the fruit float to the top.
  • Remove the hot and now dry jars from the oven and, using a jam funnel, pour your jam into the jars. You might want to use oven gloves to hold the jar steady. Fill the jars as close as possible to the top – to within 5mm at least (bacteria love air gaps, so you want to keep them as small as possible).
  • Screw the lids on tightly and then wipe off any spillage from the outside of the jars. Leave to cool completely before labelling.