Cinder Toffee

Here’s another recipe that can, be part of a home-made Christmas, either for nibbling at home or prettily wrapped in cellophane as a gift, or indeed any suitable gift-giving time.

It can also be customised in a number of ways, as I shall detail below, be it in the ingredients you choose or the finishing touches you employ.

Honeycomb recipe from a 17thC manuscript (MS1511) dated 1682 in the Wellcome Library
Honeycomb recipe from a 17th century manuscript (MS1511) dated 1682 in the Wellcome Library

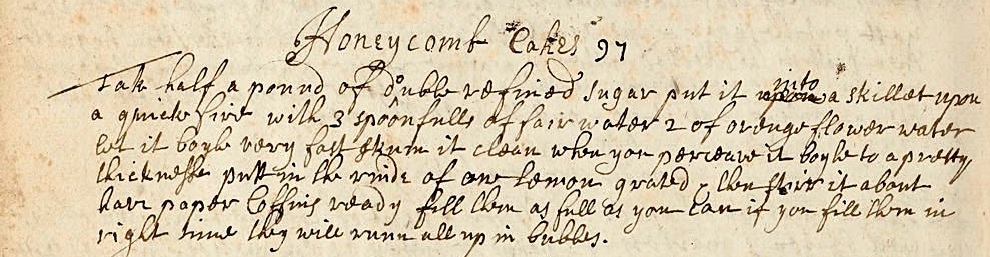
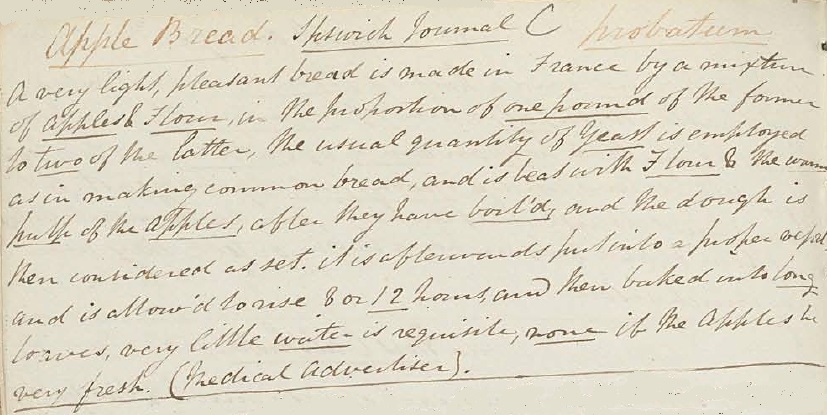
Cinder toffee is a traditional UK sweetie recipe which has been around for centuries, and early recipes can be found in household manuscript books from the reign of Charles II. Recently, it has seen a return to popularity under the name Honeycomb Toffee. Whilst a more appetising name, perhaps, unless you actually make it with honey, it is, to my mind, a bit misleading, whereas you have only to glance at the Wikipedia page for cinder to see that the appropriateness is evident in both looks and definition.

The toffee is made by bringing a mixture of sugars to the Hard Crack stage and then quickly stirring in a small amount of bicarbonate of soda to produce effervescence. The mixture is then poured into a suitably prepared tin and as it cools, the air bubbles are trapped in the sugar, thus giving it its distinctive structure.

Having read numerous recipes online, it is fairly safe to say that the most popular combination of sugars is caster sugar and golden syrup. This gives a bright, golden toffee reminiscent of the insides of a modern Crunchie bar. Whilst delicious, the flavour is, however, very one-note, and extremely sweet, and I got to pondering how it might be improved.

I found a recipe in F.Marian McNeil’s The Scots Kitchen (1929) for Black Man, a version of cinder toffee made with treacle, and kin to the Yellow Man of Northern Ireland. Made solely with treacle and bicarbonate of soda, it would definitely have the dark, bubbled appearance of genuine cinders, however in experimentation, the treacle proved exceedingly bitter as well as being much too easily burnt.

I liked the idea of using more complex flavourings to make the toffee and so I have come up with a base recipe for cinder toffee, with suggestions of how to adjust it for variety and interest. By varying the sugars and syrups, the range of flavours can be quite extensive and with more time at my disposal, I believe similar subtleties could also be achieved using honey as the liquid sugar. Feel free to experiment yourself!

Base Recipe Components

Choose your main flavouring from either the solid sugars or the liquid sugars. For example, malt extract and caster sugar, Demerera sugar and golden syrup. Both together, e.g. treacle and dark muscovado, is too dark and will burn to bitterness.

  • Solid sugar: This can range from fine, white, caster sugar, granulated sugar, soft light brown, soft dark brown, Demerera, light muscovado, dark muscovado all the way through to molasses sugar. The varying degrees of colour have a bearing on the eventual flavour which becomes richer and more caramelised the darker you go.
  • Liquid sugar: Any sweet syrup liquid at room temperature can be used including golden syrup, molasses, maple syrup, treacle, agave nectar, malt extract, honey.
  • Butter – for richness
  • water – to help dissolve the sugar
  • cream of tartar/liquid glucose – to help prevent crystallisation
  • bicarbonate of soda – for the bubbles! This recipe only uses a teaspoon, which, if properly stirred through, is more than enough to produce sufficient bubbles. Using more will produce more vigorous frothing, however, it will also become more noticeable in the flavour of the toffee, as well as being trickier to stir through without clumping.
Cinder Toffee 3 ways

Presentation Suggestions

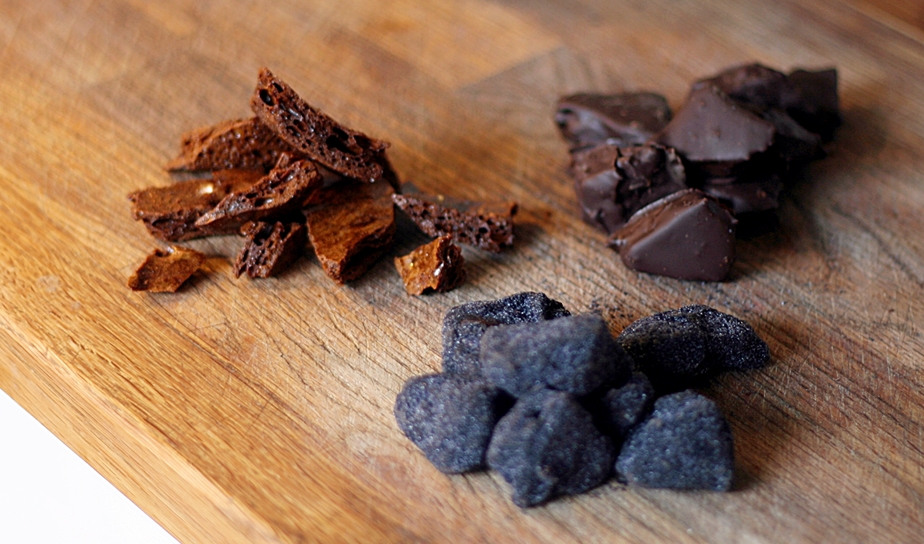
  • Plain: Cinder toffee is delicious in it’s simple, unadorned state, but will absorb moisture from the air if left exposed. Once cooled, it should be stored in an airtight box or ziplock bag to keep from becoming sticky.
  • Dipped in chocolate: To keep the toffee crisp without the need for airtight storage, you can dip pieces in melted chocolate and set aside to cool. Although this will serve admirably, it will have a tendency to melt in the hand. The solution is to temper the chocolate, instructions for which abound on the internet. Whilst milk chocolate is the most popular pairing, you can experiment with a whole range of flavours from white through to the extremely dark. The sweetness of the cinder toffee made with caster sugar and golden syrup can be offset to a certain extent by dipping in dark (at least 60% cocoa) chocolate, not to mention the very pleasing contrast of the golden toffee against the dark chocolate. Similarly, the bitterness of treacle cinder toffee can be lightened by the use of white chocolate flavoured with lemon zest.
  • Made into cinder coal: This is the most fun. By tossing the chocolate-coated cinder toffee pieces into some black caster sugar, they immediately become, to all intents and purposes, little pieces of sweet coal, and thus the embodiment of their name.

How to make black sugar

The intense colour provided by modern gel food colouring is ideal for creating vibrant coloured sugar. Although we’ll only be using black the principal is the same for making any shade of coloured sugar.

1tsp black food gel colouring
200g caster sugar.

  • Pour the sugar into a small zip-lock bag and add the food colouring gel.
  • Seal the bag and gently massage the sugar against the gel. It will gradually take on an intense colour whilst still remaining separate grains.
  • Continue massaging the sugar until it is evenly coloured throughout. If the shade is too light, add a little more gel and repeat the massaging motion.
  • The coloured sugar will keep in the ziplock bag for weeks.

Cinder Toffee

110g caster sugar
110g treacle
30g unsalted butter
2tbs cold water
1 pinch cream of tartar or 1/2tsp glucose
1tsp bicarbonate of soda

  • Line a roasting tin with parchment paper.
  • Put all of the ingredients except the bicarbonate of soda into a non-stick saucepan and warm gently until the sugar has dissolved.
  • Increase the heat until the sugars boil. Continue heating without stirring until the syrup registers 150°C on a thermometer.
  • Tip in the bicarbonate of soda and mix briskly for 5 seconds, ensuring the powder is well incorporated.
  • Pour the frothing mixture onto the baking parchment in the tin and leave to cool. You can speed this up (and thereby trap more bubbles in the toffee) by putting it into the freezer for 15 minutes.
  • When completely cold, tap gently to break into bite-sized pieces.

To cover with chocolate

  • Melt or temper 200g of your chocolate of choice.
  • Drop pieces of cinder toffee into the melted chocolate and use a fork to lift them out.
  • Tap the fork briskly on the side of the chocolate bowl in order to shake off excess chocolate.
  • Lay the coated pieces on parchment paper to set.
  • Store in an airtight container.

To make cinder toffee coal

  • Whilst still wet, drop the chocolate coated pieces into the black sugar and toss to coat.
  • Lift out the coated pieces and lay onto a wire rack until set.
  • When completely cold, toss the pieces of coal gently in a wire sieve to remove excess sugar.
  • Store in a ziplock bag or wrap in cellophane bags for presents.

Apple Bread

This recipe was copied from the Ipswich Journal into the manuscript book from a Norfolk household in the early 19th century. The manuscript was eventually purchased by the Wellcome Library and its contents digitised and made available online, which is where I discovered it. It was the simplicity of the recipe that appealed – just 3 ingredients: Flour, yeast, apples. I immediately mixed up a batch and was delighted with the results – a lovely open textured bread with a bite/chew similar to sourdough, but with a delicate, underlying sweetness which, when toasted, almost tasted like honey. It went brilliantly, un-buttered, with some strong cheddar and a crisp apple.

Original Recipe
Source: MS3082, Wellcome Library Collection

To continue the week of coincidences, I later found this recipe reprinted word for word in my 1950 copy of Farmhouse Fare, recipes sent in to and collected by Farmer’s Weekly magazine. Which means that someone else copied the same recipe from the Ipswich Advertiser and kept it alive in their family for 150 years to be revived in 1950. Utterly delightful!

It’s a regular in this household – I hope you enjoy it also.

Apple Bread

500g strong, white bread flour
1 sachet easy-blend yeast or 20g fresh yeast
4 Bramley Apples

  • Put the apples in a saucepan and cover with water.
  • Bring to the boil, turn down the heat and simmer for 15-20 minutes until the apples are soft and cooked. The skins might split, but as long as the water is just simmering, the apples should hold together – fast boiling water will only get you apple soup.
  • Lift the apples from the water (you might need some water later). Remove the skins and scrape the cooked apple flesh into a bowl.
  • Sieve the cooked apple to make a smooth puree. If using fresh yeast, you can crumble it into the puree and whisk until thoroughly mixed.
  • Put the flour and dry yeast into a bowl and stir to combine.
  • Add the apple puree gradually and stir to combine into a soft dough. You should need between 250-300g of apple puree. If you need more liquid, use some of the water the apples were cooked in.
  • If you have a mixer with a dough hook, work the dough for 10 minutes on the lowest speed. Otherwise, work it by hand, but be careful not to add too much flour in the kneading – you want to keep the dough nice and soft.
  • Put the dough in a bowl, cover and leave the mixture to double in size.
  • When sufficiently risen, tip the dough out of the bowl and knock back.
  • Shape into loaves and put into a 1kg greased loaf tin.
  • Cover lightly with a cloth and leave to rise for a further 30-45 minutes.
  • Preheat the oven to 200°C, 180°C Fan.
  • Bake for 30-40 minutes until golden brown and the base sounds hollow when tapped. If the bread appears cooked, but not sounding hollow, remove from the tin and return to the oven for 5-10 minutes to crisp up.
  • Cool completely on a wire rack before slicing.

Traditional Stuffing

Here’s something that very often gets neglected next to the flashy stars of the Christmas meal – stuffing. If I could get just one of you this year to refrain from buying a cardboard packet and to try this instead, then I’ll be happy-clappy.

Traditional stuffing is so simple – basic, almost (breadcrumbs, onions, herbs, stock) – yet it can really add to and enhance a main meal more than ingredients costing ten times as much.

When it comes to the traditional roast meal, though – I have a problem with where it goes and how it usually gets served up.

I understand that, packed inside the poultry of your choice, it’s supposed to impart flavour, but what invariably gets dished up is a big glop of solid stodge to eat alongside some dried up old bird (and I’m not just referring to myself here).

In fact, the more I think about it, the more illogical it seems:

We calculate the cooking time for a lump of meat based on its weight, and filling it with stuffing obviously adds to that weight. If you cook a bird according to its ’empty’ weight, then the stuffing remains a thick lump of glop. If you calculate cooking time based on the ‘stuffed’ weight, by the time the stuffing is cooked through, the meat is dried out.

So I say: stuff stuffing the stuffing – cook it separately. That way both the meat and the stuffing can get cooked to perfection and everything is right in the world.

You can bake it in a big slab, or roll it into balls and let it cook around the outside of the meat. Personally, I like to cook it in a bun/ muffin tin, in individual portions: the outside gets crispy and crunchy, and the inside remains moist and juicy. Traditonally, stuffing contains suet – but I prefer to replace it with butter for two reasons: it means vegetarians can enjoy it as well (make sure you use vegetable stock), and it still tastes great when cold. Cold, congealed suet is not a good taste in anything. So today’s handy hint is: Avoid suet if you’d like to continue to enjoy your stuffing cold.

Traditional Stuffing

Makes 12 portions

2 onions
50g butter
225g breadcrumbs (4-5 slices)[1]
1 heaped tsp each of dried parsley, sage, thyme, oregano
1/2-1 tsp dried rosemary
salt & pepper
200ml stock
1 egg

  • Grease your muffin tin well.
  • Chop the onions and cook gently in the butter until softened and translucent.
  • Put all the other ingredients into a bowl.
  • Mix in the softened onions and any butter left in the pan.
  • The mixture should be moist enough to hold its shape when pressed together.
  • Spoon the mixture into the tin and press down gently. I think the crunchy bits on top are the best bits, so I use a fork to just rough up the surface.
  • Bake at 200°C, 180°C Fan for 45 minutes.

[1] Stale/dry breadcrumbs are fine – use a little extra stock if you think the mix is too dry.

Banoffi Pie

I’d just like to take a moment to discuss a modern British classic pudding: Banoffi Pie.

Yes, Banoffi. Not Banoffee.

That’s just one of my little niggles regarding this dessert that have ultimately led to this post.

Done properly, to the original recipe, it is a classic, sophisticated and delicious dessert, worthy of a dinner party.

But it rarely IS done properly and, over the years, I’ve seen it churned out on television in worse and worse variations, until this past week when I saw an absolute shocker and so I was propelled into making this post just to set the record straight if nothing else.

I’m convinced that the fatty, over-sweetened mess that Banoffi Pie has evolved into, puts off a lot of people, which is a shame. Hopefully, if they can be persuaded to try it as it was originally conceived, they might just become fans.

I’ve mentioned in a previous post how Banoffi Pie came into being, and one of the co-creators has also published online the back-story as well as his original recipe.

Even though I am a fan of the original recipe, I’m going to change it a little.

I know, I know……I realise I’ve just spent three paragraphs banging on about people changing recipes, but in my head this is ALLOWED – because in the past I have actually eaten original recipe Banoffi Pie. Over the years I’ve developed a personal rule of first trying a recipe in it’s original form, out of respect to the original author. That done, you can tweak it how you like, but make it their way first. I’ve lost count of the times I’ve been pleasantly surprised with the results.

Once you’ve tried the original recipe too, you can pop back and we’ll carry on.

Back already? Excellent.

Before we begin, lets just have a quick whizz around the components, which gives me the opportunity to bang on about those too:

Pastry Base: Yes, contrary to popular belief, the original recipe called for a sweet, shortcrust pastry, which is actually ideal for this dessert. We’re going to draw a discrete veil over the crushed biscuit-and-butter and (my personal bête-noir) chocolate-biscuit-and-melted-chocolate bases, which push this dessert into being sickly. The filling is so rich and sweet, having the dry, crumbly pastry is a perfect foil. I actually have a copy of the original recipe published in the second book of recipes from the restaurant where it originated ( “The Deeper Secrets of The Hungry Monk” ) which just specified ‘shortcrust pastry’. This I interpreted as carte blanche to use whatever recipe I liked. What I have for you here is the original sweet cornflour pastry which I adapted to a savoury version for the Cheese and Potato Pies. It has that extra crispness that a regular all-butter pastry lacks.

Filling: I’ve seen some people get very precious about the caramel “I make it all by hand!” they cry, ladling in the butter and cream. However, these caramels tend to be rather runny, and to be blunt, the filling can be doing without all that fat. The original is much simpler and is obtained by simmering unopened tins of sweetened, condensed milk for an extended length of time. This can be done in a variety of ways, but my method of choice is in the slow cooker because you can leave it unattended, and it won’t boil dry. Cover the tins with water, set it on Low and leave it for 8 hours. You can simmer them longer, up to 12 hours, and the caramel will gradually become darker the longer it is left in the water. The caramel in the picture was taken out of the slow cooker after 8 hours. In the UK, the most well-known producer of milk products (Carnation) have recently started selling tins of caramel. These are great if you need a dessert at short notice, but I find the caramel isn’t quite as firm as when you make it yourself, as well as being, to my taste at least, a great deal sweeter. If convenience is what you’re after, I suggest simmering more than one tin at a time and keeping the home-made spares in the cupboard.

Banana: This addition/improvement transformed Blum’s Coffee Toffee Pie into Banoffi Pie. The banana is laid on top of the caramel and underneath the cream, NOT on the pastry base. This would make spreading the caramel very difficult, as the sliced banana would stick to the caramel and slide about. And no, they don’t go on top of the cream either, because they’ll just turn brown and become very off-putting. And if you DO put them on top of the cream and then throw chocolate on top to disguise the browning, you’re fooling no-one. One variation that meets with Ian Dowding’s approval is to replace the banana with a thickened apple puree, making an Appleoffi Pie. Made with sharp, cooking apples such as Bramleys, I can just imagine the delicious contrast in both flavour and texture, although I’d probably leave out the coffee from the whipped cream for this version.

Coffee Cream:  Yes, coffee cream – whipped cream flavoured with coffee. So often this is replaced with plain whipped cream, or even vanilla flavoured cream, to the dessert’s great detriment. And, contrary to Mr Dowding’s original, in my opinion the coffee cream should be unsweetened and strong to the point of bitterness. Using espresso coffee powder turns it into a fantastic counterpoint to all the sweetness in the caramel and bananas, as well as lifting the dessert into dinner-party status. Coffee can do that. It’s almost as if it’s status as a grown-up flavour, confers adult status on everything it touches.

Chocolate for sprinkling/garnish: Whoa, whoa, whoa there, Nellie!? Whaddya doin’? You can’t go introducing a new flavour and shoving it on top of the pie just because you feel like it! Coffee, banana and caramel flavours are plenty busy enough, thankyousoverymuch! If you must sprinkle anything, a light dusting of espresso coffee powder is all the garnish it needs.

Baking Tin: You can make this dessert in any size and shape tin you like. A 20cm round tin, preferably with a loose bottom to help ease out the cooked pastry case, is traditional, but this time I used my loose-bottom rectangular flan tin (13cm x 35cm), which means the finished dessert can be neatly cut straight across in elegant, finger slices and the different layers are clean and clearly visible.

The Original(ish) Banoffi Pie

Pastry
60g cornflour
225g plain flour
140g butter
1 large egg
85g icing sugar
ice-cold water

  • Put all the ingredients into the bowl of a food processor and blitz until the mixture resembles breadcrumbs.
  • Gradually add the water, one tablespoon at a time, until the mixture comes together in a ball.
  • Knead smooth, then roll out thinly.
  • Line your chosen tart tin, easing the pastry into the corners/sides.
  • Leave the excess pastry overhanging the sides and chill in the fridge for 1 hour.
  • Preheat the oven to 200°C, 180°C Fan.
  • Remove the tin from the fridge and, now that the pastry has relaxed, trim the excess from the sides.
  • Prick the bottom of the tart tin with a fork.
  • Line the tin with baking parchment and weigh it down with baking beads/rice.
  • Bake for 12 minutes, then remove from the oven and take out the parchment and beans.
  • If the edges are already brown, cover them closely with foil and return the tart to the oven until fully baked (10-15 minutes).
  • Set aside to cool.

Filling
1 tin sweetened condensed milk turned to caramel, cooled

Unless you’re making a huge (30cm+) tart, then one tin is all you’ll need. Warmed carefully, it’ll spread a long way and a 1-2cm layer is rich enough for a treat without becoming sickly.

  • Open the cooled tin and tip into a small saucepan.
  • Warm the caramel gently until it becomes smooth and pourable.
  • Pour the warm caramel into the cooked pastry tart shell and spread it evenly over the base.
  • Lightly grease some clingfilm with butter and lay it closely over the caramel.
  • Chill until required.

To Assemble
300ml double cream
1tsp instant espresso powder + extra to sprinkle
2-3 bananas

  • Whisk the cream and coffee powder together until firm peaks.
  • Slice the bananas and lay a thin layer over the caramel.
  • Cover the bananas with the coffee cream. I like to just spoon it over, and keep it light and billowy, but if you prefer something more formal, you can pipe it. What you must do, is ensure that all the banana slices are completely covered. Just like the meringue on a lemon meringue pie, make sure the cream goes right to the edge of the tart, touching the edge of the pastry. Any banana left uncovered with start to discolour very quickly, but covered with the cream they remain delicately pale.
  • Dust the top lightly with espresso powder and chill until required.

Grant Loaf

If you’re going to bake your own bread, you could do worse than start with this one – it doesn’t require kneading, it only needs a very short, single rise, and you can have a batch of three loaves cooling on a rack in an hour and a half! The recipe has been around for almost 70 years – read on to find out more about it and its creator!

Heroines of Cooking: Doris Grant (1905-2003)

Tireless campaigner for healthy eating and the promotion of unadulterated foods, Doris Grant was a champion of fresh, natural ingredients and the minimal processing of food, and she maintained a running battle with major food companies in the UK for more than 60 years.

Almost crippled with arthritis in her youth, Doris found relief from her symptoms by following the food-combining diet of Dr. William Hay. With her health restored, Dr. Hay encouraged Doris to write her own book for the UK market, and thus began her publishing career. Alongside her many best-selling books, she is immortalised as the creator of The Grant Loaf.

Originally, The Grant Loaf was a mistake. While teaching herself to bake in the 1930s, it was several months before Doris realised she had not been kneading her bread dough.  It didn’t seem to have made much of a difference to the loaves, and was a great deal easier and quicker than the traditional method, so she included her ‘mistake’ in her 1944 book Your Daily Bread. Here, with only a few adjustments, is that original recipe.

The dough ends up a lot wetter than traditional dough – so wet in fact, that kneading would be impossible if it weren’t already unnecessary. The bread itself is firm without being brick-like, and has a wonderfully nutty flavour as well as making great toast. I bake it in our house as our everyday bread, including sandwiches and packed lunches.

This recipe makes three loaves for two reasons:

  • It uses a whole bag of flour at once – no messy half-bags to clutter up your cupboards and spill over everything.
  • It makes sense, as well as efficient use of the oven, to cook more than one loaf at a time and the additional loaves can easily be frozen for use later.

The Grant Loaf

1.5 kg (1 bag) stone-ground wholemeal bread flour
2 sachets rapid-rise yeast
1 litre + 300ml warm water
25g salt
25g muscovado sugar (or any brown sugar, or honey)

  • Put the flour into a large bowl and place in a gentle oven to warm. It doesn’t much matter if you don’t warm it, but it does speed up the rising.
  • Put the sugar and salt into a large jug and add half the water. Stir to dissolve.
  • Grease the bread tins using cooking spray or oil.
  • Mix the yeast into the warmed flour and pour in the sugar/salt mixture, then add the rest of the water.
  • Stir until the flour is fully mixed in. This is probably easiest to do using your hands, but using a utensil works well, also. Personally, I use a large two-pronged wooden fork from an otherwise unused set of salad servers, because the prongs move easily through the wet mix. I regularly manage to whip up a batch of this bread without touching the mix with my hands at all! Remember: you’re only mixing, not kneading – so as soon as all the flour is incorporated, stop. The dough will be much more moist than traditional bread dough – more like a fruit cake mix or thick, badly-made porridge.
  • Spoon the dough into the bread tins, making sure it’s evenly divided – each tin should be approximately ¾ full. If you want to measure by weight, it’s approximately 950g per tin.
  • Set the tins on a baking sheet somewhere warm to rise by about 1/3, until the dough is just above the top of the tins and nicely rounded. It should take no more than 30 minutes. If, like me, you’re lucky enough to have a double oven, then put the baking sheet onto the shelf in the top oven while the main oven heats up. NB Don’t put the tins onto the floor of the top oven – even if they’re on a baking sheet – it will get too hot. Otherwise, anywhere warm and draft-free will do.
  • Preheat the oven to 200C, 180C Fan.
  • Bake for 30 minutes, then turn the baking sheet 180° and bake for a further 20 minutes for a total of 50 minutes.
  • Remove the tins from the oven and tip out the bread. Arrange the loaves on a wire rack.
  • Put the loaves back into the oven for 5 minutes to crisp up the crust.
  • Cool on the wire rack.

Variations: This method can also be used with brown bread flour, for a slightly lighter loaf.

Ivory Cream

A delicate cream of fresh bananas and orange set in a traditional mould for a classic and timeless pudding.

This recipe was found in a book published in the town where I live, back in the 1930s. I was drawn to the unusual combination of fruits and was curious how these two strong flavours would work together. The answer is ‘very well’ and the delicate colour of the set dessert is a genuinely attractive pale ivory. If you have any vintage glass or ceramic jelly moulds, then this is the ideal dessert to show them off.

Ivory Cream

4 leaves gelatine
5 large bananas
5tsp icing sugar
250ml double cream
juice and zest of 1 orange
150ml fresh squeezed orange juice
150ml water

To serve: whipped cream and orange zest curls

  • Soak the gelatine in water.
  • Mix the orange juice and water and warm over a low heat.
  • Add the bloomed gelatine and stir until melted. Set aside to cool.
  • Peel and mash the bananas thoroughly. Add the orange zest and juice.
  • Whisk the cream until thick, then fold in the bananas.
  • When the gelatine mixture has cooled, whisk into the banana cream mixture.
  • Rinse your jelly moulds with cold water, leaving them wet inside, then pour in the mixture.
  • Cover lightly with plastic film and chill in the fridge until set.
  • To turn out: Dip the moulds in hot water for a few seconds, to melt the surface gelatine, then turn out onto your serving dish.
  • Serve with whipped cream and orange curls to garnish.

Seedless Raspberry Jam

If you make no other preserves this year, make this one.

I’m serious. If you were here, I’d grab your lapels and lean disconcertingly close to your face whilst muttering this assertion. Look at that colour! Now imagine that colour as a taste explosion on your tongue! It’s incredible! I’m using far too many exclamation marks!!! Help meee!!!!!!!!

*takes deep breath*

Anyhoo….

For years I thought I disliked raspberry jam. No, I did actually dislike it – because all I could focus on was the seeds. A few years ago I was given a huge bag of raspberries and decided to make some jam because we’d all eaten as much of the fresh fruit as we could. Since I was running a bit low on jars, I thought I’d reduce the volume a little by sieving out the seeds and wow – what a difference it made. Without the distraction of the seeds, it was just pure, unadulterated flavour. Astonishing! This is now my number one favourite preserve.

“But I can’t make jam!” I hear you cry.  “Its all huge vats of boiling fruit…. mountains of sugar…pectin…setting point…hundreds of specialised sterilised jars…takes hours and hours….kitchens full of steam… and…and…and…”

To which I say, “Actually, not so much”.

Lets address possible objections one by one.

Huge vats of boiling fruit.
Its always puzzled me why, for the most part,  jam recipes consist of vast quantities of fruit. Yes, I know it’s all about preserving nature’s bounty for the cold winter months, but if you’re new to jam-making, and possibly you’re not sure whether you’re actually going to like a recipe, investing in huge quantities of ingredients might seem a little daunting. And even if it turns out that you DO like the recipe, you then have huge quantities of jam to get into jars and make sure it doesn’t get mouldy. Then there’s the giant preserving pans required. Actually, that’s not true. Preserving pans are really just large versions of ordinary pans and they’re big because of all the huge quantities of fruit that most recipes call for. They’re also large because they need to provide a large surface area to help with the evaporation of excess liquid, which will eventually lead to a jam setting. If you’re working with a small amount of fruit, there’s no reason why a broad, regular pan won’t do just as good a job – a deep, 28cm frying pan, for example.

Mountains of sugar
Not all jam requires vast quantities of sugar – it all depends partly on the fruit and partly on personal taste. Sugar is what preserves the fruit, so there is a minimum level below which you should not stray if you want the results of all your hard work to last. Apart from that, its pretty much down to personal taste. I don’t have a sweet tooth, yet I love seedless raspberry jam.

Pectin
Pectin occurs in fruit in varying concentrations, and, together with some kind of acid, is what helps jam to set. If a fruit is low in pectin, you can either combine it with another fruit high in pectin or add a home or commercially produced pectin. The amount of pectin in a fruit decreases as it ripens, so the riper the fruit you’re using, the more likely you’ll need some additional pectin. Raspberries have a moderate amount of pectin, so if you use slightly under-ripe berries with a dash of lemon juice, you can probably get away without using any additional pectin at all. If in doubt, use preserving sugar which has pectin already added to it.

Setting point
This is the point where the concentration of sugar and pectin are such that, when cooled, a jam will set. This is the reason for (sometimes) prolonged boiling. The boiling causes excess water to evaporate, and this in turn means that the concentration of sugar in the mix increases. When enough water has evaporated, the jam sets. Traditionally this has been tested in several ways, but thanks to modern science, these days we can just use a thermometer. You can pick up a sugar thermometer for about £7.00, and it will have the setting point for jam marked at 105°C. Since water boils at 100°C, you can relax in the knowledge that all excess moisture will be evaporated by the time your jam reaches this temperature and your jam is going to set.

Hundreds of specialised sterilised jars
Hundreds? Really? I thought I was the one doing the histrionics here?? OK, so if you’re dealing with vast quantities of fruit and sugar, you’re going to need a lot of jars, but we’re not here, so we won’t. Calm down. When I was a child, jam was always bottled in Kilner jars, and these type of jars are still available today, with either a screw-down or clip-down lid and rubber ring to make the firm seal that is going to help keep your jam sweet and fresh. When I was at school, we learned how to make jam in ordinary jam jars and to seal the jars with waxed-paper discs, cellophane and rubber bands. There’s nothing wrong with using either of these methods, but each of them have drawbacks: Kilner jars are rather expensive and the waxed-disc method is tricky to get right, and getting it wrong means fuzzy jam. The solution is to re-use jars that would otherwise go into the recycle bin. Using a variety of jars means you can just use small jars to keep the jam fresh or offer as gifts. I find pesto jars particularly suitable: they hold a small amount and they have a freshness ‘button’ on the lid which can be re-set when you make jam. To remove labels, simply soak in hot, soapy water until they slip off. If the labels are a bit more stubborn, use a knife to scrape off the softened label and a scourer covered in washing up liquid to remove the glue. Use a range of sizes and shapes, large and small. If you have a dishwasher, then sterilising couldn’t be easier – pop the clean jars and lids in on a hot cycle. Leave the door closed until you’re ready to use them. In the oven, put jars and lids on a baking tray and slide into a cold oven. Turn the heat to 100°C for 30 minutes.

Hours and hours with kitchen full of steam
No. The beauty of this recipe is that it takes very little cooking time at all – 3-5 minutes at most. No water is added to the fruit, so there’s not much excess water to be got rid of, and the less a jam is cooked, the brighter the colour and the better the flavour.

So if that’s all settled, on with the recipe!

Seedless Raspberry Jam
1.2kg raspberries – slightly under-ripe if possible.
Approximately 1kg granulated or preserving sugar (see above)
Juice of 1 lemon (optional)

Equipment
1 oven-proof bowl
1 wide, deep pan
a fine-meshed sieve
Plastic bowl
wooden spoon
knife
sugar thermometer
A selection of jars and lids

  • Wash the jars and lids in hot, soapy water and arrange on a baking tray.
  • Put the raspberries into the oven-proof bowl.
  • Put the jars and raspberries into the oven and heat to 100°C for 30 minutes. This will both sterilise the jars and encourage the juice in the fruit to run and make the next stage easier.
  • Remove the raspberries from the oven. Leave the jars in the oven to keep warm and reduce the temperature to 80°C.
  • Weigh your bowl, write it down somewhere and put the sieve over the top of the bowl.
  • Pour the softened fruit and juice into a sieve and stir vigorously with a wooden spoon to extract as much juice and pulp as possible. NB It’s probably best to do this a small quantity at a time. You need to keep stirring/pressing until there is nothing left in the sieve but a solid mass of seeds. I won’t lie to you, this takes a while, but its well worth it. Keep scraping the sieved pulp off the bottom of the sieve with the back of the knife. Don’t use the spoon, as you might accidentally get some seeds fall into the pulp. Discard seeds.
  • When done, weigh the bowl again and subtract the bowl’s original weight to find the weight of the juice and pulp.
  • Add this and an equal weight of whatever sugar you are using to your large pan. NB Warming the sugar will make it dissolve more easily.
  • Over a very low heat, stir gently until all the sugar has dissolved.
  • Taste and add lemon juice if liked.
  • Turn heat to high and, using a sugar thermometer, heat rapidly to 105°C. NB This shouldn’t take long at all. Even if it’s not quite reached 105°C, remove from the heat after 5 minutes – prolonged boiling will ruin both flavour and colour.
  • Remove from heat and pour into warmed jars to within 1cm of the top. Seal immediately. As the jam and the air trapped in the jar cools, it will contract and eventually pull the ‘safety button’ on the lid back to it’s original position. After making a batch of jam I love sitting listening to the ‘bink!’ of the lids safely sealing in all that wonderful flavour.

Variation: Not much, except to say that you can easily scale this recipe up if you want to make a larger batch. Just be sure to use an equal weight of sugar to pulp and you can make this with any amount of fruit you like.

Cost: In season, as little as £1 per pound of finished jam.