Ormskirk Gingerbread

If you’d asked me only a few years ago, of my opinion of gingerbread, I would have given an indifferent shrug in response: I didn’t dislike it, but I wasn’t a fervent fan either. Ginger biscuits and the gingerbread used for gingerbread men I thought dull. Ginger cake was fine, but it would never be a first choice. Since then, I have discovered so many old recipes that have range and depth and nuance that it’s turned my head completely. And here we have another to add to the collection.

Ormskirk Gingerbread has a lot going for it, and I’d even go so far as to say it is probably one of the best-tasting gingerbreads you’ve never heard of.

It has a speckled appearance, from mixing the dry ingredients with melted butter and treacle, which is enough to bind, but not drown. There is candied peel, traditionally lemon but sometimes others, and spices, usually ginger, but frequently, additional spices as well. A major attraction, for me at least, is the texture, falling between the softness of parkin and the crispness of a biscuit. As you, quite literally, sink your teeth into a piece, you experience a dense chewiness which, with the variety of flavourings, is immensely satisfying.

Ormskirk Gingerbread (1830s) is  one of the earliest geographically-linked gingerbreads I’ve found – predated only by Wrexham Gingerbread (1828). In the 1850s, a group of five local women paid £20 per year to the East Lancashire Railway company for the privilege to sell their gingerbread to travellers passing through Ormskirk station, which must have contributed to the spread of its popularity.

I have a selection of recipes for you to try, because in all honesty, I like them all. The method is the same for all of them, so I shall be listing the scaled-down ingredients alongside each recipe, then you can scroll down to the method and cooking instructions. All quantities are for a 20cm square tin.

Ormskirk Gingerbread recipe, (1822-1841), MS4998, Wellcome Collection

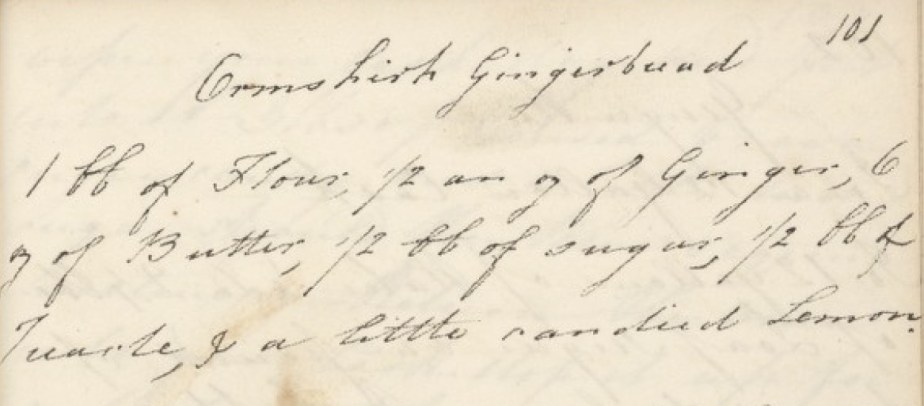
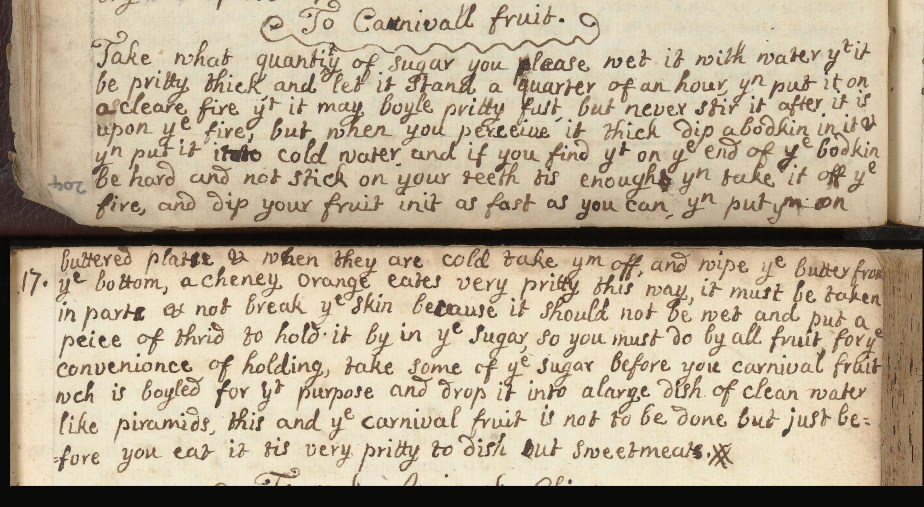
This recipe is from a handwritten manuscript held at the Wellcome Collection. It might actually be older than the recipe below, but there’s no way of telling for sure. Rather unhelpfully, there are no instructions for either making or baking, but it clearly contains all the classic ingredients and is a great introduction to this type of gingerbread:

225g plain flour
115g soft, light brown sugar
7g/1tbsp ground ginger
85g butter
115g treacle
20g candied lemon peel

From: The domestic receipt-book by Joseph Worrrall, 1832, p38.

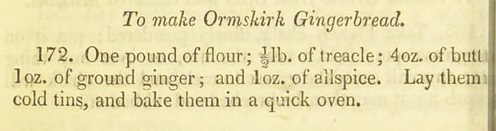
This is the earliest printed recipe I found. Unfortunately, it contains an error – the sugar is missing. Aside from this, what I found interesting was the complete omission of what appears to be a major component of other recipes, the candied lemon peel.  In  addition, there is, proportionally, a lot of spice in relation to the quantity of flour, but it is an interesting variation. In the past, I have bought dried, chipped ginger, and ground it as needed, and the flavour is bright and vibrant and, curiously, with a touch of lemon. Similarly with allspice, whose flavour really evokes a blend of spices.

225g plain flour
60g butter
115g treacle
115g soft, light brown sugar
14g ground ginger
14g allspice

From The druggist’s hand-book of practical receipts, Thomas F. Branston, 1853, p80

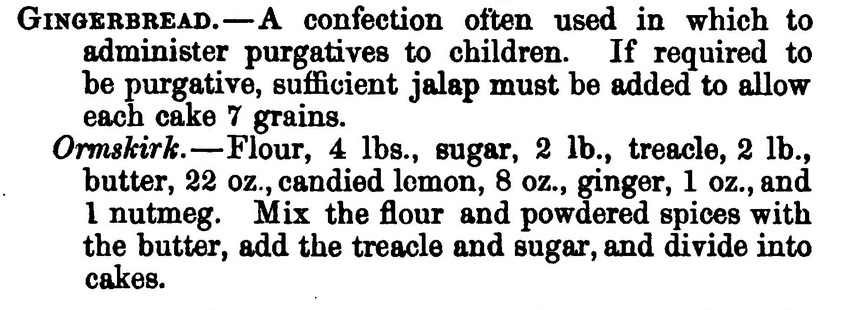
This recipe echoes the medicinal uses many believed gingerbread possessed in the middle ages. I find it odd that it is Ormskirk Gingerbread that is specified in particular, instead of a generic gingerbread recipe. Jalap is the ground root of a Mexican plant of the Morning Glory family, and it was used in times past for its laxative effect.

225g plain flour
115g soft, light brown sugar
115g treacle
80g butter
30g candied lemon peel
2 tsp ground ginger
1½ tsp ground nutmeg

Peterson Magazine 1861-01: Vol 39 Iss 1, p93

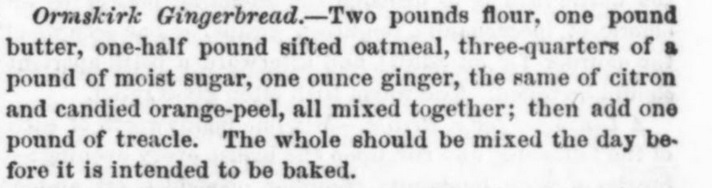
This last recipe is a full-on, all the bells and whistles version. There’s no candied lemon peel – instead there’s candied orange and candied citron and, aside from the ginger, no other spices. There’s a higher than usual farinaceous component, with the addition of some oatmeal flour (which you can make yourself by putting rolled oats into a blender/spice mill). Finally, there’s the instruction to mix it a full day before you want to bake it. Many old gingerbread recipes have this added time requirement, because they’d also use alum and potash as raising agents, and these worked slowly, so a mix for gingerbread could be sitting in a tub for days if not weeks. There’s no raising agent included in this recipe, so I was curious whether there would be any difference to the other batches. Verdict: There was, and the resulting gingerbread was definitely veering towards cakey, although this might have been due to the added oatmeal – if that’s your preferred texture, have at it. The next time I make this I probably wouldn’t wait the 24 hours, but that’s just me being impatient.

225g plain flour
115g butter
60g sifted oatmeal flour
80g soft, light brown sugar
115g treacle
15g candied orange peel
15g candied citron peel
7g ground ginger

As I said at the top, all these recipes are delicious.

Ormskirk Gingerbread

Another reason to choose to make this gingerbread is that it can be made gluten-free, using gluten-free flour (I used Doves Farm) and gluten-free oats (Morrisons have the nicest looking GF oats – they’re like steel-rolled ones!).

It can also be made vegan, if you swap out the butter for either coconut oil or some other fat that is solid at room temperature.

Finally, there’s two slight variations in method, and it relates to how you handle the butter. The traditional method for gingerbread is to melt it in the treacle and then pour the mixture into the dry ingredients to mix. The other method is to blitz it with the dry ingredients in a food processor (or rub it in by hand). It doesn’t matter which method you choose, as the result is the same.

  • Choose your ingredients from one of the four recipes above.
  • Line a 20cm square tin with baking parchment.
  • Heat the oven to 160°C, 140°C Fan.
  • Mix your spices, sugar and flour(s).
  • If you’re blitzing the butter with the dried ingredients, add it now.
  • Blitz the mixture to resemble breadcrumbs.
  • Slice the candied peel thinly and then cut into 1cm pieces. Mix the peel into the dry ingredients, making sure the pieces don’t stick together.
  • Pour your treacle into a pan to warm. I use a large frying pan, as I prefer to add everything to the treacle, as opposed to pouring the treacle into the dry ingredients. Add the butter if you’ve not added it to the flour. You’re not trying to boil it, just warm it up enough that it moves freely and the butter (if using) is melted.
  • When the butter has melted and the treacle warmed, pour  the warm liquid into the dry ingredients and mix in. It doesn’t have to be evenly coloured.
  • Tip the mixture into your prepared pan and level out. I like to leave it rather roughly textured. Don’t press the mixture down hard, just even it out.
  • Bake for 40 minutes, turning the tin around after 20 minutes to ensure even baking.
  • Remove from the oven and , leaving the gingerbread in the tin, divide it into pieces. You can cut it into any shape you please – easiest with a square tin is 16 pieces (4 x 4 grid).
  • Set the pan aside to cool completely.
  • When the gingerbread is cold, store in an airtight container.

Carnival Fruit

This recipe is such a delight. So simple, so eye-catching, and almost 400 years old.

It comes from one of my favourite manuscripts at The Wellcome Collection. Now I’ll freely admit I am very fickle with my favouritism, and I have been reminded this week of just how special this manuscript is, mainly due to a completely different manuscript I’ve been working on. I’m not going to name and shame it, but my dears… The handwriting. The spelling. Lets just say, I was sorely tested.

THIS manuscript, however, is an absolute delight. Straddling the 17th and 18th centuries, the handwriting is surprisingly modern: neat, well punctuated, with a pleasing layout, it is a joy to read, and I regularly have to remind myself just how old it actually is.

Carnival Fruit 1650-1750, MS8097, Wellcome Collection

The method used to ‘carnival’ fruit is to dip it into a clear caramel. Although I have used several different fruits in the top image, the fruit recommended in the recipe is ‘a Cheney Orange’ (China Orange), aka an eating orange (as opposed to a Seville bitter orange). Since oranges are in season during the winter months, I believe this is perfect dish to serve up during the festive season. Nowadays we have the luxury of fruit out of season, which can make for a very colourful display, however, some fruit are more suited than others. Very moist, juicy fruit such as strawberries and cherries (not pictured) will only last 2 hours before the shiny caramel coating starts to break down. Other fresh fruits such as grapes, physalis, blueberries, nuts and even dried fruit such as apricots will last 3 hours before starting to become sticky. Whilst you can do orange segments, I feel that against the scale of the other fruit, they’re a bit big, and that small orange segments (satsuma, mandarin, clementine and the like) would be more suitable.

A similar recipe in a slightly later manuscript, ‘Coromella’ 1805-1860, MS2203, Wellcome Collection

I have changed very little in this recipe: I’ve added some weights and measures, to help with getting the sugar to the correct stage and added a little liquid glucose to keep the caramel from crystallizing. I tried several times to go ‘old school’ with just sugar and water, but the caramel always crystallized too quickly to get more than just a few pieces dipped. Perhaps they used honey to help them out back then?

When choosing your fruits and nuts, it is important to consider how they are going to taste with the caramel. If you have a sweet tooth, then it gives you free rein to pick and choose almost anything. Personally, I would recommend choosing fruit that is slightly sharp, just to prevent an overload of sugar. The fruit also needs to be dry, so this rules out any fruit so large it needs to be sliced.

Choose your favourites from: green/red/black grapes, cherries, strawberries, raspberries, strings of redcurrants, blueberries, blackberries, physalis, dried apricots, walnuts, hazelnuts, pecans, almonds. If you have the patience to put individual pomegranate seeds on cocktail sticks and dip them, I think they would be delightful in both appearance and flavour.

The greatest amount of time for this recipe will involve preparing the fruits and nuts.

  • You can utilise the stalks on cherries and redcurrants, the papery coverings on physalis and the green stalks on strawberries to hold as you dip them in the caramel.
  • Most other fruits and nuts can be pierced with a wooden cocktail stick to prevent getting boiling caramel on your fingertips.
  • The recipe recommends using a thread to dip orange segments, and I must confess to not having tried this method. I opted instead to use the cocktail stick. If you can pierce the skin and avoid bursting any of the juice sacs inside, you’re onto a real winner.

To Carnival Fruit

For the caramel

400g granulated sugar
125ml water
60ml/4tbs/¼ cup glucose.

a selection of fresh fruits, berries and nuts

wooden cocktail sticks for dipping

a silicone mat or baking parchment

a sugar thermometer

  • Put the sugars and water into a small saucepan and set aside to begin dissolving while you prepare the fruit for dipping.
  • Use the wooden cocktail sticks to skewer the fruit and lay them neatly on a board or plate. If you’re using small orange segments, remove all the white pith. If you accidentally tear the skin of a segment, eat it – the juice will compromise the caramel.
  • Line a baking sheet with the silicone mat or baking parchment. This is for laying the dipped fruits on to cool. Although the dipping is straightforward, you will need to work fairly briskly in order to get all the fruit dipped before the caramel cools. If you can keep the pan on a very low heat while you dip your fruit, then this won’t be much of a problem. However, the heat will continue to cook the caramel, and it will become darker the longer it remains on the heat.
  • Arrange the prepared fruit and baking sheet so that they are easily to hand when the caramel is ready.
  • Heat the pan with the sugars in over a low heat until the granulated sugar has dissolved.
  • Increase the heat and cook until the syrup registers 150°C on a sugar thermometer. The syrup will be bubbling vigorously over the whole surface of the liquid.
  • Remove from the heat (or turn the heat down to the minimum, your choice), and begin dipping your fruits and nuts.
  • Tilt the pan so that the syrup is deep, and then one at a time, dip your fruit fully into the caramel and set on the silicone mat/parchment to cool. For fruit not on wooden sticks, be sure to keep your fingers well away from the caramel when dipping, as the caramel will burn, and stick to your skin and continue to burn, if it comes into contact.
  • The caramel needs only a minute or two to set, and then all that remains is to arrange it on your serving dish and serve. I went for a wooden board, as it’s plainness and natural material made for a great contrast against all the brightly coloured, shiny carnival fruit. To remove the wooden sticks, roll them between your thumb and forefinger – this will provide enough pressure to break the caramel surrounding them, thus making it easy to remove them.

Apple Snow

This recipe is more usually served in the late summer and autumn months, but I’ve chosen it now because the weather outside today has carpeted the garden with a thick layer of snow.

This is a classic dessert whose provenance stretches back centuries. Although the name ‘Apple Snow’ is the one more usually found in modern recipe books, it can also be found under the name Apple Fluff, Apple Souffle, Apple Puff and this version, Apple Cream Without Cream.

This last was found in a manuscript from the 17th century, held by The Wellcome Library. The manuscript has been attributed to the splendidly named Mrs Deborah Haddock, who sounds as if she should be the twinkly-eyed star of stories set in a small, quaint fishing village.

It is elegant in its simplicity, requiring only apple pulp, an egg-white and a little sugar. It is also, thanks to modern kitchen gadgetry, prepared incredibly swiftly, requiring less than ten minutes to come together before serving, once the initial preparation has been completed.

Apple Cream Without Cream, aka apple Snow, c1675, MS7892, Wellcome Library Collection

Choice of Fruit

This recipe can be made with any apple you have to hand, either keeping a purity of flavour with a single variety, or mixing and matching in a clearing-out-the-fruit-bowl, waste-not-want-not kind of way.

One of the manuscript recipes I read recommended green apples as being the best, but failed to elaborate any identifying characteristics beyond colour. I prefer to use Bramley apples, for the pale insides and sharpness of taste. Other varieties you might like to try include Worcester Pearmains, which have dazzlingly white flesh that tastes faintly of lemon and rough-skinned Russets that have an almost nutty flavour.

Alternatively, you could follow the recommendation in the recipe above and try this with gooseberries.

Apple Snow

This recipe tweaks the original slightly with additions found in other versions. In terms of quantity, it will make a visually impressive amount, but is so light and delicate, a full glass is still only a relatively small amount. It will hold its shape for two hours or so, but can be mounded in more impressive heights if served immediately after preparation.

Serves 4 – 8

5 Bramley apples, or apple of your choice.
juice of 1 lemon
2tbs cream sherry (optional)
4tbs caster sugar
1 large egg-white

  • Peel, core and chop the apples finely. Toss them in the lemon juice as you go, to prevent them from discolouring.
  • Add the apple and lemon juice to a saucepan with the sherry, if using.
  • Cover and cook over medium-low heat until the apples soften and turn to froth.
  • Mash the apples to a pulp, then sieve to remove all lumps. Chill until required.
  • Whisk the egg-white until it will stand in soft peaks. Set aside.
  • Put 250ml chilled apple pulp into a bowl and whisk on High for 2-3 minutes until pale and fluffy.
  • Add the whisked egg-white and continue whisking, adding in the sugar one spoonful at a time.
  • After 2-3 minutes the mixture will have both increased in volume and become dazzlingly white.
  • Taste and whisk in more sugar if needed.
  • Spoon or pipe into glasses and serve with some crisp biscuits on the side.
  • If you have apple pulp spare, you could spoon a little of it into the glasses before adding the apple snow.