Easter Simnel

Wotchers!

We’re back to the history books this week, with an original Simnel recipe from the 1650s. And yes, I’m exactly a week late, since they were originally enjoyed on Mid-Lent Sunday, which has, over the years, segued into Mothering Sunday/Mothers’ Day. Still, they were popular throughout the Easter celebrations, so there’s still time to rustle some up if you feel inspired.

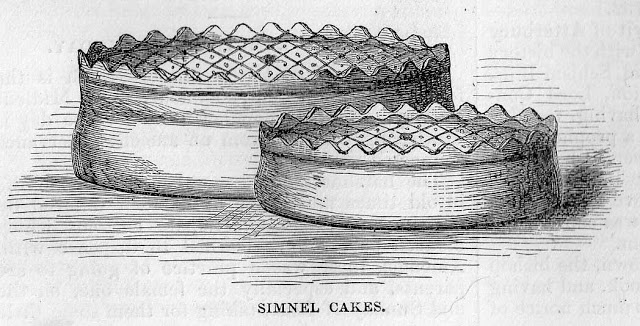
Three regions of Britain lay claim to strong Simnel traditions: Devizes in Wiltshire, Bury in Lancashire and Shrewsbury in Shropshire. The Devises Simnel is recorded as being star-shaped and without a crust, and the Bury Simnel is traditionally flat, but the Shrewsbury Simnel was the most popular and which went on to develop into the Easter cake we know today.

The Shrewsbury Simnel of 350 years ago was much different to the traditional almond-paste-filled cake made today. Originally, it was an enriched and fruited yeast dough wrapped in a plain, yeasted dough,and then boiled before being baked, in a method similar to the way modern bagels are made. There are similarities with today’s Scottish Black Bun, the difference being both the use of unleavened pastry and the much richer filling of the northern version.

simnel cakes
Shrewsbury Simnels, from The Book of Days, Robert Chambers, 1863, Volume 1, p3
15thC simnels
Sketches of an early Tudor Symnelle (from A Pictorial Vocabulary of the 15th Century, in “A Volume of Vocabularies! by Thomas Wright, 1857, p266)

Whilst descriptions and images of what Simnels looked like are well known, recipes have, to a great extent, been either extremely vague or pretty much guess-work, as all the original recipes have vanished over the years.

Until now.

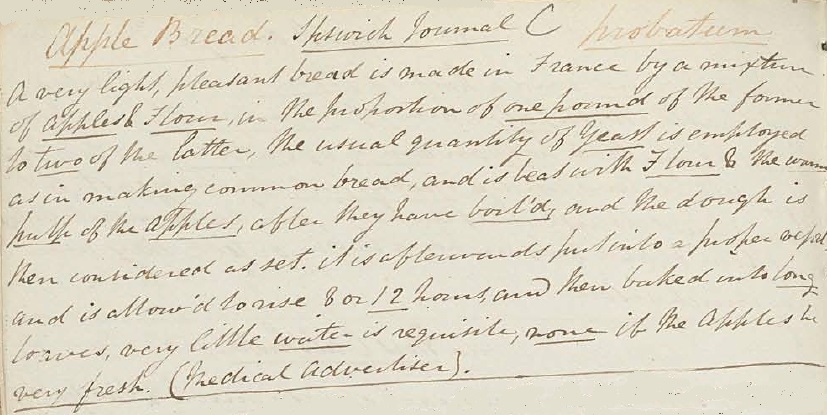
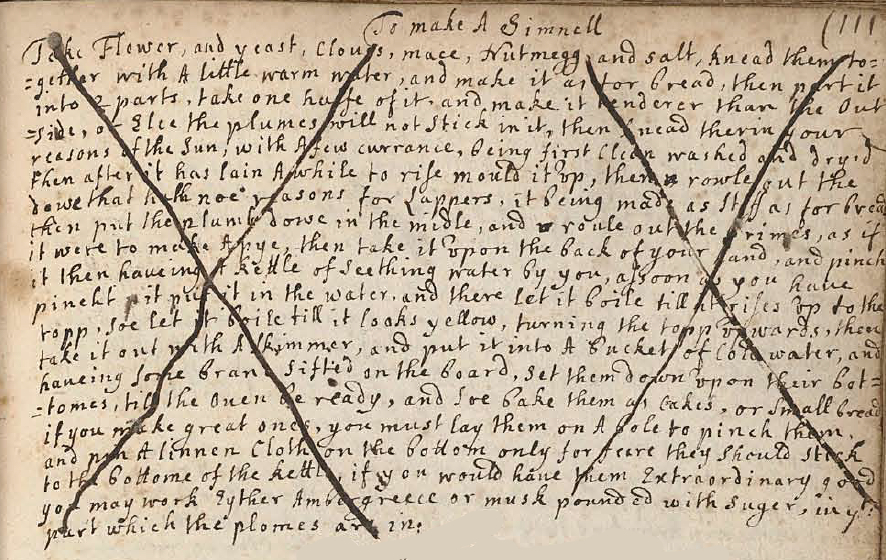
For, as I was browsing through the digitised 17th century manuscripts of The Wellcome Library, I found a recipe for a Simnell. It’s made in the traditional manner of first boiling then baking, and someone has subsequently crossed it out, but it’s still legible and much older than anything I’ve been able to find until now, so in terms of authenticity, that’s good enough for me.

SimnelRecipe
Simnel recipe from The Wellcome Library’s digitised 17th century manuscripts collection

It’s a little sparse on quantities and details such as cooking times and temperatures, but there was enough for me to muddle along with my own interpretation. Interestingly, there’s no mention of the traditional saffron flavouring, these cakes being ‘gilded’ with egg-yolk glaze only, so maybe the use of this spice was a later development.

It also fails to mention what size these festive cakes were. There’s anecdotal evidence from several 19th century sources, that claim Shrewsbury Simnels were made in all sizes from miniature up to cushion size, and also of them being sent all over the country as gifts. One account tells of a bemused recipient using hers as a footstool, not being aware that there was a delicious cake within the double-cooked crust. I opted for pork-pie-sized cakes for a couple of reasons:

  • The recipe says to “take it upon the back of your hand and pinch it” – difficult for a large sized cake.
  • The baking instructions are “bake them as cakes or small bread” – so bread roll size rather than loaf sized.
  • Mention I found of cymlings or simnels in the notes of early American settlers on the local vegetation.
    • In 1690, the Reverend John Banister recorded in his Natural History [of Virginia]

    We plant also Cucumbers & Pompions, the common, & the Indian kind with a long narrow neck, which from them we call a Cushaw. Of Melopepones or the lesser sort of Pompions there is also great variety, all which go by the Indian name of Macocks; yet the Clypeatae are sometimes called Simnels & because these others also from the Lenten Cake of that name which some of them very much resemble.

    • Earlier, in A Description of New Albion (1648), Beauchamp Plantagenet (what an AWESOME name!) observed “strawberries, mulberries, symnels, maycocks, and horns, like cucumbers” on Palmer’s Isle (now called Garrett Island)  at the northern end of Chesapeake Bay.

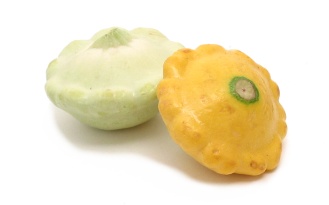
The vegetable they both refer to is nowadays more commonly called the pattypan squash.

Pattypan Squash
Pattypan Squash

The recipe below will make four, individual-sized Simnels. Feel free to enrich the filling for the dough even more by adding extra fruit, spice peel, sugar, butter and eggs. The mix below, however, will make a delicately spiced and fruited tea bread that is delicious on its own as well as spread with butter and/or toasted. Provided your Simnels don’t burst their seams during baking, the hard outer dough will ensure that they keep very well for a couple of weeks.

Shrewsbury Simnels

For the plain dough:

250g white bread flour
0.5tsp salt
0.5tsp mace
0.5tsp nutmeg
0.25tsp cloves
1/2 sachet easy-blend, fast-action yeast
warm water to mix

  • Sift the flour, salt, spices and yeast into a bowl.
  • Slowly add enough warm water to bring the ingredients together into a firm dough.
  • Knead for 10 minutes.
  • Put into an oiled bowl and cover with plastic film.
  • Set aside to rise for 1 hour.

For the filling dough:

250g white bread flour
0.5tsp salt
0.5tsp mace
0.5tsp nutmeg
0.25tsp cloves
1/2 sachet easy-blend, fast-action yeast
1 large egg
60ml double cream
50g butter
2tbs sugar

100g raisins
100g currants

2 large egg yolks for glazing.

  • Sift the flour, salt, spices and yeast into a bowl.
  • Cut the butter into small pieces and put into a pan with the cream and the sugar.
  • Warm gently until the butter has melted and the sugar has dissolved
  • Whisk the egg and add to the warmed ingredients. NB Make sure they aren’t so hot that they cook the egg.
  • Add the liquid ingredients to the flour mixture and knead for 10 minutes.
  • Put into an oiled bowl and cover with plastic film.
  • Set aside to rise for 1 hour.
  • Put a large pan of water on the cooker to boil. I use my preserving pan. Do it now because it will take practically the whole hour to come to heat up.
  • When the dough has doubled in size, knead in the raisins and currants.

To assemble the cakes:

  • Divide the plain dough into 8 even pieces and roll each piece out thinly (3mm).
  • Line 4 small deep pie/tart tins with cling film. This will help turn out the finished cakes.
  • Use 4 pieces of plain dough to line the tart tins. Leave the excess dough hanging over the edge of the tins, as it will help in forming a good seal around the cake dough.
  • Chill in the fridge together with the remaining pieces of dough, which will form the lids, for 20 minutes. This chilling will firm up the dough and make it easier to form the crust on the cakes.
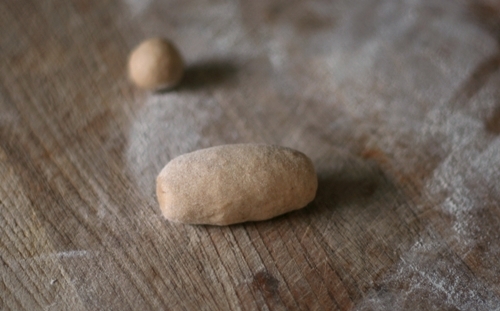
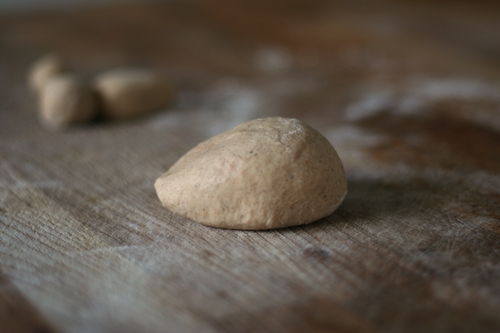
  • Divide the fruit dough into four and knead until firm and smooth. If you’ve added extra fruit or your tins are on the small side, you may need to reduce the size of the dough balls.
  • Remove the chilled dough from the fridge. It is best to form one cake and then place it in the hot water immediately. If left to one side while you make the other cakes, the dough will warm up, rise and potentially burst its seals.
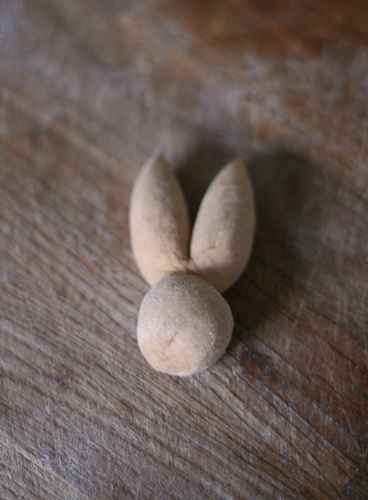
  • Place a ball of fruit dough in each tin.
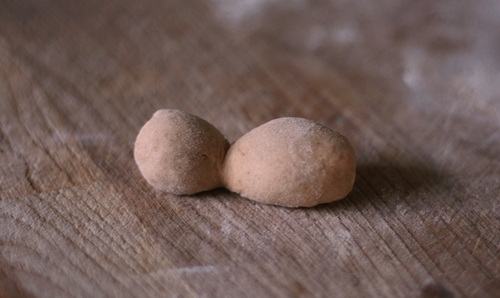
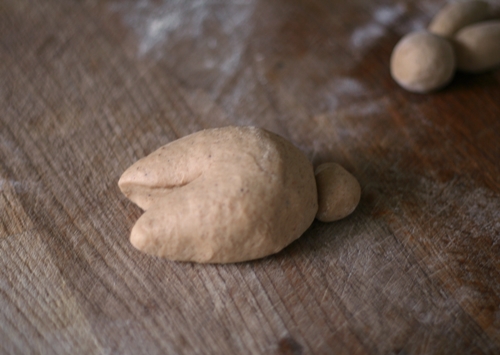
  • Moisten the edges of the dough with water and cover with one of the dough lids.
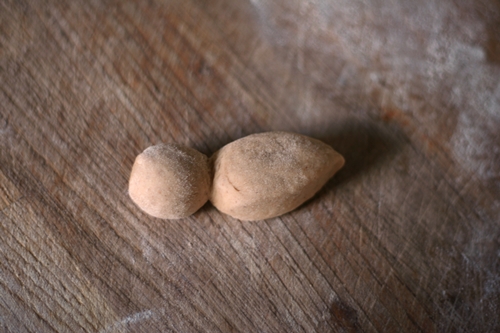
  • Press firmly and pinch together to form a seal around the fruit filling. Trim any excess dough.
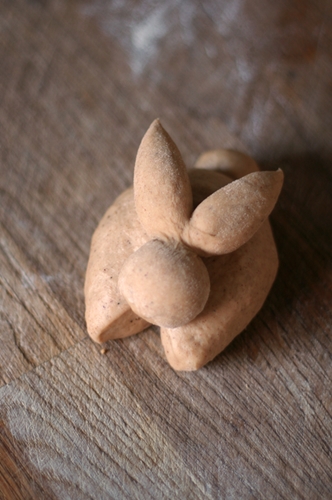
  • Crimp the edges of the cake according to your own design.
  • Fill a large bowl with cold water.
  • When the water is simmering, place each cake on a skimmer and slowly lower into the water. It will sink to the bottom of the pan initially. When the cake rises, use a skimmer to gently turn it over so that the lid cooks for about a minute.
  • Lift the cake from the hot water and lower it gently into the bowl of cold water.
  • When cooled, set the cake  onto a silicon sheet (so that it doesn’t stick) to dry.
  • Repeat for the remaining cakes.
  • Preheat the oven to 170°C, 150°C Fan.
  • Line a baking sheet with parchment.
  • Place the Simnels onto the baking sheet.
  • Brush with beaten egg-yolk to glaze.
  • Bake for 45-50 minutes until firm and golden. They should sound hollow when tapped on the bottom. Don’t be tempted to take them out too early, even with the dip in the hot water, these will take a relatively long time to bake.
  • Cool on a wire rack.

Honey Bunnies

The recipe for this dough comes from one of the many digital manuscripts made available by The Wellcome Library, and dates from 1699. The original was a bit sparse in some of the instructions (“add honey to sweeten” “what spice you will”), but I’ve experimented and come up with a version that is rich, not too sweet and delicately spiced. I specifically wanted a recipe that did not contain fruit, but feel free to throw some in if you like. Additionally, mix it up with your own spice blends.

Bun recipe from MS.3107, p28, dated circa1699,  Wellcome Collection.
Bun recipe from MS.3107, p28, dated circa1699, Wellcome Collection.

Honey Bunnies

Makes 12 bunny buns

450g strong, white flour – plus extra for kneading.
1 sachet easy-blend yeast
2tsp ground cinnamon
2tsp ground nutmeg
1tsp ground allspice
250ml whole milk
113g honey
113g unsalted butter
2 large eggs

  • Put the honey, butter and milk into a small pan and warm gently until the butter has melted and the honey dissolved.
  • Whisk the eggs in a bowl.
  • When the milk mixture has cooled to blood temperature, pour into the whisked eggs, stirring briskly.
  • Add the remaining ingredients to a large bowl and stir to combine.
  • Make a well in the centre and pour in the wet ingredients.
  • Stir together until the mixture comes together in a soft dough. Important: The texture of the dough depends on the moisture content of the ingredients, including that of the flour, eggs, butter and honey. It is probably going to look too wet. Don’t panic. Knead in extra flour to bring it back to a consistency with which you’re happy. It is better to have it slightly too soft, than too dry.
  • Knead for 10 minutes until smooth.
  • Cover and set to rise until doubled in size. The butter and the honey will mean that it will take longer to rise than regular bread dough, so think more in terms of 2-3 hours than just a single hour.
  • When risen, tip out from the bowl and press out the air.
  • Fold the dough together loosely and weigh it.
  • Cut into 12 portions. Using a digital scale will give you the greatest accuracy and therefore a more even batch overall.
  • Shape into buns. To help you shape the dough into bunnies, I’ve prepared a photographic how-to:
dough tail head
Divide each portion of dough into 3 – about 5g for the tail, 1/3 for the head/ears, and 2/3 for the body. Roll all three into smooth balls. Roll the medium ball into a sausage shape as above.
forming ears
Hold your hand as if you were going to do a karate chop, and roll the bottom edge of it back and forth over the sausage of dough, about 1/3 of the way from the left. The smaller portion of dough will form the head, and the remainder the ears.
Shape the 'ears' portion by flattening it slightly and adding a point at the end. It will be roughly leaf-shaped, whilst the 'head' portion remains rounded.
Shape the ‘ears’ portion by flattening it slightly and adding a point at the end. It will be roughly leaf-shaped, whilst the ‘head’ portion remains rounded.
Using a sharp knife or the edge of a scraper, divide the ears by cutting down the middle of the dough.
Shape the body. I pondered long and hard how to describe the shaping of this piece of dough, until I had a brainwave: make it into the shape of a computer mouse. Vaguely oval, with the back end higher and rounded and the front sloping downwards.
Using a little dab of water, attach the tail. Shape the two front paws by cutting approx. 1/3 of the length of the dough, dividing the front part into 2, just like with the ears.
Raw honey dough bunny
Add another dab of water to moisten and lay the head/ears onto the body.
  • Set the buns onto a baking sheet lined with baking parchment while the oven heats up.
  • Heat the oven to 180°C, 160°C Fan.
  • I opted not to glaze the dough, but if you prefer to, brush with milk and/or egg yolk.
  • Bake for 20 minutes, turning the baking tray around 180 degrees after 10 minutes to ensure even baking.
  • Leave cooked buns on the baking sheet and cover with a clean cloth to cool. This will help to keep the crust soft.
  • Eat warm, either as is or with butter.

Apple Bread

This recipe was copied from the Ipswich Journal into the manuscript book from a Norfolk household in the early 19th century. The manuscript was eventually purchased by the Wellcome Library and its contents digitised and made available online, which is where I discovered it. It was the simplicity of the recipe that appealed – just 3 ingredients: Flour, yeast, apples. I immediately mixed up a batch and was delighted with the results – a lovely open textured bread with a bite/chew similar to sourdough, but with a delicate, underlying sweetness which, when toasted, almost tasted like honey. It went brilliantly, un-buttered, with some strong cheddar and a crisp apple.

Original Recipe
Source: MS3082, Wellcome Library Collection

To continue the week of coincidences, I later found this recipe reprinted word for word in my 1950 copy of Farmhouse Fare, recipes sent in to and collected by Farmer’s Weekly magazine. Which means that someone else copied the same recipe from the Ipswich Advertiser and kept it alive in their family for 150 years to be revived in 1950. Utterly delightful!

It’s a regular in this household – I hope you enjoy it also.

Apple Bread

500g strong, white bread flour
1 sachet easy-blend yeast or 20g fresh yeast
4 Bramley Apples

  • Put the apples in a saucepan and cover with water.
  • Bring to the boil, turn down the heat and simmer for 15-20 minutes until the apples are soft and cooked. The skins might split, but as long as the water is just simmering, the apples should hold together – fast boiling water will only get you apple soup.
  • Lift the apples from the water (you might need some water later). Remove the skins and scrape the cooked apple flesh into a bowl.
  • Sieve the cooked apple to make a smooth puree. If using fresh yeast, you can crumble it into the puree and whisk until thoroughly mixed.
  • Put the flour and dry yeast into a bowl and stir to combine.
  • Add the apple puree gradually and stir to combine into a soft dough. You should need between 250-300g of apple puree. If you need more liquid, use some of the water the apples were cooked in.
  • If you have a mixer with a dough hook, work the dough for 10 minutes on the lowest speed. Otherwise, work it by hand, but be careful not to add too much flour in the kneading – you want to keep the dough nice and soft.
  • Put the dough in a bowl, cover and leave the mixture to double in size.
  • When sufficiently risen, tip the dough out of the bowl and knock back.
  • Shape into loaves and put into a 1kg greased loaf tin.
  • Cover lightly with a cloth and leave to rise for a further 30-45 minutes.
  • Preheat the oven to 200°C, 180°C Fan.
  • Bake for 30-40 minutes until golden brown and the base sounds hollow when tapped. If the bread appears cooked, but not sounding hollow, remove from the tin and return to the oven for 5-10 minutes to crisp up.
  • Cool completely on a wire rack before slicing.

Muffins

Bread muffins are quintessentially and traditionally British and have a very particular appearance – golden brown on their flat tops and bottoms, with a broad band of pale softness around the middle.  Recipes can be found at least as far as the mid 18th century, but there seems to be a lack of anything older. I suspect the reason for this is that muffins were traditionally made by bakers as opposed to the home cook, and therefore had no place in domestic cookery books. So – a professional baker might well have been the original source of Hannah Glasse’s muffin recipe.

Heroines of Cookery: Hannah Glasse (1708 – 1770)

Hannah Glasse is best known for her cookbook, The Art of Cookery Made Plain and Easy, first published in 1747 and constantly in print for almost 100 years – although her authorship was allegedly only definitively established in the 1930s. She wrote in a very no-nonsense manner, advocated the use of fresh, seasonal, inexpensive ingredients and made her opinions regarding pretentious and wasteful foreign cooks known in no uncertain terms:

“So much is the blind folly of this age, that they would rather be imposed on by a French booby than give encouragement to a good English cook.”

The Art of Cookery covers all aspects of food preparation in a straightforward and concise manner. Impressively, Hannah also includes chapters on preserving meats, bottling and pickling, tips on how to buy fresh produce at market and also includes a seasonal calendar of fruits and vegetables. Free digital copies of her famous book are available here and here.

I think Hannah must have been quite a character. Her recipe is entitled “To make muffins and oat cakes” – but in enthusing about the proper way to make muffins, she wanders off at a tangent and gets so distracted, that the oat cakes are never mentioned again. She even goes so far as to include instructions for building the cooking surface upon which you are supposed to do your muffin cooking. On one point, however, she is most clear: knives should not be used on muffins. Toast them whole and then tear them apart by hand, and be rewarded with pillowy-soft, honeycombed centre, but…

“…don’t touch them with a knife, either to spread or cut them open, if you do they will be as heavy as lead…”


Muffins

Makes 12-15 small muffins

420ml whole milk
50g butter
1 tsp salt
2 tbs granulated sugar
1 large egg
3 tbs potato flour [1]
400g strong white bread flour
1 sachet instant yeast
rice flour, for shaping (optional)[2]
semolina, for cooking (optional)

  • Cut the butter into small dice and add to the milk. Heat gently (microwave/saucepan) until the milk is warmed and the butter melted.
  • Put all ingredients except the semolina and the rice flour in the bowl of your stand mixer and knead slowly to combine. Continue kneading for 5 minutes.
  • If the dough is looking stretchy and shiny, then cover and leave to rise for 1 hour. If not, add more(3-4 tbs) flour and knead for another 5 minutes. Cover and leave to rise.
  • Tip out the dough and knock it back (i.e. pat it down to deflate).
  • Divide dough into 80-100g pieces and shape the dough into balls.
  • Heat your pan over a low heat. Do not add any grease or oil.
  •  When the whole pan is of an even heat, scatter semolina into the bottom of the pan if liked.
  • Use a fish slice/spatula to move the muffins into the pan turning them over as you do so.
  • Cook gently until the undersides are nicely browned – between 5-8 minutes – then use your spatula to turn over the muffins.
  • Cook the second side for a slightly shorter time. If you’ve made a test muffin, you can pull it apart to check the insides are fully cooked.
  • The semolina helps keep the muffins from sticking to the pan, but it does get very browned, so wipe the pan clean after every batch and add fresh semolina before the next batch.

[1] Available at health food stores, Holland & Barrett, Oriental food shops.
[2] I got this tip from Elizabeth David’s book English Bread and Yeast Cookery. The rice flour dries the surface of the muffins without making them sticky or leaving clumps, so the excess is easy to brush off. If unavailable, substitute with cornflour or just use regular flour.

Grant Loaf

If you’re going to bake your own bread, you could do worse than start with this one – it doesn’t require kneading, it only needs a very short, single rise, and you can have a batch of three loaves cooling on a rack in an hour and a half! The recipe has been around for almost 70 years – read on to find out more about it and its creator!

Heroines of Cooking: Doris Grant (1905-2003)

Tireless campaigner for healthy eating and the promotion of unadulterated foods, Doris Grant was a champion of fresh, natural ingredients and the minimal processing of food, and she maintained a running battle with major food companies in the UK for more than 60 years.

Almost crippled with arthritis in her youth, Doris found relief from her symptoms by following the food-combining diet of Dr. William Hay. With her health restored, Dr. Hay encouraged Doris to write her own book for the UK market, and thus began her publishing career. Alongside her many best-selling books, she is immortalised as the creator of The Grant Loaf.

Originally, The Grant Loaf was a mistake. While teaching herself to bake in the 1930s, it was several months before Doris realised she had not been kneading her bread dough.  It didn’t seem to have made much of a difference to the loaves, and was a great deal easier and quicker than the traditional method, so she included her ‘mistake’ in her 1944 book Your Daily Bread. Here, with only a few adjustments, is that original recipe.

The dough ends up a lot wetter than traditional dough – so wet in fact, that kneading would be impossible if it weren’t already unnecessary. The bread itself is firm without being brick-like, and has a wonderfully nutty flavour as well as making great toast. I bake it in our house as our everyday bread, including sandwiches and packed lunches.

This recipe makes three loaves for two reasons:

  • It uses a whole bag of flour at once – no messy half-bags to clutter up your cupboards and spill over everything.
  • It makes sense, as well as efficient use of the oven, to cook more than one loaf at a time and the additional loaves can easily be frozen for use later.

The Grant Loaf

1.5 kg (1 bag) stone-ground wholemeal bread flour
2 sachets rapid-rise yeast
1 litre + 300ml warm water
25g salt
25g muscovado sugar (or any brown sugar, or honey)

  • Put the flour into a large bowl and place in a gentle oven to warm. It doesn’t much matter if you don’t warm it, but it does speed up the rising.
  • Put the sugar and salt into a large jug and add half the water. Stir to dissolve.
  • Grease the bread tins using cooking spray or oil.
  • Mix the yeast into the warmed flour and pour in the sugar/salt mixture, then add the rest of the water.
  • Stir until the flour is fully mixed in. This is probably easiest to do using your hands, but using a utensil works well, also. Personally, I use a large two-pronged wooden fork from an otherwise unused set of salad servers, because the prongs move easily through the wet mix. I regularly manage to whip up a batch of this bread without touching the mix with my hands at all! Remember: you’re only mixing, not kneading – so as soon as all the flour is incorporated, stop. The dough will be much more moist than traditional bread dough – more like a fruit cake mix or thick, badly-made porridge.
  • Spoon the dough into the bread tins, making sure it’s evenly divided – each tin should be approximately ¾ full. If you want to measure by weight, it’s approximately 950g per tin.
  • Set the tins on a baking sheet somewhere warm to rise by about 1/3, until the dough is just above the top of the tins and nicely rounded. It should take no more than 30 minutes. If, like me, you’re lucky enough to have a double oven, then put the baking sheet onto the shelf in the top oven while the main oven heats up. NB Don’t put the tins onto the floor of the top oven – even if they’re on a baking sheet – it will get too hot. Otherwise, anywhere warm and draft-free will do.
  • Preheat the oven to 200C, 180C Fan.
  • Bake for 30 minutes, then turn the baking sheet 180° and bake for a further 20 minutes for a total of 50 minutes.
  • Remove the tins from the oven and tip out the bread. Arrange the loaves on a wire rack.
  • Put the loaves back into the oven for 5 minutes to crisp up the crust.
  • Cool on the wire rack.

Variations: This method can also be used with brown bread flour, for a slightly lighter loaf.