Nankaties

Something a little different for you this week, dear Reader, and something of a surprise, perhaps.

These are Nantakies: Indian shortbread biscuits that are still enjoyed today, mainly at Christmastime.

This particular recipe comes from a book printed in 1887 in Bombay (Mumbai) at the height of the British rule in India. It is one of many Indian cookery books in English that I have collected over the years and is freely available to download at The Internet Archive.

What first drew me to this shortbread recipe was the small number of ingredients when compared to modern recipes. Also, following on from my earlier shortbread investigations, I was curious to know how using 100% ‘rolong’ (semolina) as the flour ingredient would affect the taste and texture.

Initially, testing this recipe went poorly, because I used coarse semolina. Switching to finely ground semolina (found in my local orange supermarket under the brand name Natco) was a great improvement. It was still too sweet for my tastes, so I tinkered a little with the ratios and switched out regular butter for more appropriate clarified ghee.

In the UK, ghee can be found in supermarkets and smaller shops in distinctive green and gold tins. Once opened, they don’t require refrigeration and can be stored in a drawer/cupboard. However, I must impress upon you that not all tins of ghee are the same. The very best brand, in my humble opinion, is East End.

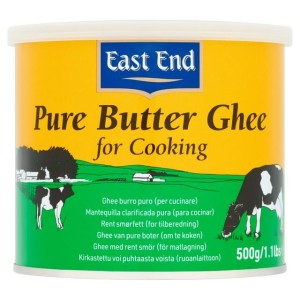
Opening this brand especially, releases an almost perfumed aroma that immediately sends you to a more exotic and fragrant place. I have not had the same experience with other tins of ghee – purchase them at your peril!

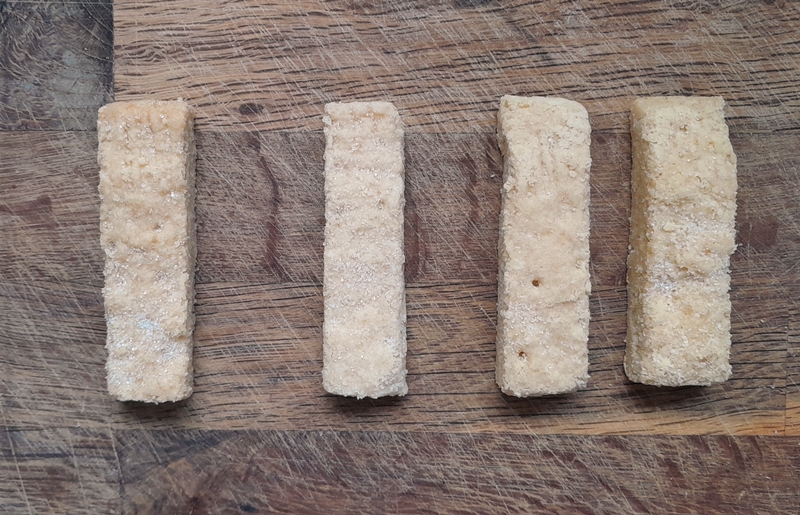
The result of the tweaks and changes made for  a wonderfully aromatic and decadent shortbread bite, needing no further flavouring. However, if you’d like to add a hint of cardamom or rosewater, I think it would be a delicious variation. The golden colour from the ghee remained during baking in the cool oven and I have added a gold dragee to the top of each one as an exotic but restrained decoration.

You will have noticed that there are two shades of biscuit in the above photograph. Spurred on by my success with the tweaked original, I also made a gluten-free version using ground rice instead of semolina, and accented the biscuits with a silver dragee. I used up most of my ground rice in doing so and when I went to buy more I was disappointed to find that my local shops no-longer stock ground rice as a matter of course: perhaps it’s viewed as old-fashioned. I would have thought it would be readily available, given its usefulness in gluten-free baking, but there are numerous shops online that stock it, so all it requires is a little forward planning.

I wanted small, neat biscuits and having persevered with hand rolling various sizes, I eventually found the perfect ‘mould’ in my tablespoon measuring spoon. It was a little fiddly to form the biscuits one by one, but well worth it in the end result.

Nankaties – 1887, Mumbai

Makes 12-20 biscuits, depending on size.

150g finely-ground semolina or ground rice if gluten-free
75g ghee
35g icing sugar

gold/silver dragees for decoration

  • Heat the oven to 150°C, 130°C Fan if baking the biscuits immediately. Otherwise, heat the oven just before removing the chilled biscuits from the fridge.
  • Put the ingredients into a food processor and blitz until the mixture resembles breadcrumbs. It will have a texture of damp sand, and will hold together when pressed.
  • Tip out the mixture and shape your biscuits – either by hand rolling or by pressing it into a mould. If you choose the measuring tablespoon method mentioned above, I found it useful to use some plastic wrap/cling film to line the spoon, which made it very easy to remove the moulded biscuits without damaging them. Be sure to pack the mixture firmly in order for it to keep its shape during baking.
  • Arrange your biscuits on a baking sheet lined with parchment or a silpat mat.
  • Add the dragee decoration if using.
  • You can chill the biscuits in the fridge for 30 minutes before baking, if liked. It can help retain a neat shape, although I should point out that the biscuits in the photo above were not chilled before baking. If you want especially crisp edges to your biscuits, you can always neaten them once cold with a microblade grater.
  • Bake for 30-40 minutes until crisp. The colour won’t really change, due to the low temperature.
  • WARNING: the biscuits will be extremely delicate when hot. Leave them to cool on the baking sheet/tin until completely cold before moving them.
  • Store in an airtight tin.

Mince Pie Shortbread

I seem to be on a bit of a shortbread obsession lately, but this is the last post on it for now, promise.

Today I have for you a combination of two festive treats: Mince Pies & Shortbread.

Back in the far off days of the 1980s, I had the distinct pleasure of discovering Jocelyn Dimbleby’s “Cooking for Christmas” – a slim paperback book of recipes, produced in association with Sainsbury’s. Amongst its pages I found Deluxe Mince Pies, a version of which I have had posted over on my other blog for over 12 years now. With their orange pastry and decadent cream cheese and mincemeat filling, if you’re only going to eat one mince pie during the season, it really should be those.

However, even I will admit that they are a bit of a faff and since they are best served warm, it does limit their accessibility. So recently, whilst experimenting with the butterscotch shortbread, I got to thinking whether I could make a mincemeat version, and from there it was just a hop and a skip to re-imagining Jocelyn’s recipe.

This recipe is also an adaptation of recipes I’ve already posted on here, which I love as an example of some real Lego™ thinking, taking two different recipes and smushing them together to create something new.

The shortbread here is standing in for the mince pie pastry, so the only thing I changed was to add some orange zest. The mincemeat is an adaptation of the guilt-free mincemeat, based on Hannah Glasse’s 1747 Lenten mince pie recipe. The potential problem here was whether it would hold together on top of the shortbread, so the slight tweak I made was to increase the quantity of dates, which break down into a sweet and sticky paste during the simmering of the fruit, and firm up when cooled. I increased the spices a little, to compensate for the mincemeat being eaten cold, which tends to dull their potency. I also used an egg-white wash over the top of the shortbread, which when briefly baked forms something of a barrier to keep the moisture from the mincemeat compromising the crispness of the shortbread. Finally, I decided to top things off with white chocolate flavoured with lemon zest, to mimic the cream cheese element of the original mince pies.

Baking a slab of shortbread is a lot more straightforward than battling with pastry and filling and fretting whether the lids are sealed properly and whether the bottoms are properly cooked, etc. Bonus: you can cut your shortbread into as many pieces of whatever size you like.

Mince Pie Shortbread

The Mincemeat

You can make this several days beforehand and store in the fridge, if liked. When required, to make it easier to then spread over the shortbread, put it into a pan, cover and heat on the lowest setting. You might want to add a little more liquid (apple juice/orange juice/brandy/sherry) to help it loosen up. The additional dates add to the sweetness, so if you don’t have a sweet tooth, you might want to substitute the apple juice for the juice of an extra orange or even lemon

50g currants
50g raisins – crimson raisins look pretty
50g sultanas
200g dates – finely chopped
25g candied orange peel
25g candied lemon peel
25g candied grapefruit or citron peel
35g dried cranberries
25g slivered almonds or flaked almonds – chopped
2tbs sherry
1tbs brandy
juice & grated rind of 1 orange
¼ tsp of ground ginger
¼ tsp of nutmeg,
¼ tsp of ground cinnamon
¼ tsp of mixed spice
¼ tsp of ground cloves

60-100ml apple juice or juice of 1 orange/lemon

  • Put the dried fruits into a small saucepan.
  • Cut the candied peel into small pieces with scissors and add to the pan with the spices. NB If you’re using your home-made candied peel that has been stored in syrup, then there’s no need to soften it in the saucepan – just stir it in with the nuts once the fruit has plumped.
  • Add the orange juice and zest, brandy, sherry and 60ml of apple juice (or the extra orange/lemon juice).
  • Stir gently to combine and set pan over the lowest possible heat.
  • Cover and let the mixture stew gently until all the liquid has been absorbed.
  • If the fruit isn’t as plumped and juicy as you would like, add a little more liquid.
  • The mixture should be moist, but with no liquid visible in the bottom.
  • When you’re happy with the consistency, stir through the almonds.


The Shortbread

Make whichever shortbread variation you prefer, regular or gluten-free.

60g soft brown sugar
120g unsalted butter, chilled
180g plain flour – or gluten-free flour
60g your choice of additional flour (rice flour, cornflour, cornmeal, semolina, etc)
¼ tsp salt
zest of 1-2 oranges, depending on size

1 egg-white for glazing

  • Line a small baking tin (18cm x 25cm) with baking parchment. Leave extra parchment overlapping the sides, to assist in moving the baked shortbread.
  • Heat the oven to 160°C, 140°C Fan.
  • Cut the butter into cubes and add to the bowl of a food processor fitted with a blade.
  • Add the remaining dry ingredients and zest to the butter and pulse briefly until the mixture resembles breadcrumbs.
  • Tip the mixture onto the parchment, and press into an even layer.
  • Use a round skewer or cocktail stick to poke holes all over the surface of the slab of shortbread.
  • Bake the shortbread for 30 minutes, turning the tin around after 15 minutes to ensure even baking.
  • Once the shortbread is baked,
    • Remove the shortbread from the oven. Keep the oven on.
    • Whisk the egg white until frothy, then paint a layer onto the hot shortbread and return it to the oven for 3 minutes to set.
    • Remove the tin from the oven, switch off the heat and using a very thin bladed knife or (ideally, in my opinion) a metal dough scraper, cut the shortbread into pieces. I cut mine lengthwise in half, then across into fingers 2-3cm wide.
    • Return the tin to the cooling oven to cool.

The Topping

250g white chocolate
zest from 1 lemon

  • Break the chocolate into pieces and melt in a bowl either over simmering water, or by zapping in the microwave in short bursts.
  • Stir through the lemon zest.

To Assemble

  • Spread a layer of mincemeat over the cooled shortbread. I didn’t use all of the batch, only about 2/3, but if you’d prefer a thicker layer, have at it by all means.
  • Smooth over the top with a palette knife or similar.
  • Pour over the lemon-flavoured white chocolate and smooth over.
  • Put it in the fridge to set (optional – you can leave it on the worktop if you have the room).

To Divide

In a repeat of the instructions from Butterscotch Shortbread, here is how to ensure your slab of mince pie shortbread emerges in sharp and clean slices.

  • When you’re ready to portion it out, remove your slab of mince pie shortbread from the fridge and set it on the countertop. Leave it to come to room temperature. Trying to cut through the chocolate layer whilst chilled will just shatter it. If your shortbread cooled on the worktop, you can, if course, skip this step.
  • Take a clean cloth or a double layer of kitchen roll and lay it on top of the set chocolate.
  • Lay a cutting board on top of that, and carefully turn the whole slab over, so that once the tin and the baking parchment are removed, the shortbread is uppermost.
  • The lines from cutting the shortbread earlier should be clearly visible.
  • Slide your dough blade into the cuts in the shortbread, then press down sharply to cut through both the mincemeat and the chocolate layers in one clean movement.
  • Make sure you have cut – or rather re-cut – through all of the pieces before trying to move your mince pie shortbread.
  • Store your shortbread in an airtight container. Use a piece of parchment between layers to keep crumbs off your pristine chocolate finish.

Butterscotch Shortbread

The deliciousness I have for you this week is something of a Lego™ recipe in that it started with A New Thing, which was exciting and delicious, but for which I had no use for at the time. However, if you then clip it together with two other things, Voila! A NEW New thing that VERY usable anytime, but especially as a delicious-mouth-filler-round-about-mid-morning-with-some-hot-strong-coffee-thankyousoverymuch.

OK, enough code-talking. The New Thing to which I refer is something that I found on the internet which is Whipped Caramel. A simple and straightforward combination of sugar, cream and butter which is whipped as it cools to incorporate air into the mixture, thus making it light and creamy. It holds it’s shape very well, making it an indulgent means of filling and topping cakes, large and small.

However, I must confess to taking issue with the name, because it’s not so much caramel as butterscotch. Because, and I don’t feel this is too much of an exaggeration, it has butter in it. I also think it has something to do with the incorporation of the air. It’s almost as if it tastes lighter. Anyway, I only mention this because if you’re expecting a caramel from a recipe and you end up with a butterscotch, it might throw a spanner in your recipe works. A delicious spanner, but a spanner nonetheless.

So there I was, with some delicious whipped butterscotch, and nothing to use it on, so I popped it in the fridge, reasoning that, if nothing else, I could determine how long it would last.

Well, as luck would have it, my daughter came home from school the very next day with news that the school’s Macmillan Coffee Morning was scheduled for the end of the week and she needed ALL the bakes. Also lucky was the fact that I’d just finished my mammoth shortbread testing session, so it was just a matter of thinking what to top it off with, found I had some white chocolate in the cupboard, and the Coffee Morning was saved!

I was pleased with the way that the white chocolate finished it all off, and the overall result is very similar to Millionaire’s Shortbread (Sidebar: the difference between Millionaire’s and Billionaire’s Shortbread is, apparently, Billionaire’s Shortbread has a little salt in the caramel – who knew!?) to look at. The butterscotch and white chocolate gives it a flavour combination which is both decidedly different, and rather moreish. Teamed with your favourite 1:2:4 shortbread, and you have a customised treat fit for bake sales, gifting or even just hiding away for your own special treat.

The only changes I’ve made to the Whipped Caramel are a couple of suggestions for the method, which, due to the somewhat Faffy™ approach, will markedly reduce your chances of failure.

I am suggesting making a large batch here, mainly due to the Faff™ Factor, because you don’t want to end up having to go through it all again because it has been inhaled by your nearest and dearest. That said, you could make a batch of the caramel and just a regular batch of shortbread, and keep the extra in the fridge for later (it will keep a week at least).

Butterscotch Shortbread

There are three elements to this recipe: the shortbread, the whipped butterscotch and the white chocolate topping. I recommend that they are made in that order, or if you want to spread out the tasks, make the whipped butterscotch the day before.

The Shortbread

  • Make a batch of 1:2:4 shortbread.
    • For a small batch, that uses only half the quantity of whipped caramel, use a tin of size 18cm x 25cm.
    • For the large amount of butterscotch shortbread, I used a double batch of shortbread and a tin of dimensions 30cm x 22cm and bake for a total of 40 minutes, turning the tin around halfway through.
  • Take the cooked shortbread out of the oven and cut it to the size pieces you wish to serve your butterscotch shortbread. I cut fingers of dimensions approximately 3cm by 10cm. NB The finished shortbread is very rich, so smaller is better – with hindsight, a more reasonable size would have been 5cm x 3cm. Remember, you can always go back for another piece, but a too-large piece… well, let’s just say it IS possible to have too much of a good thing.
  •   Set the shortbread aside to cool, either in the cooling oven or on the worktop.

The Whipped Butterscotch

375g caster sugar
100ml water
100g unsalted butter cut into cubes
300ml double cream[1]

  • Add the sugar and water to a pan. A broad (frying) pan will help with moisture evaporation more than a saucepan. A non-stick pan for preference.
  • Stir the sugar and water together over low heat until dissolved. It is possible to skip using the water and just melt the sugar, but you then run the risk of burning the sugar, and once burnt, there’s no disguising the bitterness. And I know this because I did it myself. I was melting the sugar without water, and I thought I’d smelled a touch of burn, but ploughed on regardless. After going through all the whipping and cooling and more whipping, it was very disappointing to be able to taste the burn in the finished butterscotch. So making a syrup and evaporating the water is worth it for peace of mind and guaranteed success, and doesn’t lengthen the process by much.
  • Simmer the syrup to evaporate the water, and allow it to bubble until it has reached a golden caramel colour. Once all the water has evaporated, it will caramelise quickly, so keep a beady eye on it.
  • When the caramel has darkened to your liking, add in the butter and whisk it as it melts.
  • Add the cream and continue whisking over heat until combined – about 2 minutes.
  • Pour the butterscotch into a bowl and cool in the fridge for 20 minutes. It won’t be cold, but it will be much cooler than it was, and quicker than waiting for it to cool on the side.
  • Using a hand whisk, or a stand mixer, whisk the butterscotch for 1-2 minutes. The aim is to incorporate as much air into the butterscotch as it cools. It will thicken as it cools and the colour will become lighter.
  • Put the butterscotch bowl into the freezer and chill for 10 minutes, then whisk again. Each time you whisk, the butterscotch will thicken and get lighter again.
  • You can now use your whipped butterscotch, or keep it in the fridge until required.

To Assemble

400g white chocolate

  • If you’ve stored your whipped butterscotch in the fridge, you might want to give it an extra whisk, to make it easier to spread.
  • Spread the butterscotch over your shortbread in as thick a layer as you wish. I recommend erring on the side of caution, as it is very rich. Smooth over the surface and chill in the fridge while the chocolate is prepared. If you don’t use all your whipped butterscotch, you can store it in the fridge in a covered container. When needed, just whisk it briefly to get it to a suitable softness.
  • Break the chocolate into squares and melt – either over hot water or in 30 second intervals in the microwave. Stir the chocolate until fully melted, and then for 1-2 more minutes in order to cool it down: too hot, and it will start to melt the butterscotch and you won’t get a clean finish. Then again, a few swirls of butterscotch in the chocolate isn’t the end of the world by any means.
  • Take the shortbread and butterscotch slab out of the fridge and pour over the melted chocolate. Smooth it to an even layer using an offset spatula.
  • Return the tin to the fridge to set completely.

To Divide

Regular listeners will be aware of how much I love a clean, sharp slice. Even the humblest of recipes can become eye-catching with the cunning wielding of a sharp blade.

That said, I’ve found one of the best blades is one of these dough scrapers. The blade itself isn’t sharp, but it is super thin and can make an excellent and clean cut.

Here is how to ensure your slab of butterscotch shortbread emerges in sharp and clean slices.

  • Remove your slab of butterscotch shortbread from the fridge and set it on the countertop.
  • Take a clean cloth or a double layer of kitchen roll and lay it on top of the set chocolate.
  • Lay a cutting board on top of that, and carefully turn the whole slab over, so that once the baking parchment is removed, the shortbread is uppermost.
  • The lines from cutting the shortbread earlier after it was baked should be visible.
  • Slide your dough blade into the cuts in the shortbread, then press down sharply to cut through both the butterscotch and the chocolate in one clean movement.
  • Make sure you have cut – or rather re-cut – through all of the pieces before transferring your butterscotch shortbread to an airtight container. Use a piece of parchment between layers to keep crumbs off your pristine chocolate finish.
  • NB I recommend storing your butterscotch shortbread in an airtight container in the fridge, or failing that, somewhere cool, in order to preserve the clean, sharp edges of the butterscotch. Allow it to come to room temperature before serving.

[1] You can also use whipping cream, which will give a softer textured butterscotch, that might be more suitable for frosting/filling cakes/cupcakes.

Shortbread Variations

This week’s recipe subject came about, as it increasingly does of late, with a casual thought when looking for something else.

Behold this recipe from Mary Jewry, editor of Warne’s Model Cookery and Housekeeping Book (1868). The first thing that caught my eye, and got me thinking, was the proportions of the ingredients. Nowadays, a proportion of 1:2:3 (of sugar, butter and flour) is touted by many as traditional, but here was a proportion of 1:2:4. Also of interest was the addition of ground almonds to add texture, whereas modern purist recipes staunchly abide by the ‘rule of three’ (i.e. no additions, especially not caraway comfits and citron). Lastly, there was the cooking temperature – a slow oven – which is different to the short sharp bake at high temperature in use today.

I resolved to put these variations to the test, but then the addition of the almonds got me thinking some more: what else has been added to traditional shortbread, and to what end? The answer turned out to be: quite a bit. I ended up baking twelve batches of 1:2:4 shortbread, each with a different ingredient making up 1/4 of the flour component, and performing a giant taste test to see which was, for me, the ultimate combination. And here’s a key point: it’s all down to personal taste. What I might find delightful, others may find not to their taste. I’m hoping that by presenting a wide range of options, you too may find your ultimate shortbread recipe.

Here are the choices I made:

  • Sugar: I chose to use soft light brown. This was to give a more rounded flavour to the shortbread. White caster (superfine) sugar is sweet, but only that – rather one note.
  • Butter: unsalted, but with a small quantity of salt added. I had made some shortbread recently, and used salted butter, and the shortbread was delicious, but the finishing lick of saltiness might be an acquired taste. I tried another batch with unsalted butter, and this proved less popular, so for the run of test batches I resolved to split the difference and use unsalted butter, with just a quarter teaspoon of salt.
  • Flour: regular, unbranded white plain flour. After baking a control batch using 100% flour, the remaining batches each had 1 part of the flour component as a different ingredient. These comprised: ground almonds, rice flour, ground rice, cornflour, ground almonds, semolina, fine cornmeal and coarse cornmeal (caveat: I was unable to find any coarse cornmeal, and used polenta instead).

The Results

There are several outcomes from this mammoth bake and taste test. (Top image, Shortbread Variations: From the left, classic (butter, sugar, flour), then baked with: cornflour, rice flour, semolina, ground rice, ground almonds, polenta).

  • The ‘flours’ – these can be divided into two groups, the powders and the granules. Both affect the texture of the finished shortbread.
    • The powders include cornflour, rice flour, fine cornmeal (and possibly by extension, arrowroot, potato starch). The effects of using these powder-fine flours is to make the texture of the shortbread crisp and ‘melt in the mouth’.
    • The granules include ground almonds, ground rice, semolina, coarse cornmeal, polenta. The  effects of using these granules is to make the shortbread both crisp and crumbly. They create a thin, outside ‘crust’ and inside deliciously friable and crumbly. Ground almonds obviously bring a nuttiness to the cooked shortbread, which, if it’s your favourite, could be intensified by using ground hazelnuts. The polenta/cornmeal versions also baked to a gorgeous golden colour.
  • The long, slow baking allows the shortbread to cook though thoroughly. Sometimes I have had shortbread where the outsides are cooked, but the insides moist, dense and almost doughy. This method of cooking eliminates that.
  • To further improve the texture of the shortbread, it was returned to the oven to cool, to ensure all moisture is eliminated. The shortbread should not be stored until completely cold.
  • A number of gluten-free batches were made, although fewer that those using regular flour. I have always had good results by substituting Doves Farm gluten-free flour on a 1-for-1 basis, and so it proved here. NB Gluten-free shortbread is extremely delicate when freshly baked, and will need a very careful approach (see below). However, if my advice is followed, once cooled they will be much more sturdy.

Gluten-free shortbread variations: classic, ground rice, fine cornmeal, polenta

To summarise: All the shortbread versions were delicious, and unless you line them up side by side like I did, it is unlikely that you would be able to rate one over another, It’s really almost splitting hairs to rank them – everyone’s personal taste is different – so I won’t. One observation of mine, which you are free to discard, is that, for my tastes, the shortbreads were a little sweet, so in my perfect recipe (below), I reduced the amount of sugar to just 45g – it’s practically health food! With the sprinkling of sugar on the top, it made for the perfect amount of sweetness.

People with gluten sensitivity: At the risk of stating the obvious, almost all of the flours can be enjoyed – rice flour, corn flour, ground rice, fine corn meal, coarse cornmeal/polenta, ground almonds, ground hazelnuts – and as already mentioned, probably arrowroot and potato starch as well. A gentle reminder that the one exception is semolina. SEMOLINA is made from durum wheat and is NOT GLUTEN-FREE.

The Recipe

60g soft brown sugar
120g unsalted butter, chilled
180g plain flour – or gluten-free flour
60g your choice of additional flour
¼ tsp salt
a little caster sugar for sprinkling

  • Line a small baking tin (18cm x 25cm) with baking parchment. Leave extra parchment overlapping the sides, to assist in moving the baked shortbread.
  • Heat the oven to 160°C, 140°C Fan.
  • Cut the butter into cubes and add to the bowl of a food processor fitted with a blade.
  • Add the remaining ingredients to the butter and pulse briefly until the mixture resembles breadcrumbs.
  • Tip the mixture onto the parchment, and press into an even layer.
  • Use a round skewer to poke holes all over the surface of the slab of shortbread.
  • Use the tines of a fork to mark the shortbread along the long edges of the tin.
  • Bake the shortbread for 30 minutes, turning the tin around after 15 minutes to ensure even baking.
  • Once the shortbread is baked, there are additional steps you need to take in order to make your shortbread the very best,
    • Remove the shortbread from the oven. Keep the oven on.
    • Sprinkle the surface of the shortbread with a little caster sugar.
    • Using a very thin bladed knife or (ideally, in my opinion, a metal dough scraper), cut the shortbread into pieces. I cut mine lengthwise in half, then across into fingers 3cm wide.
    • Allow to cool in the tin for 15 minutes.
    • Gently slide the parchment out of the tin and onto a baking sheet. Smooth out the parchment.
    • Using the dough scraper (or palette knife turned sideways), ease the shortbread pieces apart to leave a 5mm gap in-between. You want to gently push them apart, not try and slide anything underneath, because the shortbread will break. NB The gluten-free shortbread will be EXTREMELY delicate, take extra care at this point.
    • Return the shortbread to the oven, switch the oven off and leave to cool until both oven and shortbread are completely cold. I baked most batches in the evening and let the shortbread cool overnight. If baking during the day, it will take between 3-4 hours.
    • When completely cold, transfer the shortbread to an airtight container to store.

Bonus

On a personal level, I discovered that I much preferred the gluten-free shortbread made with the grains, specifically cornmeal, the texture being surprisingly moreish. I think the natural sweetness of maize and the greatness of the flavour when pairing with butter is a significant contribution. To this end, I decided to make one more batch, with cornmeal, and some raw butter (made from unpasteurised milk). In the 19th century all butter was raw butter, so I reasoned that this would be even more authentic (I had brought some raw butter back from France this summer). To cut a long, rambling story short – it was amazing. If you have the opportunity to get your hands on some raw butter made from unpasteurized milk, do it, and then make shortbread. It’s sublime. It is possible to get raw butter in the UK, but it is more expensive than regular, and in the current cost of living crunch, it might not be your number one priority. However, if you fancy treating yourself, then Sainsbury’s stocks Isigny Sainte-Mère salted raw butter, whilst Ocado has both salted and unsalted (doux).

My Perfect Shortbread

45g soft brown sugar
120g raw butter made from unpasteurized milk, chilled
180g plain white gluten-free flour
60g coarse cornmeal
¼ tsp salt
a little caster sugar for sprinkling

Make and bake as above.

Petticoat Tails and Pitcaithly Bannock

This might seem like a double recipe post, but it is more of a ‘two for one’ in that the same ingredients can be presented in different ways, depending on your inclination and the effort you wish to put in.

So… Petticoat Tails.

Much has already been made of the contortion of ‘petites gatelles’ into ‘petticoat tails’, as well as other origins,  so I’m going to dwell no more upon it.

No, what I’ve been looking at/obsessing over of late is the early recipes. Late eighteenth/early nineteenth century recipes.

Mrs Frazer’s 1806 recipe for “Petticoat Tails For Tea” caught my eye, as it seems to be the earliest recipe in print.

Two interesting details about this recipe are the inclusion of caraway seeds and the first (to date) description of the now iconic Petticoat Tails shape. There’s also oblique reference to the Scottish weights and measures system, which is significantly different to the English one at the time. This factor was the source of much head-scratching until I eventually managed to get the ingredients scaled accurately. It is a much less rich version than that which is popular today, and while I will concede that caraways aren’t a regular sweet spice these days, they are strangely compelling and I can heartily recommend them if you’ve not tried them before in a sweet context.

The next recipe I spotted comes from John Caird (1809) as something of a post-script to his recipe for “Fine Short Bread, called Pitcaithly Bannocks”.

From “The Complete Confectioner and Family Cook” by John Caird, 1809

So it would seem that Petticoat Tails are just a thin version of rich shortbread or Pitcaithly Bannocks. It certainly makes Petticoat Tails a lot more interesting than the pale and unadorned recipes we have today. I must take issue, however, with the size of Mr Caird’s Petticoat Tails – they’re enormous! Eighteen inches in diameter? What on earth is he cutting round – a cartwheel? I used a dinner plate and a pastry ring to cut the two circle in the photo at the top of the page, and doubled the number of slices to sixteen to make the portions reasonable and not too slab-like, because in the first test batch of eight portions (using a dinner plate –  see below) they were so massive I could only fit four pieces on my cutting board. Mr Caird only suggests cutting his cartwheel of shortbread into eight pieces, so I am puzzled as to how it was then served: broken into smaller pieces by hand, perhaps? Seems odd to go to the trouble of observing the format outlined by Mrs Frazer, but insisting on them being of giant size.

The other challenge was the sticky issue of caraway comfits. These were popular confections of caraway seeds coated in several layers of sugar and often enjoyed at the end of a meal, or in sweetened, baked goods, as an aid to digestion. No-one makes caraway comfits these days, that I have been able to find, at least – and the process of making them is very time-consuming, even with the correct equipment (which I don’t have). Thus I have come up with an adaptation which mimics bith the flavour and texture, but without all the Faff™ of having to make them yourself. Adding caraway seeds to the dough, then scattering sugar nibs ensures both the added sweetness and the caraway flavouring can be enjoyed together, as well as the textural crunch. Just scattering seeds over the surface of the shortbread doesn’t work, as they tend to fall off, even when they have been vigorously rolled in.

So here we have a recipe that can be shaped in two separate ways – thick and chunky or thin and ladylike. Whichever way you decide to make it, with the candied peel and the caraway seeds and the rich buttery taste, it is going to pack a real punch in terms of flavour. Enjoy!

Petticoat Tails and Pitcaithly Bannock, 1809

After persevering for several batches, I made the decision to change the method slightly, as the recipe as written just wasn’t working out very well, being very dry and crumbly. I suspect that the butter of times past might have had a higher water content than modern butters. It is still prone to crumbling, and so if it’s not coming together for you, try adding a little cream to help things along.

225g room temperature best butter*
60g caster sugar
390g plain flour
2 tsp caraway seeds
60g sliced, blanched almonds
60g orange peel, cut small
a little double cream (optional)

To decorate
30g sugar nibs
sliced candied orange peel to taste

  • Decide how you want to bake your shortbread. If its the traditional shape, line a baking sheet with parchment. If you prefer to bake a slab, line a suitably sized baking tin with parchment. I suggest 20cm x 30cm or similar. A third alternative is to bake individual portions. In the top photograph, I have included a couple of thick, square servings. I made them with the offcuts of the circle of shortbread, and shaped them in a brownie pan with square holes, before baking them ‘free-standing’.
  • Cream the butter and sugar together until light and fluffy.
  • Add the caraway seeds.
  • Gradually add in the flour, almonds and peel and mix until incorporated. Add a little cream if necessary.
  • Tip out the dough onto whatever you are baking it on/in.
  • If making thin Petticoat Tails,
    • Roll out to 1cm thick.
    • Scatter over sugar nibs and orange peel to taste. Use the rolling pin to roll over and press them into the dough.
    • Use a skewer to poke holes all over the surface of the dough.
    • Use a dining plate to cut out a circle, and a large, plain pastry cutter to cut the centre circle.
    • Pinch the edges of the outer circle between finger and thumb to decorate.
    • With a thin, bladed knife or pastry scraper, cut the outer circle into 16 wedges.
  • If making thick Pitcaithly Bannock,
    • Press the dough evenly into your baking tin.
    • Scatter over sugar nibs and orange peel to taste. Use the rolling pin to roll over and press them into the dough.
    • Use a skewer to poke holes all over the surface of the dough.
    • Use the tines of a fork to mark a border around the edges.
    • With a thin, bladed knife or pastry scraper, cut your dough into serving size pieces – squares or fingers.
  • Chill the dough for an hour or until ready to bake.
  • Heat the oven to 150°C, 130°C Fan.
  • Bake for 45-50 minutes, until pale but still cooked through. Turn the baking tin/sheet around half-way through, to ensure even baking. Yes, it is the same baking time whether it be thick chunks or broad but thin Petticoat Tails. The colour will darken only very slightly.
  • When baked, remove from the oven. Using the same thin-bladed knife/dough scraper to refresh the cuts in the dough, but do not lift out.
  • Allow to cool in/on the tin.
  • Store in an airtight container.

* Salted or unsalted, as you like. I used Isigny Sainte-Mère Unpasteurised Salted Butter, because it has a wonderful flavour and might actually be close in flavour to the best butter of old.