Bacon and Egg Pies

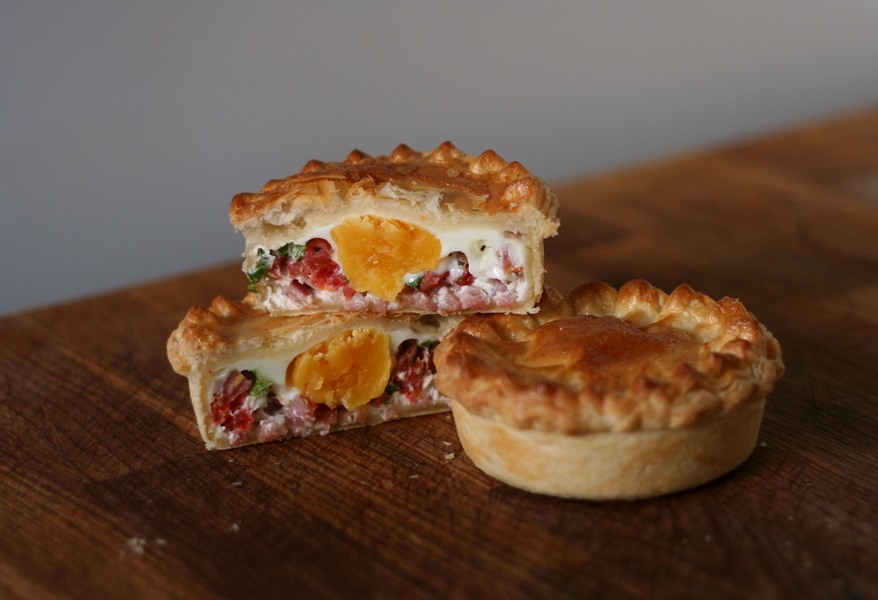
Sometimes the best-tasting food is also the simplest. This recipe was yet another from one of my many dusty W.I.pamphlets from the mid 20th century. It was so brief it barely qualified as a paragraph, let alone a recipe, so I’ve added some detail below to help things along. In essence, you can count the number of ingredients in this pie on one hand: pastry, egg, bacon, seasoning. The pie in the picture above also contains diced tomato, which I thought would add freshness; it did to a certain extent, but not to the degree I was hoping, and in fact, the ‘plain’ bacon and egg pie was tastier. Alas, my cross-section photo for this pie (see below) wasn’t as visually arresting as the one above, so I decided to lure you with the picture above, then set the record straight. You can choose whichever version appeals most.
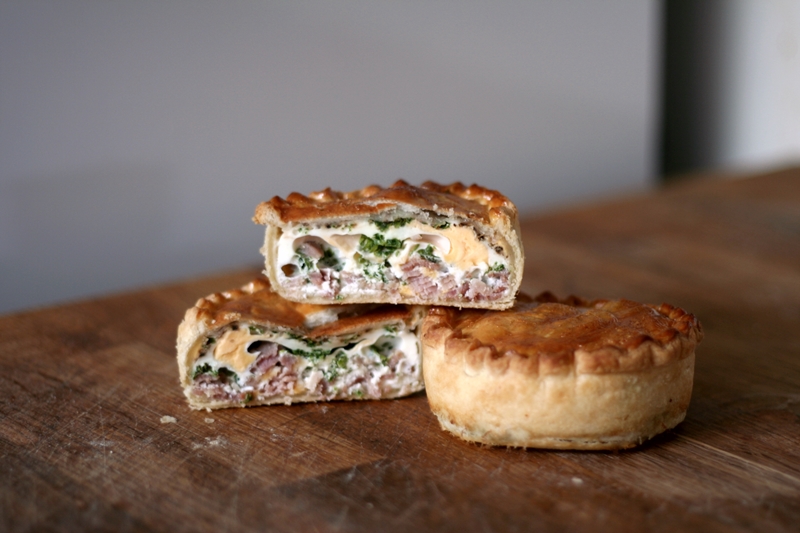
Bacon and Egg Pie
Also, I’ve mentioned them before, but I just LOVE my small cake/tart tins I found at my local The Range (4 x 10cm diameter pans for £2.50). They have a small lip on the side, which makes them great for tarts or, in this case, for firmly attaching the pastry lids of pies. This is not a paid endorsement – I just think they are a bargain and am sharing.

You can be as pro-active or as lazy as you like with these pies – make everything from scratch or buy it in if you’re pressed for time. Personally, I like to hover, metaphorically, between the two: make the pastry for the base, but buy a sheet of ready rolled puff pastry for the top, on account of life too short etc. The cornflour shortcrust is dry and crisp, and the buttery, flaky, puff pastry is both delicious and a fantastic contrast. Once the pans are lined, sprinkle over a little cooked bacon, crack in a whole egg and add the lid and you’re done!

OK, yes, you should add a sprinkling of fresh parsley too.

And pepper. Of course pepper.

Well OBVIOUSLY crimping the edges is a good idea.

And it goes without saying that egg-yolk wash will give both colour and shine.

…

I’ll come in again.

AMONGST OUR WEAPONRY are such diverse elements as….

Oops! Wrong sketch.[1]

Once the pans are lined, sprinkle over a little cooked bacon and some fresh parsley, season with black pepper, crack in a whole egg, a little more parsley and pepper, add the lid, crimp the pastry edges, wash over with beaten egg and you’re DONE!

The quantities are up to you and however many you’re catering for. The suggestions below are for 4 individual pies. Any excess pastry, of either sort, can be frozen for later, as can the cooked pies, for up to a month.

Bacon and Egg Pies

1 batch cornflour shortcrust – scroll down on this page
1 sheet of puff pastry
100g lean bacon
4 large eggs
4-6 tablespoons of chopped, fresh parsley
coarse-ground black pepper
4 tomatoes – skinned, de-seeded and diced finely – optional

1 large yolk – for glazing

  • Pre-heat the oven to 200°C/180°C Fan.
  • Roll out the shortcrust pastry to a thickness of 5mm.
  • Grease and line your tart tins with the shortcrust pastry, making sure to ease the pastry into the bottom edge of the pan, not stretch it. Leave excess pastry hanging over the sides of the tin and chill in the fridge until required.
  • Chop the bacon into small dice and cook until just done. No browning. Drain on kitchen roll.
  • Remove pies from fridge.
  • Scatter the bacon in the bottom of the pies.
  • Add a sprinkling of chopped parsley and a little back pepper. No need for salt, as the bacon is salty enough. Add the tomatoes if using.
  • Crack an egg into each pie. If you want the yolk to be dead centre, you could clear a space amongst the bacon, but it’s not really necessary.
  • Add more parsley and black pepper.
  • Cut four squares of puff pastry, large enough to cover the pies.
  • Brush the rims of the pies with water then lay over the puff pastry squares.
  • Press firmly around the edges, then trim the excess pastry with a sharp knife.
  • Crimp the edges of the pies for a decorative effect.
  • Whisk the yolk with a tablespoon of water and brush the pie tops liberally.
  • Cut three or four small vent holes, NOT in the middle – you don’t want to break the yolk inside.
  • Bake for 15-20 minutes until the top is puffed and golden and the underside crisp.
  • Enjoy hot, warm or cold.

[1] NOBODY expects the Spanish Inquisition! Least of all my husband who read all of the above with a blank expression then said “I don’t get it.” *sigh*
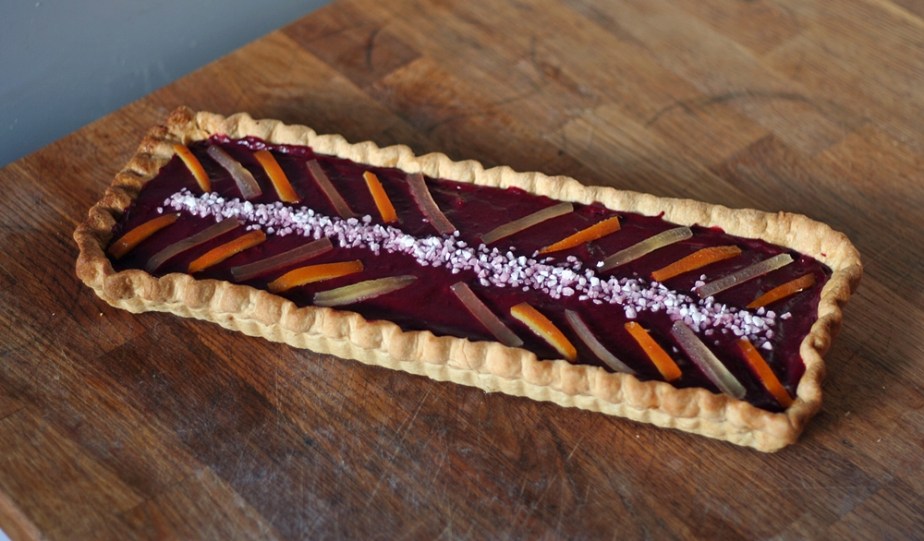
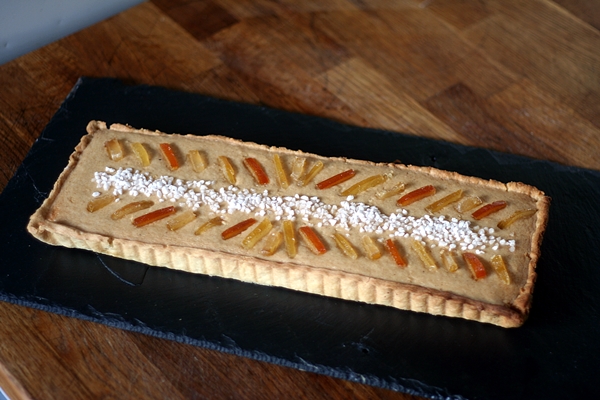
Posset Pie

Joseph Cooper, 1654

The surfeted Groomes doe mock their charge With Snores.
I have drugg’d their Possets.

Macbeth, Act II, scene II

The broadest description of a posset that I can think of is that of a hot syllabub: a thickened drink of either milk or cream, sweetened and flavoured with any of a number of alcoholic drinks and/or fruit, served warm.

In the Middle Ages it was seen as a winter warmer and it’s ability to make one feel good meant that over the years it segued into becoming borderline medicinal. It was recommended for insomnia, indigestion, as a purgative and of benefit when fasting.

Recipes abound, and the styles are as numerous as their intended uses: custard posset, cold posset, apple posset, whipped posset, froth posset, sack posset, soap sud posset, posset without milk, posset without wine, posset without milk wine or beer.

Thus far, Joseph Cooper is the only person I have found that turns posset into a dessert. Twenty years later Hannah Woolley would include this same recipe in her own book, adding a few of her own details to the method.

Apples are the recommended fruit, but this would work well with almost any fleshy fruit pulp; apricots in summer, for example, and dark, sharp damsons in autumn.

Posset Pie

Sweet shortcrust pastry
Eggwhite for glazing

500g fruit puree
2 large yolks
200ml double cream
50ml cream sherry
1tsp ginger
1/2tsp cinnamon
1-2tbs icing sugar
4 heaped tablespoons dried white breadcrumbs

To decorate
2cm matchsticks of candied orange, lemon and citron peel
sugar nibs

  • Preheat the oven to 200°C/180°C fan/gas 6.
  • Roll out the pastry and line a greased shallow tart tin. My favourite shape is long and rectangular (36 x 12 x 3cm).
  • Prick the bottom with the tines of a fork to prevent blistering and line with parchment paper and baking beads.
  • Bake for 10 minutes, then remove the parchment and baking beads and bake for a further five minutes.
  • Brush the insides of the tart with beaten egg white and bake for a further 3 minutes.
  • Turn the oven heat to 160°C/140°C fan/gas 3.
  • Mix the filling ingredients until smooth. Taste and add more sugar if liked.
  • Pour into the pastry case and smooth over.
  • Bake for 20-25 minutes until the filling is almost set. It will firm up while it cools.
  • Arrange your candied peel and sugar nibs on the pie as decoratively as you like.
  • Serve cold.
Apple Posset Pie
Apple Posset Pie Joseph Cooper, 1654

Pickled Cherries

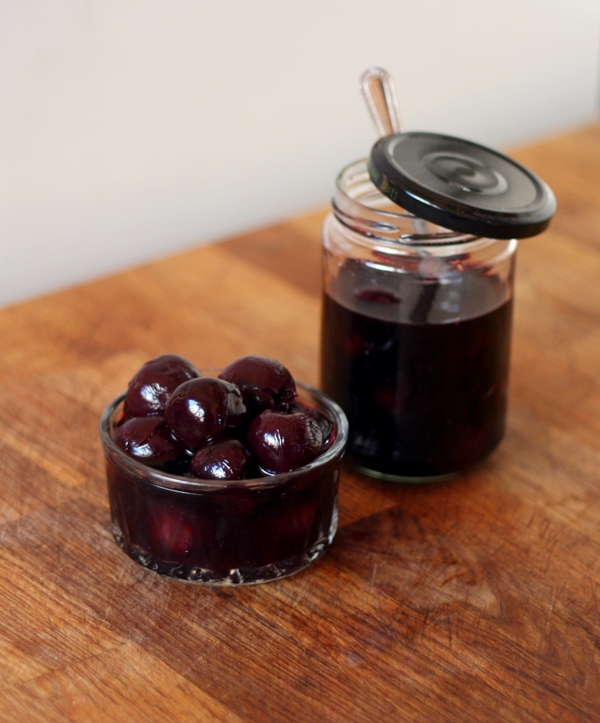
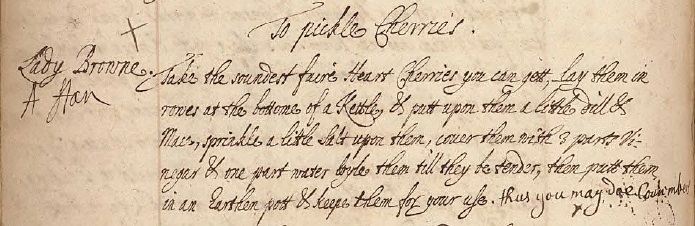
This recipe comes from the manuscript receipt book of Lady Ann Fanshawe at The Wellcome Library – page 292 by Lady Ann’s numbering. It is very quick and straightforward and not that different to the other pickled cherry recipes around, except for the seasonings.

Lady Ann favours mace and dill which were unusual enough to tempt me to try. The recipe also calls for the very best heart cherries, which are cherries that have a soft and rounded heart shape. A bit of research into old varieties reveals that heart cherries could be both dark or pale. I’ve gone with dark, and used a little red wine in place of the original water, in order to help preserve the colour of the fruit. If you can get pale dessert cherries, then swap the red wine for white.

The original recipe contained no sugar, which was a bit much even for a vinegar-lover like myself, so I have tweaked the recipe and added a little brown sugar to soften the flavour.

Original Recipe
Source: MS7113, Wellcome Library Collections

Pickled Cherries

2kg dark purple cherries
540ml light fruit vinegar – I used home-made gooseberry, but you could use whatever you like, as long as it doesn’t overpower the flavour of the fruit. A white balsamic, for example
180ml red wine
6tbs dark muscovado sugar
3 blades of mace
1 tbs dried dill
½ tsp salt

  • Stone the cherries and arrange them neatly in concentric circles in the bottom of a preserving pan. There should be enough to make a full single layer covering the bottom of the pan.
  • Add the sugar, mace, dill and salt.
  • Gently pour in the vinegar and red wine. This should just cover the cherries.  If you need more liquid add it in the proportion of 3 parts vinegar, 1 part wine.
  • Put the pan on medium heat and bring to a gentle simmer.
  • Cook for 10 minutes, until the cherries are just tender but still holding their shape.
  • Gently spoon the cherries into sterilised jars. Pour in the cooking liquid to cover and seal.
  • Can be enjoyed immediately with ham and terrines, as well as fatty meats such as roast lamb, duck and pork.


Shrewsbury Pudding Tart

Georgiana Hill, 1862

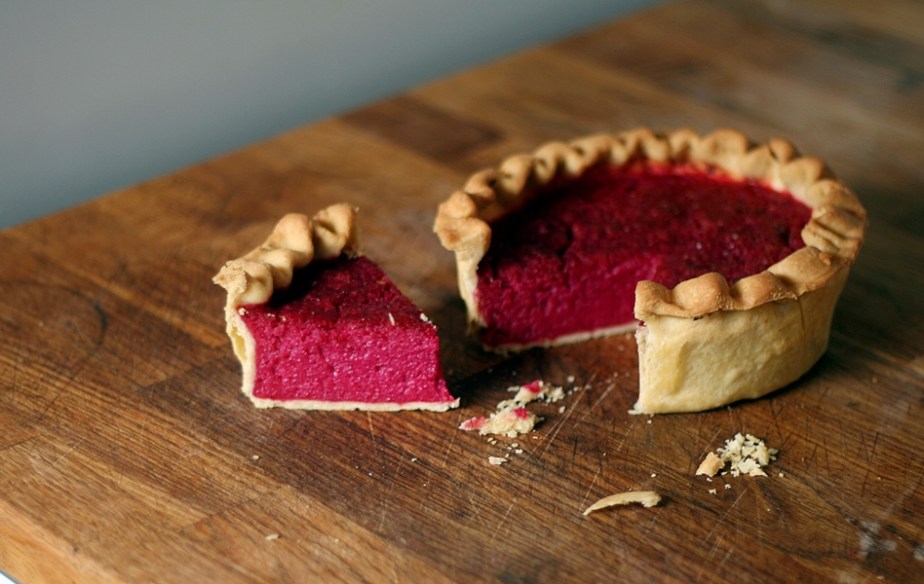
Here is something a little different for the adventurous, an unusual dessert in the form of a gloriously vibrant beetroot tart: given an official Thumb’s Up™ by my daughter. I’ve tweaked this recipe slightly and baked it in a pastry case, for ease of serving. The original method was for a buttered-and-breadcrumbed bowl. The cooking times are roughly the same. The flavour is very light and delicate, the lemon counteracting a lot of the beetroot’s sweetness.

1 x 24cm blind-baked pastry shell

225g cooked beetroot
115g unsalted butter – melted
150g icing sugar
zest of 1 lemon
juice of 2 lemons
3 large eggs
60ml brandy
150-200g fresh white breadcrumbs

  • Preheat the oven to 150°C, 130°C Fan.
  • Puree the beetroot until smooth.
  • Add the butter, sugar, lemon, eggs and brandy and whisk thoroughly.
  • Add in the breadcrumbs BUT not all at once. You want them to absorb a lot of the moisture in the filling, which will vary depending on the freshness of the eggs and the moisture in the beetroot. You might not need all of them. The texture should be similar to a sponge cake mix, but still pourable.
  • Add the filling to the pie shell and place the tin on a baking sheet.
  • Bake for 25-30 minutes until the filling has set. Turn the baking sheet around after 15 minutes to ensure even baking.
  • Cool on a wire rack.

Old-Fashioned Lemonades

I don’t think I’ve done drinks on the blog before, but I’ve got a trio of delicious variations on lemonade, originating in the 17th century manuscript books at the Wellcome Library. They are each wonderfully thirst-quenching and will make for a delicious treat to have in the fridge.

Mrs Yorke’s Lemonade – the best that can be made

From the recipe book of Mary Rooke, 1770s (back right in photo).

Mary Rook's Original Recipe
Source: DDU 818/1, Essex Record Office

225g granulated sugar
225ml fresh lemon juice (from 4 juicy lemons – have 5, just in case)
Thin strips of peel from 4 lemons
900ml boiling water
450ml boiling milk

  • Put the sugar, lemon juice, thinly peeled lemon peel into a bowl.
  • Pour over the boiling water and stir to dissolve the sugar.
  • Cover with plastic and allow to cool.
  • When cold, pour in the boiling milk. NB The lemon juice will cause the milk to curdle. DON’T PANIC – THIS IS FINE.
  • Cover with plastic and allow to cool, then chill overnight in the fridge.
  • Strain the solids out by passing the lemonade through a fine-mesh sieve.
  • Strain the lemonade finely by passing it through a jelly bag, or a double layer of muslin. Be sure to scald the muslin first by pouring boiling water over it, then squeeze out the excess moisture.
  • To have your lemonade especially clear, rinse the muslin thoroughly and double the layers to 4 and pass the lemonade through it again. This will take longer than the first time, due to the greater number of layers of material.
  • Taste and add more sugar if liked. For adults only, you can add 225ml of white wine. Choose one with light, citrus flavours.
  • Chill thoroughly.
  • Serve over ice.

Cool Summer Drink

Anon., 17th century (back left in photo).

Original Recipe
Source: MS8097, Wellcome Library Collection

This is a very refreshing drink similar to an Indian lassi. The milk will tend to separate slightly, so blending the drink just before serving helps combat this.

450ml milk
400ml water
½ tsp rosewater – I use Nielsen Massey
Juice of 2 lemons
1/4 nutmeg, grated
1 sprig rosemary
1 tbs granulated sugar

Slices of lemon and sprigs of rosemary to serve

  • Bruise the rosemary to release its flavour by gently tapping the leaves with a rolling-pin.
  • Put all of the ingredients into a jug.
  • Cover with plastic and allow to infuse for 2 hours in the fridge.
  • Remove the rosemary and strain the drink by passing it through a fine-mesh sieve, which will catch any rosemary leaves that might have fallen from the stem.
  • Using a stick blender or liquidiser, thoroughly mix the drink to an even consistency.
  • Serve at once.

Lemonada

Anon., 17th century, (front left in photo).

Lemonada Original Recipe
Source: MS8097, Wellcome Library Collection

600ml light and fresh German white wine – Liebfraumilch or Reisling
450ml water
225g granulated sugar
Juice of 2 lemons
juice of 1 orange
5cm stick of cinnamon
1/4 nutmeg in 1 piece
thumb-sized piece of fresh ginger, sliced thinly

  • Put all of the ingredients into a pan over a low heat and stir until the sugar is dissolved.
  • Bring to the boil, cover and remove from the heat.
  • Allow to steep until cold.
  • Strain to remove solids and chill in the fridge until required.
  • Serve over ice.

Fruitbowl Tea Loaf

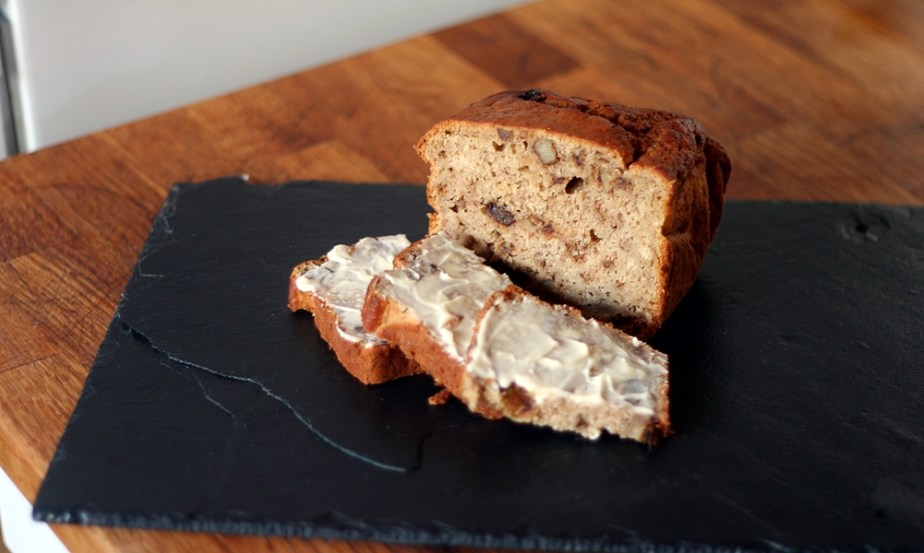
Retrieved from  an old farmhouse baking book, this recipe has dates and walnuts, which make for a delicious tea loaf, but can also make it a little dry, almost dusty, especially if the walnuts aren’t in their first flush of youth. Deliciously, the inclusion of mashed bananas helps with the moistness and the apple sauce really brightens the flavour with its freshness. Neither flavour dominates, making the loaf wonderfully flavoursome. Finally, it is brought to a rich, batter consistency by a splash-ette of lager – and indeed, Lager Loaf was the original recipe title – but that sounds too much like Lager Lout to my ears – which is far from tasty – so I feel justified in renaming it.

And it is a distinct improvement to eat spread with butter, with a cup of something hot.

Fruitbowl Tea Bread

You don’t HAVE to make this with the apple – if you have the eggs, just use two and no apple.

85g unsalted butter
1tbs golden syrup
85g soft brown or light muscovado sugar
1 sharp eating apple, e.g. Jazz or Braeburn
1 large egg
280g self-raising flour
¼ tsp bicarbonate of soda
½ tsp cream of tartar
pinch of salt
150ml lager
2 ripe bananas, peeled and mashed
125g chopped dates
50g walnuts, roughly chopped

  • Preheat the oven to 180°C, 160°C Fan.
  • Grease and line a 1kg loaf tin with parchment paper. Tear off a second piece of parchment and make a fold down the middle. This piece will be used during the baking.
  • Peel and core the apple, then grate finely into a small saucepan. Cover with a lid and heat gently until the apple has broken down into a puree. Sieve to remove any lumps. If you’re impatient, whizz it in a small food processor.
  • Gently warm the butter, syrup and sugar either in a pan or using the microwave, until melted.
  • Add the lager and apple puree, then whisk in the egg.
  • Mash the bananas. Make sure your dates and walnuts are also chopped and ready.
  • Sift the flour, bicarbonate of soda and cream of tartar into a bowl.
  • Add the liquid mixture and stir thoroughly.
  • Quickly fold through the bananas, dates and nuts and pour into the prepared tin.
  • Place into the oven and prop the second piece of parchment over the tin with the fold at the top, rather like a tent. This will prevent the top of the loaf from becoming too dark during baking.
  • Bake for 30 minutes, then remove the ‘tent’ and bake for a further 15-20 minutes.
  • Be sure to test the cake for done-ness using a cocktail stick/skewer/cake tester before removing from the oven – the moisture in the bananas and apple will make it very moist, so be sure it’s baked all the way through, especially towards the bottom.
  • Allow to cool in the tin for 10 minutes before removing to a wire rack to cool completely.
  • Serve sliced and buttered, and store in an airtight container.

18thC English French Bread

Bread is a curious topic to go a-hunting in the recipe archives because there are relatively so few recipes. Considering how central it was for such a large part of the population, the proportion of recorded recipes is surprisingly low.

The reason for this might be similar to that often cited as being behind Marco Polo’s failure to mention paper money in his account of travels in China: familiarity. It is a theory that Polo was so familiar with its usage after his many years in the country, and since his memoirs were written so long after his return, he completely forgot the surprise and wonder that the concept paper money would have for his readers. Perhaps the ability to make bread was so fundamental, so ingrained, few thought to write down the recipes since it was a skill everyone possessed.

It was also, however, a specialised craft, requiring both skill and equipment to produce on a large-scale, not to mention the unsociable hours and back-breaking work mixing huge quantities of dough without machinery. As such, as hard, manual labour, it was firmly in the province of the labouring classes, however skilled.

The more well-to-do, whose recipes have survived in household manuscript books, seem to have been partial to French bread, and it has been interesting to note the numbers of recipes for French bread consistently exceeding those for anything English. A large proportion of them are variations on this recipe, using egg whites as part of the liquid component.

French Bread recipe dating from 1703, MS7788 in the Wellcome Collection

I chose this 1703 recipe because of its simplicity – other recipes use whole eggs/butter/milk/cream, and I wanted to see whether the egg-whites had a noticeable effect on the flavour and texture of the loaf without any other distractions. The answer is yes – it is certainly different to a bread made without egg-whites. There’s no way to tell whether this is a genuine approximation of the French bread of the time, but I suspect that it wouldn’t have been too far removed from the sourdough bread enjoying a resurgence today.

Traditional sourdough, baked in a wood-fired oven, is a wonderful thing – insanely crusty with a great ‘chew’. It’s not to everyone’s tastes, though – which is where this loaf might gain favour. After baking, the crisp crust softens as it cools, making it easy to slice without the dangers of crust fragments ricocheting off at alarming speeds that comes with cutting a traditional sourdough. The crumb is open and springy with enough of a chew to make it very satisfying. From the photo above, it would appear that the centre of the loaf actually has a more open texture than the edges. It can be relished spread with just a little butter – and how long is it since you can say you honestly enjoyed a slice of white bread and butter?

I’ve obviously scaled this recipe down from the original and have made just one change: salt. True to my own code of conduct when working with old recipes, I did bake it ‘as written’ in the first instance, and while it had the great crust and texture described above, the flavour was lacking. Finally, I find it amusing to note that 300 years after it was jotted down, this recipe still takes just 30 minutes to bake.

18th Century English French Bread

450g strong white bread flour
1 sachet fast-action yeast
1tsp salt
50ml egg-white whisked with 300ml warm water
Additional warm water (maybe)

  • Mix the flour, yeast and salt in a bowl.
  • Whisk together the eggwhites and the warm water and add to the dry ingredients.
  • Mix thoroughly, adding more water if required (unlikely), to form a rather soft dough.
  • Knead for 10 minutes.
  • Cover lightly with plastic and set in a warm place to rise for 1 hour. If your kitchen is on the cool side, you can turn the oven to 160°C, 140°C Fan for 2 minutes, then switch it off and put in your dough to prove.
  • Tip out the risen dough and pat gently to deflate.
  • Shape the dough into a smooth ball and transfer to a greased 1kg loaf tin. The dough should half-fill the tin. If you’d prefer a taller loaf, use a smaller or longer shape.
  • Set aside to rise for 30 minutes. On cold days I put the loaf into the small top oven while the main oven below warms up.
  • Preheat the oven to 200°C, 180°C Fan.
  • Bake for 30 minutes, turning the loaf around after 20 minutes to help colour it evenly.
  • Cool on a wire rack.
  • Slice when cold.

Sweet Shortcrust Pastry

This pastry has been scaled down from a recipe I found in a Victorian/Edwardian commercial bakers’ book. It’s an all-butter (and therefore vegetarian) pastry  and includes a small proportion of cornflour. This makes the pastry extra crispy, which isn’t always easy with an all-butter pastry. It also gives it a really smooth, almost silken, dry feel which makes it very easy to handle.

60g cornflour
225g plain flour
140g butter
1 large egg
85g icing sugar
ice-cold water

  • Put all the ingredients into the bowl of a food processor and blitz until the mixture resembles breadcrumbs.
  • Gradually add the water, one tablespoon at a time, until the mixture comes together in a ball.
  • Knead smooth, then roll out.
  • Cover with plastic and chill for 30 minutes.


Hard Sauce

100g unsalted butter – softened
150g caster sugar
120ml cream sherry, or any favourite alcohol

  • Whisk the softened butter until extremely light and fluffy. This is easiest with a stand mixer and paddle attachment, but electric mixer is fine.
  • Add the caster sugar and continue whisking until even paler and fluffier.
  • Gradually add the sherry a tablespoon at a time until fully incorporated. The mixture should look like thick whipped cream.
  • You can either use as is, or do the following for a pourable sauce.
    • Spoon the mixture into a small pan and put over the lowest heat possible.
    • Allow the mixture to melt, and DO NOT stir. It will slowly form a creamy sauce the consistency of double cream.
    • Pour into a jug and serve at once.

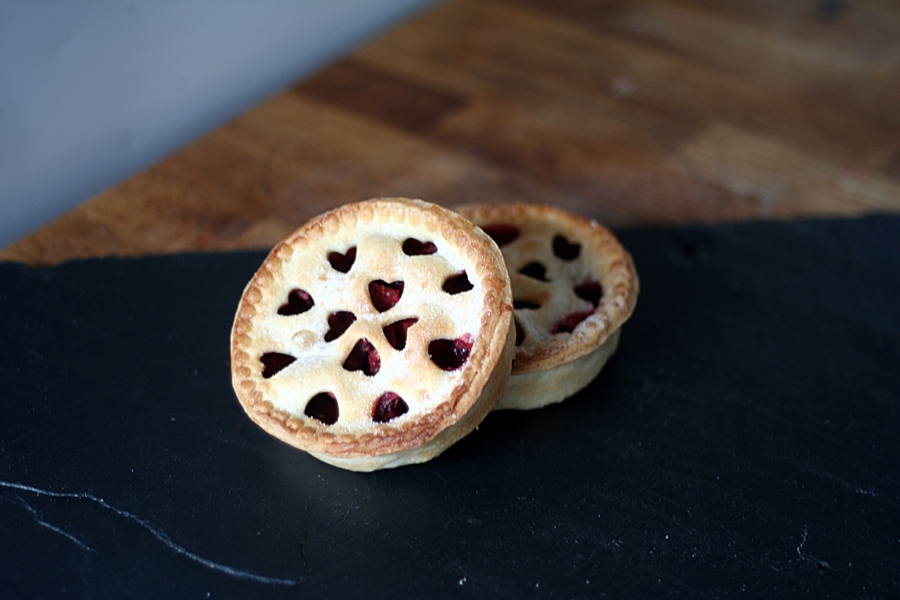
Spiced Strawberry Tart

Jane Parker, 1651 adapted from The Good Huswife’s Jewell, 1587

I was drawn to this recipe because it involved spicing strawberries and baking them in pastry, both details being so different from how we tend to use strawberries today. Originally, I was delighted to find the recipe in Jane Parker’s manuscript recipe book¹ but some months later, when I found an earlier version in a cookery book from the previous century, it became at once both more interesting and more delightful. Thomas Dawson’s recipe for strawberry tart², was published in the middle of the reign of Elizabeth I, and is, in all honesty, a little sparse on the level of detail to which our 21st century eyes are accustomed when it comes to recipes. Indeed, it is so brief I can quote it in full below:

To make a tart of strawberries

Wash your strawberries and put them into your Tarte and season them with sugar, cinnamon, and ginger and put in a little red wine into them.

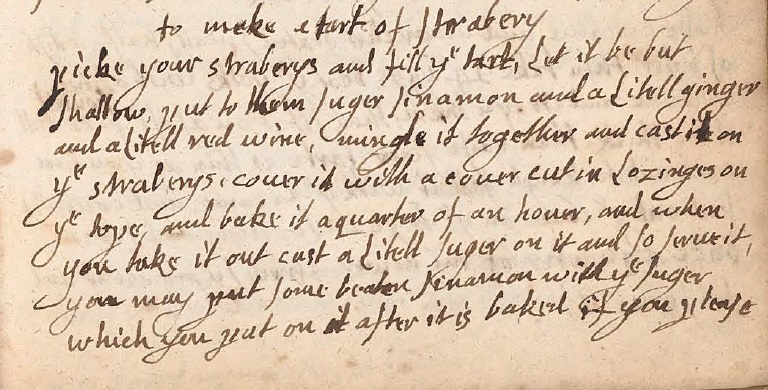
No quantities, cooking times, or even mention of a pastry recipe. It would appear Jane Parker also thought a little extra detail was required, and her recipe is as follows:

Jane Parker's Recipe
Source: MS3769, Wellcome Library Collection

Whilst there’s still no pastry recipe, we do have more detail in terms of presentation: the tart should be shallow, the pastry lid should have diamond cutouts, baking time of 15 minutes and a sprinkling of spiced sugar over the baked tart. These additional details, to my mind, highlight the fact that, even if she didn’t actually make the tart herself, Jane Parker definitely got the recipe from someone who had, as these details are precisely the kind of personal touches an experienced cook would note down for future reference.

After centuries of refinement, the strawberries we now use are impressively large but much milder in flavour than those that would have been used for this originally Elizabethan tart. If you can find sufficient wild strawberries either to mix with your ordinary strawberries or, decadently, to use on their own, their deep aromatic flavour, together with the wine and spices, will make for a much more robust flavour to this unusual Tudor tart.

Spiced Strawberry Tart

1 batch of Sweet Shortcrust Pastry

600g fresh strawberries
3 tbs caster sugar
1tbs cornflour
1tsp ground cinnamon
1 tsp ground ginger
½ tsp coarse ground black pepper
60ml red wine or port
Milk for glazing
1tbs caster sugar
1tsb ground cinnamon

  • Preheat the oven to 200°C/180°C fan/gas 6.
  • Roll out the shortcrust pastry thinly. The thinner the pastry, the less time it will need in the oven and the freshness of the strawberries will be all the better for it.
  • Cut out four lids for your tarts. Cut them generously so that there is sufficient pastry to form a seal with the pastry lining the tins. Use a small diamond cutter or any small shape, to cut a lattice into the lids. Be careful not to cut too close to the edge, otherwise they will be tricky to attach to the rest of the pastry.
  • Gather the trimmings and re-roll the pastry.
  • Grease and line four individual pie tins with the pastry. Let any excess pastry hang over the sides for now.
  • Prepare the strawberries: Remove the stalks and cut into small pieces, either 4 or 8, depending on the size of the strawberries.
  • Put the cut strawberries into a bowl and sprinkle over the red wine. Toss gently to coat.
  • Mix the sugar, cornflour and spices together. Sprinkle over the strawberries and toss gently to mix.
  • Divide the strawberry filling amongst the tins and smooth over.
  • Moisten the edges of the pastry and place the lids over each tart. Press firmly to seal, then trim and crimp the edges
  • Brush the tops with milk and bake for 12-15 minutes until the pastry is cooked and lightly golden.
  • Mix the remaining caster sugar and cinnamon together and sprinkle over the hot pies.
  • Cool on a wire rack.

¹ MS3769, Wellcome Library.
² The Good Huswife’s Jewell, 1587