Spiced Strawberry Tart

Jane Parker, 1651 adapted from The Good Huswife’s Jewell, 1587

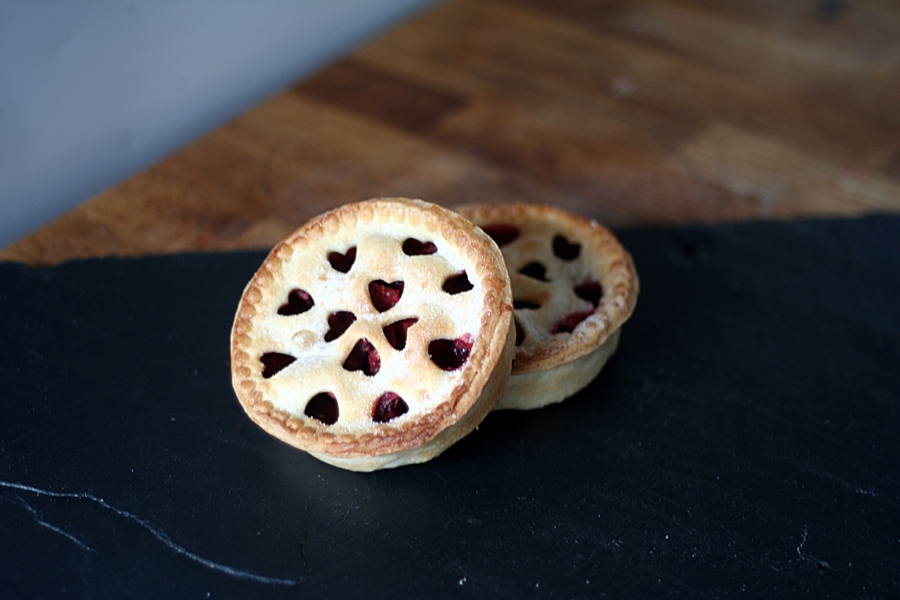
I was drawn to this recipe because it involved spicing strawberries and baking them in pastry, both details being so different from how we tend to use strawberries today. Originally, I was delighted to find the recipe in Jane Parker’s manuscript recipe book¹ but some months later, when I found an earlier version in a cookery book from the previous century, it became at once both more interesting and more delightful. Thomas Dawson’s recipe for strawberry tart², was published in the middle of the reign of Elizabeth I, and is, in all honesty, a little sparse on the level of detail to which our 21st century eyes are accustomed when it comes to recipes. Indeed, it is so brief I can quote it in full below:

To make a tart of strawberries

Wash your strawberries and put them into your Tarte and season them with sugar, cinnamon, and ginger and put in a little red wine into them.

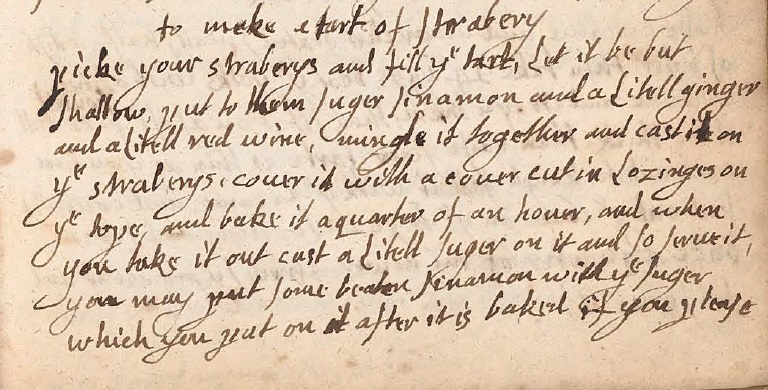
No quantities, cooking times, or even mention of a pastry recipe. It would appear Jane Parker also thought a little extra detail was required, and her recipe is as follows:
Jane Parker's Recipe
Source: MS3769, Wellcome Library Collection

Whilst there’s still no pastry recipe, we do have more detail in terms of presentation: the tart should be shallow, the pastry lid should have diamond cutouts, baking time of 15 minutes and a sprinkling of spiced sugar over the baked tart. These additional details, to my mind, highlight the fact that, even if she didn’t actually make the tart herself, Jane Parker definitely got the recipe from someone who had, as these details are precisely the kind of personal touches an experienced cook would note down for future reference.

After centuries of refinement, the strawberries we now use are impressively large but much milder in flavour than those that would have been used for this originally Elizabethan tart. If you can find sufficient wild strawberries either to mix with your ordinary strawberries or, decadently, to use on their own, their deep aromatic flavour, together with the wine and spices, will make for a much more robust flavour to this unusual Tudor tart.

Spiced Strawberry Tart

1 batch of Sweet Shortcrust Pastry

600g fresh strawberries
3 tbs caster sugar
1tbs cornflour
1tsp ground cinnamon
1 tsp ground ginger
½ tsp coarse ground black pepper
60ml red wine or port
Milk for glazing
1tbs caster sugar
1tsb ground cinnamon

  • Preheat the oven to 200°C/180°C fan/gas 6.
  • Roll out the shortcrust pastry thinly. The thinner the pastry, the less time it will need in the oven and the freshness of the strawberries will be all the better for it.
  • Cut out four lids for your tarts. Cut them generously so that there is sufficient pastry to form a seal with the pastry lining the tins. Use a small diamond cutter or any small shape, to cut a lattice into the lids. Be careful not to cut too close to the edge, otherwise they will be tricky to attach to the rest of the pastry.
  • Gather the trimmings and re-roll the pastry.
  • Grease and line four individual pie tins with the pastry. Let any excess pastry hang over the sides for now.
  • Prepare the strawberries: Remove the stalks and cut into small pieces, either 4 or 8, depending on the size of the strawberries.
  • Put the cut strawberries into a bowl and sprinkle over the red wine. Toss gently to coat.
  • Mix the sugar, cornflour and spices together. Sprinkle over the strawberries and toss gently to mix.
  • Divide the strawberry filling amongst the tins and smooth over.
  • Moisten the edges of the pastry and place the lids over each tart. Press firmly to seal, then trim and crimp the edges
  • Brush the tops with milk and bake for 12-15 minutes until the pastry is cooked and lightly golden.
  • Mix the remaining caster sugar and cinnamon together and sprinkle over the hot pies.
  • Cool on a wire rack.

¹ MS3769, Wellcome Library.
² The Good Huswife’s Jewell, 1587
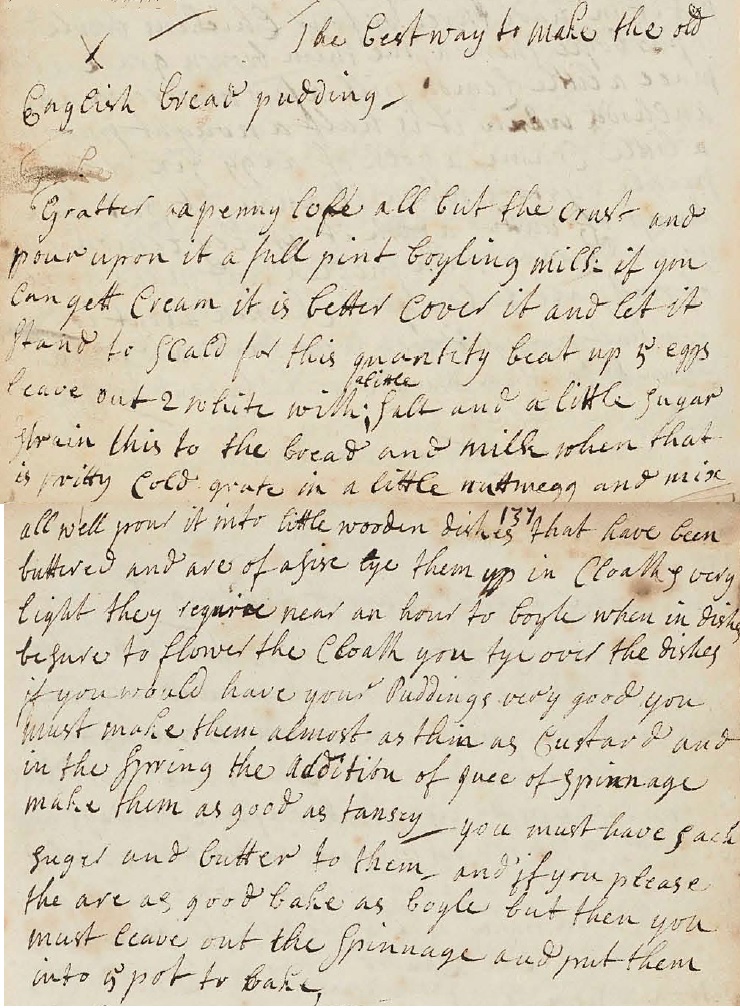
Old English Bread Pudding

Mary Bent, circa 1670

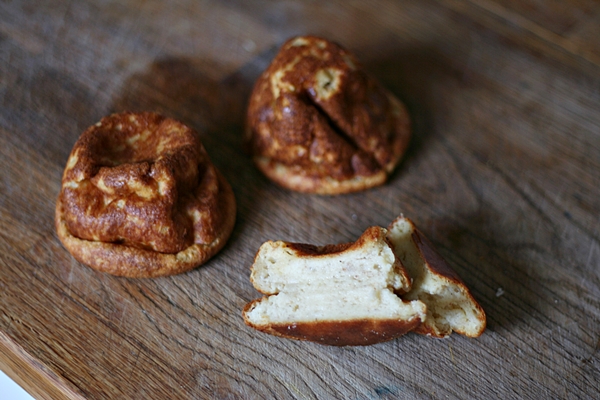
I adore everything about this recipe. For a start, it epitomises the very British traits of not only being a hot pudding, but also having been created from almost nothing. The ingredients are modest, the flavouring minimal, yet these simple, little puddings are a real delight. Even more so when you realise that these were already being looked upon with nostalgic fondness when Mary Bent recorded this recipe in the middle of the seventeenth century. Where modern bread puddings tend towards the solid and the fruited, this 350 year old recipe is light and delicate as a souffle.

Original Recipe
Source: MS1127, Wellcome Library Collection

Old English Bread Pudding

125g fresh breadcrumbs
300ml milk
2 large yolks
1 large egg
2tbs caster sugar
1/4tsp salt
freshly grated nutmeg

  • Warm the milk until just below boiling then pour over the breadcrumbs and allow to soak for 15 minutes.
  • Preheat the oven to 160°C/140°C fan/gas 3.
  • Whisk the egg and yolks and pour into the breadcrumb mixture. Add the sugar, salt and grate the nutmeg.
  • Stir everything together until a smooth mixture.
  • Generously butter four pudding basins and pour the breadcrumb mixture evenly amongst them.
  • Arrange the basins on a lipped baking sheet.
  • Bake for 45 minutes, turning the baking sheet around after 20 minutes to ensure even browning.
  • When cooked, allow the puddings to rest for a couple of minutes, then run a knife around the sides of the pudding bowls and turn out.
  • Serve with a few fresh berries and whipped cream or Hard Sauce .


Fudge

Confession: This is not my recipe.

It is the original fudge recipe that used to be posted on the Carnation website and for some reason was taken down a few years ago.

Luckily for me – and you – I have it ingrained on my brain as it is the best, no-fail recipe I have ever used, and I am posting it here so I can be lazy and just point everyone who asks for the recipe here, instead of writing it out again and again.

It makes the kind of fudge that has texture: when cooled, it is hard to bite into – yet it melts in the mouth. Very similar to the confection known in Scotland as Tablet.

The secret is two-fold: boiling the mixture to the correct temperature, and beating it as it cools to ‘grain’ the sugar.

You CAN make this the Old School way, testing for the Firm Ball stage by doing the drop test in water, and by beating the cooling mixture hard with a wooden spoon. However, I’m all for using gadgets wherever possible, so a thermapen or similar thermometer and an electric whisk or stand mixer are my recommendations.

Each batch makes a 1.2kg slab large enough to last over the festive season. Alternatively, you can make a batch and divide it up into small batches in clear plastic bags and use it for presents, or make two batches of contrasting flavours and make it go even further.

You can use the basic recipe to make a number of equally delicious variations, and I’ve thrown in an extra one by Nell Heaton – a favourite author of mine from the 1940s/1950s, who deserves greater recognition for her delicious, trustworthy recipes – which is a real explosion of flavour when made with home-made candied peel, fruit and nuts.

Fudge

1 x 397ml tin of sweetened, condensed milk
150ml milk
125g butter
450g Demerera sugar

  • Line a baking pan with parchment. The size of the pan doesn’t really matter, but I recommend a rectangular pan, for ease of cutting the fudge into cubes once cooled. The original recipe suggested a pan 18cm square, which will make for a small, very thick slab. Personally, I use a pan 30cm by 24cm
  • Put all of the ingredients into a pan and stir over a low heat until the sugar has dissolved.
  • Bring to the boil and stir continuously until it registers between 116°C and 120°C on a thermometer dipped into the centre of the pan. Make sure the tip of the thermometer doesn’t touch the bottom of the pan, as this will be much hotter and the thermometer will thus give a false reading.
  • When your fudge reaches temperature, remove from the heat and allow the bubbles to settle. Pour into your stand mixer and use the beating paddle (not the whisk) to beat slowly until the mixture thickens. Alternatively, use your electric hand mixer directly into the pan, also whisking until the mixture has thickened.
  • When it is thick and still just pour-able, tip it into your parchment-lined tin and smooth over. I tested the most recent batch I made and when sufficiently thickened and cooled, it registered 80°C.
  • Leave to cool completely.
  • When cold, cut into cubes with a sharp knife and store in an airtight box.

Variations

  • Rum and Raisin Fudge: Warm 115g raisins in 3-4tbs dark rum and leave to plump. Add just before beating.
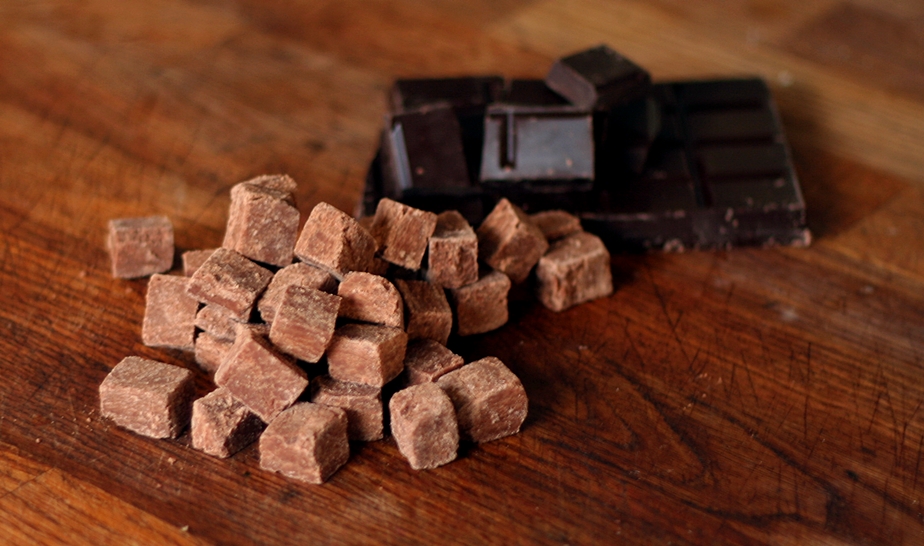
  • Chocolate Fudge: Melt 170g dark, 60% chocolate and add just before beating.
  • Fruit and nut fudge: Stir in 85g mixed dried fruit and chopped nuts.
  • Nell Heaton’s Tutti Frutti Fudge (my favourite) Add 350g – yes, a whopping 12 ounces in old money – of mixed chopped nuts, dried fruit and candied peel sliced or diced small. I suggest about 90g mixed candied peel, 130g flaked or slivered almonds and chopped walnuts, and 130g mixed raisins, sultanas, cranberries and chopped apricots.

Cream Cakes

I spend a lot of our holidays in southwest France prowling around patisseries and artisan boulangeries with eyes like saucers, admiring the delicate and stylish combinations of cream and fruit and chocolate and truffle and glaze and, and, and….

However, in order to get there, it is rather a mammoth road trip, so I generally make sure I’ve got a handful of recipe books with me in the car to while away the hours. With no other reading matter to hand, I find it’s a good way to make sure I actually READ some of the hundreds of books on my shelves and I invariably discover something I’ve overlooked before. Sure enough, this year, yet again, I have re-discovered a recipe in a dusty housewives’ pamphlet from umpty-plonk years ago that reveals itself to be a real gem and, despite my hopeless and complete admiration for the exotic and awe-inspiring patisserie creations of France, I am enchanted all over again by British simplicity.

The recipe for these cakes was so brief I almost passed it by, yet curiosity caused me to pause and read it over, wondering what ‘trick’ there was; surely the small paragraph didn’t contain making, baking AND decorating instructions for cream cakes?

Sure enough, it didn’t, because the recipe was for cakes MADE with cream. Specifically, substituting cream into the mix instead of butter.

So simple – flour, sugar, eggs, cream, baking powder. I just had to try them.

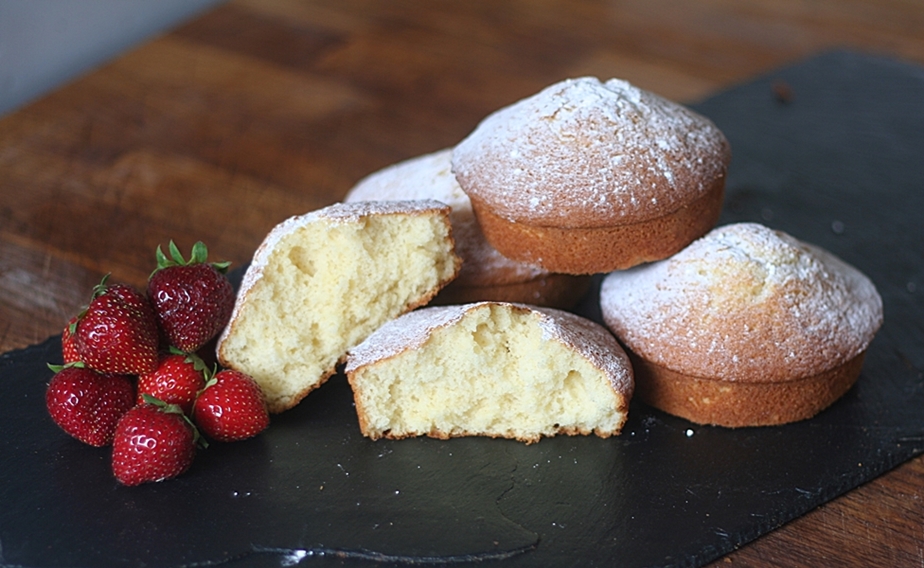
And they were delicious, and a complete breeze to make; no fretting over whether the butter is soft enough, or whether the sugar is dissolved sufficiently. They rose, magnificently domed, in the oven and are light and tender of crumb.

If I had just one niggle, it was that they were sweet. Tooth-achingly so. I couldn’t resist tweaking them a little. Even the sugar-pop posing as my daughter prefers this version. Of course she ate the sweet batch too, but she prefers these.

There’s no added flavouring – you could add some if you like, but I urge you to try the recipe just once, with farm-fresh eggs and rich double – or even clotted – cream.

The simplicity, lightness and flavour will be a delight.

Promise.

Cream Cakes

The cakes in the photo are made in mini layer tins I bought in my local The Range, 4 x 10cm diameter pans for £2.50 (also fab for Yorkshire Puddings – I bought 2 sets) and I put 100g of batter per pan and made six. If you’re using large cupcake/muffin tins, I suggest just 50g of batter per ‘hole’, and thus twelve cakes. Cooking time is the same for both sizes.

150g caster sugar
2 large eggs
125ml cream – double or clotted
150g plain flour
1.5 tsp baking powder

  •  Preheat the oven to 180°C/160°C Fan.
  • Crack the eggs into a bowl and add the sugar. Beat with a balloon whisk (or by hand or stand mixer) until the eggs are frothy and the sugar dissolved – about 5 minutes.
  • Add the cream and whisk in.
  • Sift the flour and baking powder together and stir into the rest of the ingredients – the balloon whisk/attachment is best for this, less washing up too!
  • Grease and line your tins, or use cupcake cases.
  • Spoon your mixture into your tins. Spread the batter to the sides, leaving a hollow in the middle. They will still dome up during cooking, but this way it should be a little more controlled.
  • Bake for 15 minutes until risen and golden brown.
  • Cool on a wire rack.
  • I think these are delicious served warm, lightly dusted with icing sugar and with a drizzle of cold cream poured over and a few fresh berries on the side. You can also split them and fill with whipped cream and berries or jam, or indeed any way that takes your fancy!

Dundee Cake

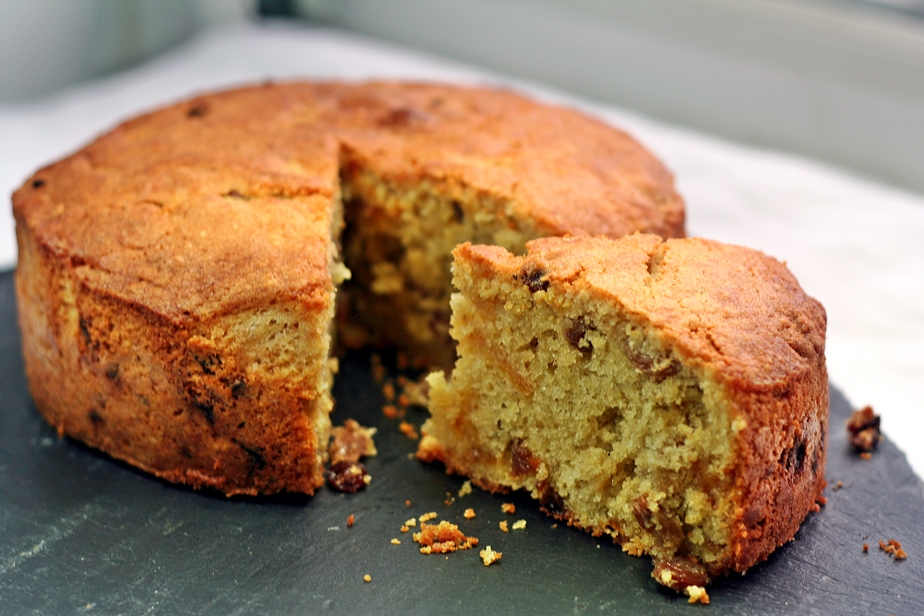
This recipe is fabulous – and this recommendation is coming from an until-recently Dundee-Cake-Disliker. The crust is crisp but delicately thin, the insides delicately moist and buttery, rich with the sweetness of sultanas and the tang of candied orange peel.

The modern Dundee Cake has an iconic appearance: the carefully laid-out pattern of whole, blanched almonds immediately distinguishes it from other fruit cakes. For many years I’ve not been a fan, based on the Dundee Cakes I’d been served as a child: dry, crumbly, tasteless, overly-fruited masses with burnt nuts on the top and, horror of horrors, glacé cherries studding their depths.

After a bit of digging around in the cake history books, it turns out that the Dundee Cake known today is quite a few steps removed from the original. So I had high hopes that with a little experimentation I could, as with other recipes I’ve managed to rehabilitate from childhood dislikes, bring Dundee Cake back to its former glory and once again make it a teatime favourite.

Dundee Cake was first made by the Dundee-based Keiller company, as an off-season sideline to their marmalade business, as a way of using up excess peel generated by the marmalade manufacturing process. By gentleman’s agreement, no other bakers in the city made the cake. Keiller’s were also responsible for popularising their creation under the name Dundee Cake, described by Alan Davidson in the Oxford Companion to Food as light, buttery delicacy stuffed with sultanas, almonds and candied orange peel.

Quite when the cake was first made is a bit of a mystery, but it is mentioned in stories and novels of the mid-nineteenth century. An 1853 edition of The Lancet carries an advertisement for a Regent Street caterer, which includes Dundee Cake in its list of available cakes. This recipe is based on Madam Marie de Joncourt’s 1882 recipe, but tweaked to conform to the description of the original delicate and rich cake: more butter, almonds, sultanas and peel, no currants, no almonds on top. I’ve left off the distinguishing almonds, because they’re not mentioned in the original recipe, but you can make your own decision on that.

Dundee Cake

180g butter – softened
112g caster sugar
4 eggs
1tsp vanilla extract
180g flour
150g sultanas
2 tsp baking powder
1/3 grated nutmeg
100g ground almonds
125g candied peel, cut into thin, 2cm slivers

  • Preheat the oven to 170°C, 150°C Fan.
  • Grease a 20cm, deep (at least 10cm) loose-bottomed cake tin.
  • Line the base with a circle of parchment.
  • Tear off a long strip of parchment, long enough to wrap around the whole tin.
  • Fold the strip of parchment in half lengthwise.
  • Unfold, then fold in each long edge towards the centre fold.
  • Fold both halves together, making for four layers of parchment.
  • Line the tin with this 4-ply strip of parchment. Any fruit-filled cake needs protecting from the high temperatures that baking in a tin will generate.
    Grease the parchment on the sides and base of the tin.
  • Put the softened butter into a bowl and whisk until light and creamy.
  • Add the sugar and whisk until pale and fluffy.
  • Whisk in the eggs one at a time. Whisk for a good 3-4 minutes before adding the next egg.
  • Stir in the vanilla.
  • Gently stir the remaining ingredients together, then fold into the wet ingredients. Don’t over-mix, or you run the risk of deflating all the air you’ve just whisked into it.
  • Spread the mixture into the tin and level the top.
  • Bake for one hour, gently turning the tin around 180 degrees after 40 minutes.
  • Check for done-ness by inserting a wooden toothpick deep into the centre of the cake. If no liquid batter is clinging to it when removed, the cake is done.
    Cool for 10 minutes in the tin, then remove to a wire rack to cool completely.
  • Store, wrapped in foil, in an airtight tin.

Tunbridge Cakes

Here’s another recipe resurrection, but I’ll give you fair warning, it’s a little caraway-heavy. If you’re not a fan of the taste of caraway, then you’re not going to have a fun time.

The solution to that, of course, would be to substitute a different flavouring for the caraway – easy-peasy – aniseed or cumin if you want to keep it seedy, or lemon/orange zest to make it fresh but really, anything that appeals is fine.

ANYHOO – back to the cakes.

Despite the name, Tunbridge Cakes are actually a biscuit. In the mid nineteenth century, Alfred Romary set up a biscuit factory in the town and the biscuits were manufactured for over a hundred years. Queen Victoria was so delighted with them she awarded a royal warrant and the royal connection continued until the final batch was baked for the wedding of Prince Charles and Lady Diana Spencer in 1981.

The advertisements for the biscuits described them as being “As thin as lace, of a flavour so delicate as to be indefinable. The clubs serve them with port, but they are also excellent with ices or at afternoon tea. Many people prefer them to sweets and chocolate. In two flavours, Sweet and Ginger.” Interestingly, there’s no mention of caraway, nor does it appear on the ingredients list on the tins, which mention only flour, butter, shortening, sugar and salt. George Read’s “The complete biscuit and gingerbread baker’s assistant” (1854) makes a distinction between ‘Water Cakes with Caraways’ and ‘Tunbridge Water Cakes’, though whether these bear any resemblance to the Romary biscuits is unclear.

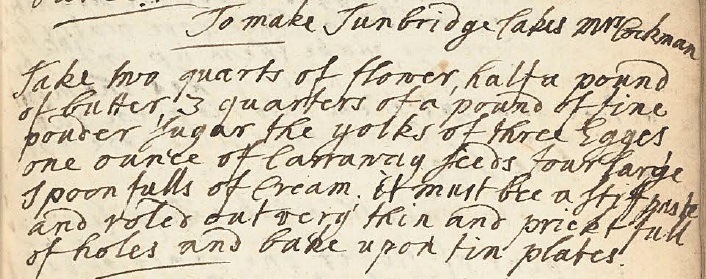
Tunbridge Cakes actually go back much further than mere Victorian times. Recipe books from the early half of the nineteenth century contain several mentions of Tunbridge Cakes, although, on closer examination. they all appear to be plagiarised copies of Mrs Eliza Rundell’s 1806 recipe. The earliest printed recipe I could find just managed to sidle into the eighteenth century – John Perkins’ 1796 recipe for Tunbridge Wafer Cakes. However, in my favourite recipe collection, that of the manuscripts of The Wellcome Library, I found not one but four recipes more than one hundred years older than any I could find in print.

Sample Recipe
Source: MSMSL2, Wellcome Library Collection

Since the recipes were so similar, with only slight variations in proportions of flour, butter, sugar, eggs and seeds, baking a batch of each was the only way they could be fairly compared. I managed to scale down the recipes to a common quantity of flour, and then mixed and baked a batch of each.

It was immediately apparent that two of the batches stood out as being superior, but for different reasons. Batch A was incredibly light and delicate, friable and crumbly in texture, whilst the flavour of Batch B had that elusive je ne sais quoi deliciousness that was difficult to place, without knowing what the ingredients were. My dilemma was: I couldn’t decide which I liked better. Batch B was very heavy on the caraway seeds, but the background spices kept me coming back to nibble. The delicate texture of Batch A was a delight.

In the end I added the extra flavourings from Batch B to the mix of Batch A and baked a hybrid that seemed to being the best of both batches. If you want to try the original recipe, simply omit the optional flavourings in the ingredients listed below.

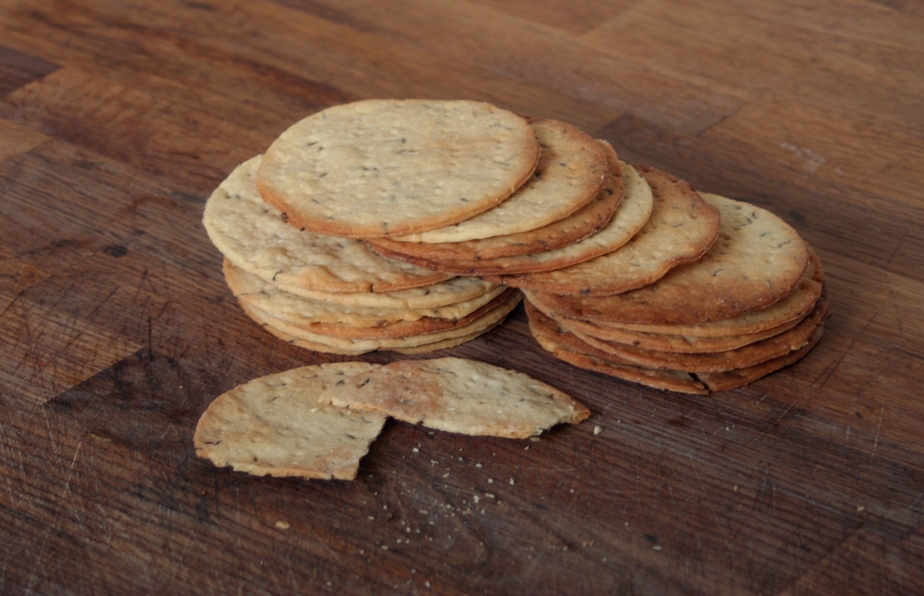
“Yes, but even after all the yaddah, yaddah, yaddah, they still don’t look very interesting” I hear you say. I know. They’ve not got much wow factor to look at, and if you’ve read this far, you might even be wondering why you should bother with them at all. So allow me to try and convince you. Firstly, their taste – the most basic quality for a recipe – they are delicious, and this should be reason enough. If you need further convincing,  it would be their delicate texture: crisp, crumbly and friable. And lastly, and for me this is their most enchanting quality, their age. Late 17th century. To put this in context, contemporaneous events include the English civil war, Roundheads & Cavaliers, Oliver Cromwell, the Great Fire of London, Peter The Great crowned Czar of Russia and the Salem witch trials are conducted in Massachusetts. And this is a delicious biscuit from those times. As Sue Perkins so eloquently put it in her Foreword for my first book, it’s taste-bud time travel!

Apart from the flavourings, the other key aspect of these biscuits is their thinness. And I mean thin. Really, really thin. Like 2mm. Even though the quantity of dough is small, I strongly suggest working with just half of it at a time, so that you can really concentrate on getting the dough as thin as possible. It will become translucent when rolled thinly enough. The biscuits will then take only minutes to bake.

Tunbridge Cakes

Based on recipes in The Wellcome Library 17th century manuscripts, dated 1650-1700

113g plain flour
23g unsalted butter
34g powdered sugar
1 large egg yolk
½tsp caraway seeds
½tsp ground ginger – optional
¼tsp salt – optional
50-70ml double cream to mix

  • Put the flour, butter, sugar and egg yolk into a food processor and blitz together to mix.
  • Tip mixture into a bowl and add the caraway seeds, ginger and salt, if using.
  • Stir together.
  • Gradually add the cream until the mixture comes together into a stiff paste.,
  • Tip the paste out of the bowl and knead smooth. The texture should be like a firm shortcrust pastry.
  • Wrap in plastic and chill for 1 hour.
  • Preheat the oven to 180°C, 160°C Fan.
  • Retrieve the paste from the fridge, divide in half and put one half back into the fridge to stay cool.
  • Lightly flour the work surface and a rolling pin and roll out the dough extremely thinly, until translucent and the work surface is visible through it.
  • Using a fork, dock (i.e. poke holes in) the whole surface of the paste. This is a little time consuming, but infinitely better than trying to dock the biscuits once they have been cut out.
  • Cut out biscuits using a plain, 8cm cutter.
  • Transfer the biscuits to baking sheets lined with parchment paper.
  • Bake for 4-6 minutes, until the edges are just beginning to brown. Check after 3 minutes and turn the baking sheet around if the biscuits are colouring unevenly.
  • Remove the biscuits from the baking sheet and cool on a wire rack.
  • Store in an airtight container.

Whitsun Cake

Wotchers!

Time was, we used to mark the passing of the year with festivals and their associated foods. The list of celebrations that have continued into the 21st century is a lot shorter than it used to be: pancakes on Shrove Tuesday, Simnel Cake on Mothering Sunday, Cross Buns on Good Friday are about all that remain in national consciousness.

Regionally, there are still pockets of celebration peculiar to that particular area. Whilst researching my book (shameless plug) Great British Bakes, I discovered two such celebrations with which I have a personal connection.

The first was that of Pax Cakes at King’s Capel, near Ross-on-Wye, where my father spend his final years and is now buried. Under the terms of the sixteenth century will of Lady Scudamore, cakes and ale were to be distributed to the parishioners of Hentland, Sellack and King’s Capel on Palm Sunday, to be consumed in church with the aim of fostering good will and letting the grievances of the past year be forgotten. The cakes became known as Pax Cakes and the toast/blessing was “Peace and good neighbourhood”.

The second was the celebration at Kidderminster, where I now live, held on Midsummer Eve, for all residents of Church Street. A bequest left by John Brecknell in 1778 added to an earlier bequest and provided cake for each child or unmarried woman born or living in the street. The men-folk were to gather together to oversee the distribution, and for this meeting both beer and tobacco were paid for by the bequest. Old quarrels had to be set aside in order for the meeting to proceed. Over the years, the celebration evolved into a Midsummer’s Even dinner for residents of the street, where the toast was “Peace and good neighbourhood”.

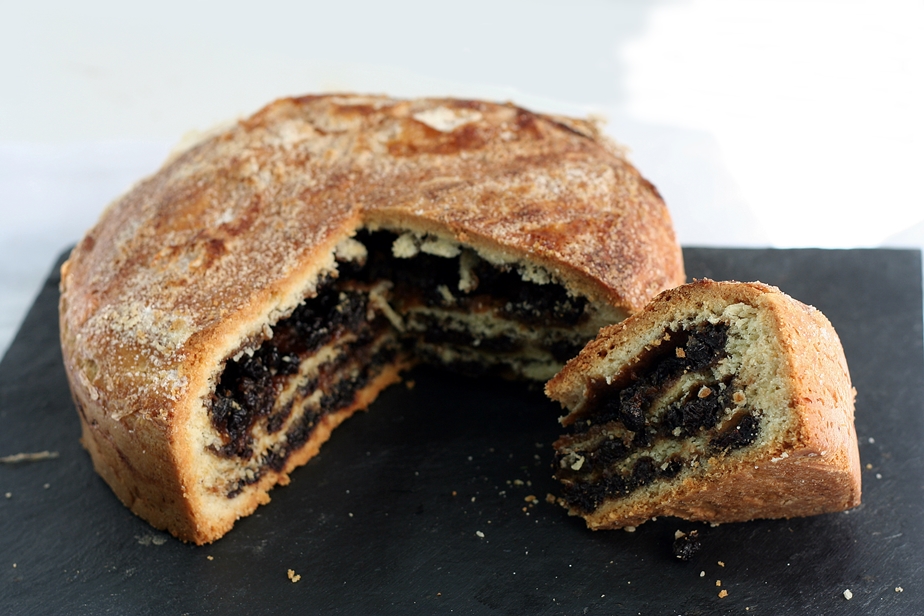
All of which leads me to this week’s recipe found in my grandmother’s cookery book. It’s for a cake to celebrate Whitsun, originating from Lincolnshire. The recipe was very insistent that, after baking, the cake be wrapped and carefully stored for “several days” in order for the flavours to mingle. The first time I made it, I dismissed this notion, as the aroma was so tantalising, and indeed, it was absolutely delicious, warm from the oven. This time I decided to follow the instructions as written, purely to compare taste. Long story short, although the cake I unwrapped this morning was nice, I still prefer the cake fresh and warm. The flavour is akin to an Eccles or Banbury cake, but with an enriched dough taking the place of pastry.

This recipe makes two, 20cm cakes. You can either do your own taste test, by eating one warm and trying the second several days later, or make just one cake by halving the recipe.

There’s no indication, other than the recipe title, what exactly this cake was meant to symbolise or celebrate, so whether you choose to make one cake or two, Peace and Good Neighbourhood to you!

Lincolnshire Whitsun Cake

Makes two 20cm diameter cakes.

170g unsalted butter
¼tsp salt
625g strong plain flour
2 sachets fast-action yeast

170g unsalted butter
300ml milk

450g currants
450g soft light brown sugar
60g butter
1 large egg yolk
2 tsp grated nutmeg
1 tsp allspice

1 large egg white for glazing
caster sugar

  • Grease and line with parchment paper two 20cm loose-bottom or spring-form cake tins. Tart tins are not suitable, as the sides need to be relatively high because of the cakes rising both before and during cooking.
  • Put the first four ingredients into the bowl of a food processor and blitz until the mixture resembles breadcrumbs.
  • Tip the mixture into a bowl.
  • Gently warm the butter and milk together until the butter has melted.
  • Allow to cool to blood temperature, then add to the flour mixture. It will form a very soft dough.
  • Knead for 10 minutes, then set aside to rise for 30 minutes.
  • Mix the fruit, sugar, yolk, butter and spices together in a saucepan and warm through until moist and the fruit soft.
  • After 30 minutes, divide the dough into two and then each half into four equal pieces.
  • Divide the fruit filling into six
  • Pat each piece of dough into a circle of diameter 20cm and place in the prepared tins, alternating with layers of the fruit mixture. The top layer will be of dough.
  • Set tins aside to rise for 30 minutes.
  • Preheat the oven to 180°C, 160°C Fan.
  • Bake the cakes for 30 minutes, then remove and quickly brush them with the beaten egg-white and sprinkle with caster sugar.
  • Return to the oven and bake for a further 25-30 minutes, until the top is browned and the cakes have shrunk away from the sides of the tin a little.
  • Cool in the tins for 10 minutes, then remove and cool on a wire rack.
  • Eat warm, or wait until completely cold before wrapping tightly in foil and storing in a tin, or wrap in plastic and freeze for later.

Honey Bunnies

The recipe for this dough comes from one of the many digital manuscripts made available by The Wellcome Library, and dates from 1699. The original was a bit sparse in some of the instructions (“add honey to sweeten” “what spice you will”), but I’ve experimented and come up with a version that is rich, not too sweet and delicately spiced. I specifically wanted a recipe that did not contain fruit, but feel free to throw some in if you like. Additionally, mix it up with your own spice blends.

Bun recipe from MS.3107, p28, dated circa1699,  Wellcome Collection.
Bun recipe from MS.3107, p28, dated circa1699, Wellcome Collection.

Honey Bunnies

Makes 12 bunny buns

450g strong, white flour – plus extra for kneading.
1 sachet easy-blend yeast
2tsp ground cinnamon
2tsp ground nutmeg
1tsp ground allspice
250ml whole milk
113g honey
113g unsalted butter
2 large eggs

  • Put the honey, butter and milk into a small pan and warm gently until the butter has melted and the honey dissolved.
  • Whisk the eggs in a bowl.
  • When the milk mixture has cooled to blood temperature, pour into the whisked eggs, stirring briskly.
  • Add the remaining ingredients to a large bowl and stir to combine.
  • Make a well in the centre and pour in the wet ingredients.
  • Stir together until the mixture comes together in a soft dough. Important: The texture of the dough depends on the moisture content of the ingredients, including that of the flour, eggs, butter and honey. It is probably going to look too wet. Don’t panic. Knead in extra flour to bring it back to a consistency with which you’re happy. It is better to have it slightly too soft, than too dry.
  • Knead for 10 minutes until smooth.
  • Cover and set to rise until doubled in size. The butter and the honey will mean that it will take longer to rise than regular bread dough, so think more in terms of 2-3 hours than just a single hour.
  • When risen, tip out from the bowl and press out the air.
  • Fold the dough together loosely and weigh it.
  • Cut into 12 portions. Using a digital scale will give you the greatest accuracy and therefore a more even batch overall.
  • Shape into buns. To help you shape the dough into bunnies, I’ve prepared a photographic how-to:
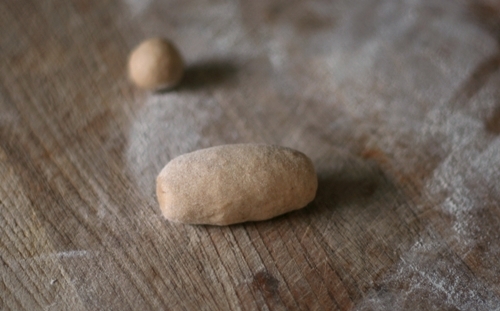
dough tail head
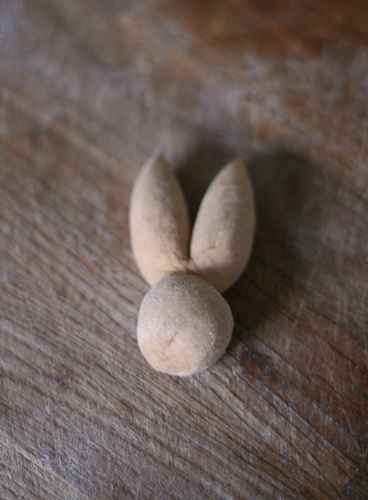
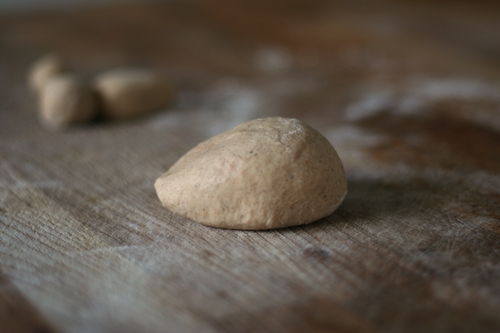
Divide each portion of dough into 3 – about 5g for the tail, 1/3 for the head/ears, and 2/3 for the body. Roll all three into smooth balls. Roll the medium ball into a sausage shape as above.
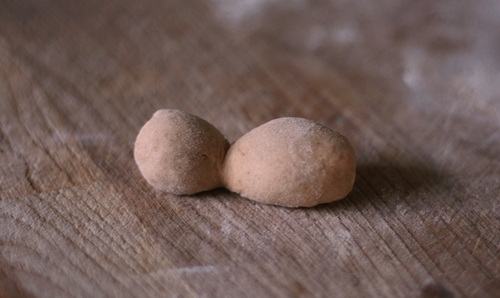
forming ears
Hold your hand as if you were going to do a karate chop, and roll the bottom edge of it back and forth over the sausage of dough, about 1/3 of the way from the left. The smaller portion of dough will form the head, and the remainder the ears.
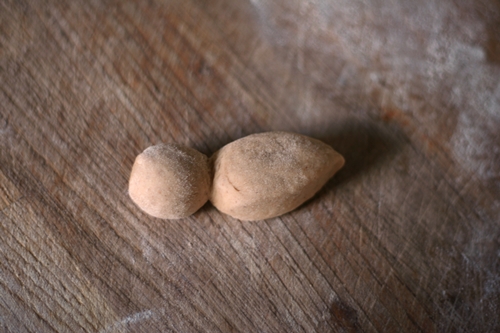
Shape the 'ears' portion by flattening it slightly and adding a point at the end. It will be roughly leaf-shaped, whilst the 'head' portion remains rounded.
Shape the ‘ears’ portion by flattening it slightly and adding a point at the end. It will be roughly leaf-shaped, whilst the ‘head’ portion remains rounded.
Using a sharp knife or the edge of a scraper, divide the ears by cutting down the middle of the dough.
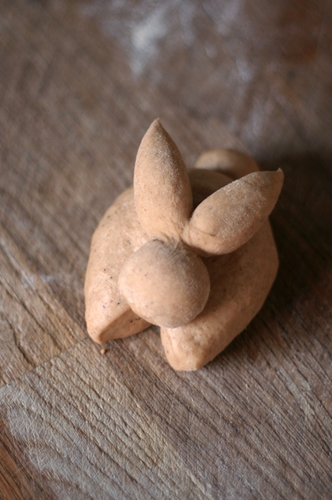
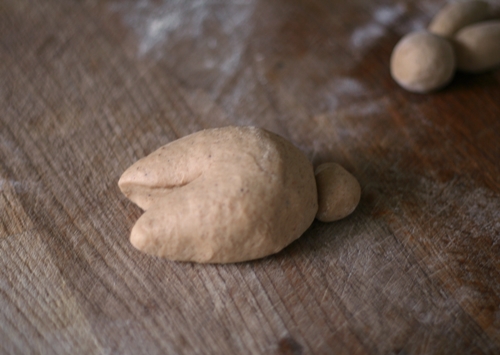
Shape the body. I pondered long and hard how to describe the shaping of this piece of dough, until I had a brainwave: make it into the shape of a computer mouse. Vaguely oval, with the back end higher and rounded and the front sloping downwards.
Using a little dab of water, attach the tail. Shape the two front paws by cutting approx. 1/3 of the length of the dough, dividing the front part into 2, just like with the ears.
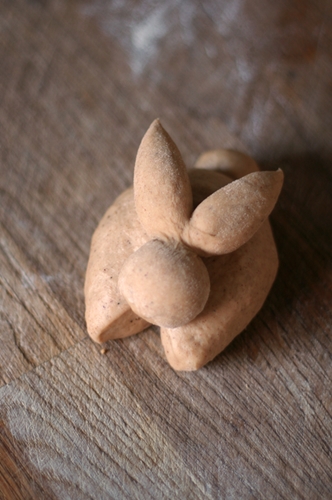
Raw honey dough bunny
Add another dab of water to moisten and lay the head/ears onto the body.
  • Set the buns onto a baking sheet lined with baking parchment while the oven heats up.
  • Heat the oven to 180°C, 160°C Fan.
  • I opted not to glaze the dough, but if you prefer to, brush with milk and/or egg yolk.
  • Bake for 20 minutes, turning the baking tray around 180 degrees after 10 minutes to ensure even baking.
  • Leave cooked buns on the baking sheet and cover with a clean cloth to cool. This will help to keep the crust soft.
  • Eat warm, either as is or with butter.

Radnor Cranberry Tart

If you have an extended social life in the run-up to Christmas, and sample nothing but mince pies throughout December, by the time you get to the 25th, what with the Christmas Cake and Christmas Pudding, you can be all mince-pied out.

Also, sometimes you find yourself fancying something a little savoury at the end of a meal, and this is why this recipe is perfect. It’s simple and straightforward – just two main ingredients of fresh cranberries and juicy raisins. The raisins take the edge off the sometimes eye-popping sharpness of the cranberries and the little dash of vanilla also gives the aroma of sweetness, so only the merest sprinkle of sugar is required. It’s festively reminiscent enough of a mince pie to deserve a place on the table, its fresh-tasting, palate-cleansing, sweet but not too sweet, can be served hot or cold, but ALWAYS with a slice of cheese. I’m thinking some vintage cheddar, crumbly white Cheshire or even one of the fruited cheeses – white Stilton and apricot anyone?

It is a traditional (Welsh) border tart, ideal for Christmas – just look at that glorious colour! The original 1930s recipe in Mrs Arthur Webb’s Farmhouse Cookery didn’t specify any particular pastry, so I’m taking the opportunity to offer for your delectation and amusement, a new pastry recipe! Yes, I know I love the cornflour pastry – and I really do, both sweet and savoury versions – but I can’t resist something that has the potential to add a new arrow to my pastry quiver, as it were, and in this case, I’m really glad that I did.

It’s Eliza Acton’s 1845 recipe for cream pastry and it has my seal of approval for several reasons:

  • Simplicity – in its basic form, it can be whisked together with just two ingredients.
  • Taste – when baked, it is crisp and dry, without any hint of greasiness or stodginess.
  • It can be enriched with butter, but at a ratio of just 1/4 fat-to-flour, it is not as indulgent as it tastes. When enriched with butter, the texture is moving towards the flakiness of flaky pastry, yet with the ‘dryness’ and crispness of the cornflour pastry – Nom!
  • And on the practical side, it handles and rolls really nicely.

You can, of course, use your own favourite pastry instead.

Radnor Cranberry Tart

Eliza Acton’s Cream Pastry
This quantity makes enough for a 20cm pie.

225g plain flour
0.5tsp salt
300-450ml double cream
56g butter

  • Put the flour and salt into the bowl of a food processor.
  • With the motor running, gradually add in the cream, a little at a time, until the mixture comes together.
  • Tip the mixture out and knead until smooth.
  • Roll out the pastry into a long rectangle.
  • Using the same method as for Flaky Pastry, dot over half the butter.
  • Fold the ends over, turn the pastry 90 degrees and repeat.
  • Roll out one last time, and fold the ends inwards.
  • Wrap in plastic and chill in the fridge for 30 minutes.
  • Make the filling (see below).
  • Remove the pastry from the fridge and cut into 2 pieces (2/3 + 1/3 is about right).
  • Roll out the large piece and use it to line a greased, 20cm loose bottomed tart tin. Ease the pastry into the sides, rather than just stretching it by pressing down too hard. Leave the excess hanging over the edge of the tin.
  • Roll out the smaller piece of pastry to make the lid, and lay it onto a cutting board.
  • Chill both pieces of pastry in the fridge for 20 minutes. This will make sure it is relaxed and less prone to shrinkage in the oven.
  • By this time, the filling should be cool enough to use.
  • Preheat the oven to 200°C, 180°C Fan.
  • Remove the two lots of pastry from the fridge.
  • Fill the lined tin with the cooled filling and smooth over.
  • Using a pastry brush, wet the edges of the pastry, then lay the lid across the top and press the edges together.
  • Trim off the excess using the back of a knife.
  • Crimp the edges to your liking – I used the tines of a fork to make for a good seal.
  • Brush the surface of the tart with milk and sprinkle with caster sugar.
  • Cut a steam vent in the middle of the pastry lid using a sharp knife.
  • Bake for 25-30 minutes until the pastry is crisp and golden brown.
  • Allow to cool for 10 minutes in the tin, then remove to a wire rack to cool, if not serving warm.
  • Serve with a nice wedge of cheese.

Filling
450g fresh cranberries
225g raisins
30g sugar
60ml cold water
0.5tsp vanilla extract

  • Rinse the cranberries and put them in a pan with the raisins, sugar and water.
  • Cover and warm on a low heat until the mixture comes to the boil and you can hear the cranberries starting to pop.
  • Simmer for just five minutes, then turn off the heat.
  • Taste to make sure of the sweetness, but remember, this is not supposed to be a really sweet tart, however, it shouldn’t be too sour either. If you think it needs a little more sugar, add it by all means.
  • Stir in the vanilla and leave to cool.

Orange Blossom Tart

Here’s a wonderfully aromatic and delicious dessert that I have adapted from a recipe that appears in Hannah Glasse’s “The art of cookery, made plain and easy”. It must have been popular, because Hannah gives no fewer than four recipes for Orange Pudding, each slightly different. Copyright infringement back then being rife, it is highly likely that Hannah is not the original author of this recipe, but I have yet to find an older version with these particular ingredients.

Hannah calls this a pudding – and indeed it is certainly something that you might eat after lunch or dinner, but it is in fact what we would term a tart, and I can honestly say it is unlike any tart I’ve ever tasted before, for the very best of reasons.

The most striking aspect is the flavour – a mixture of Seville orange, orange flower water, rosewater and white wine. Rather surprisingly, the word that popped into my head when breathing in its aroma was ice-cream – and that was before it was cooked! Once cooked and chilled, the flavours mingle together and taste extraordinary – the only way I can think to describe it is like plunging your face into a bunch of fresh flowers – but in a good way! This isn’t soapy/perfumed – it’s light and fresh and rounded. None of the flavours overpower, it’s just fantastically floral.

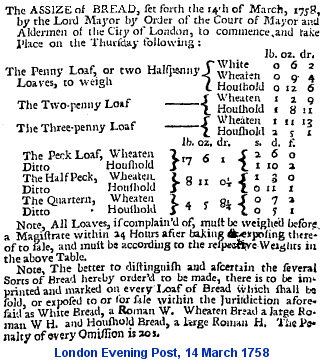
One of the challenges when adapting old recipes, is that specific quantities are sometimes a bit of a challenge. This recipe is a good example, because amongst other things it calls for “the crumb of a halfpenny loaf”. Although food prices were relatively stable before the industrial revolution, wheat, and by extension bread, was especially subject to price fluctuations due to harvest yield. So much so, specific laws were created concerning the manufacture and sale of the various types of bread (The Assize of Bread) and books of tables drawn up specifying the size of loaves depending on the cost of wheat.

Even with the Assize of Bread tables to hand, it’s still not clear which loaf the crumb should come from: white, wheaten or household. Household bread was the coarsest, and therefore unlikely, I reasoned, to have been used for such a delicate dessert. That left either white or wheaten and at just over 6oz and 9oz for a penny loaf, the difference in the quantity of crumb was going to be significant. The only solution was to make two tarts, and try each to see if one quantity was more suited than the other.

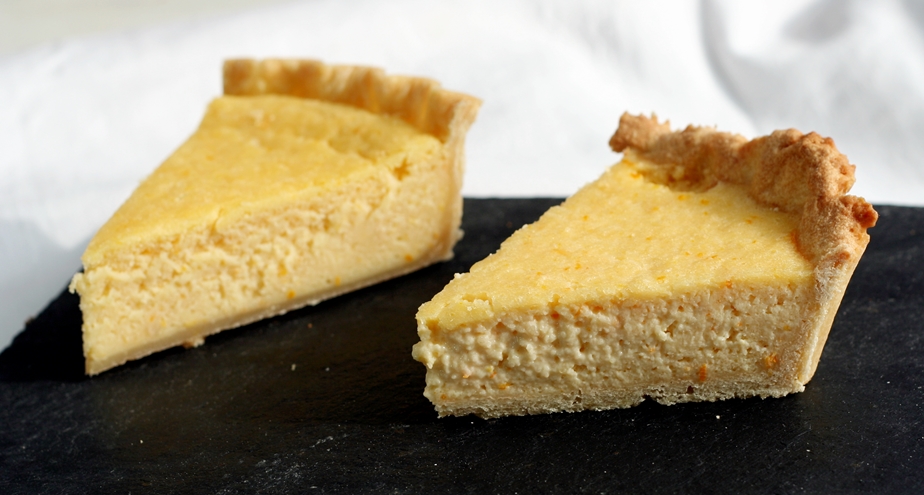
The photograph at the top shows the result. The slice on the left was cut from a tart made with 150g fresh white breadcrumbs. The slice on the right from a tart made with just 100g. Personally, I prefer the one on the left – the texture is like baked cheesecake, but not heavy and cloying. The slice on the right has a much softer consistency – if you’re a fan of baked custards, then this is the one for you. For an even more delicate texture, you could even try with just 50g of breadcrumbs – do let me know if you try this!

This is a wonderful springtime tart and I really hope you’ll give it a try.

Orange Blossom Tart

Sweet Shortcrust Pastry
225g plain flour
140g butter
60g cornflour
85g caster sugar
1 large egg
grated zest of 1 lemon
ice cold water
egg-white for glazing

  • Put all the ingredients except the water into the bowl of a food processor and blitz until the mixture comes together in a ball.
  • If the mixture is too dry, add some ice cold water 1 tablespoon at a time until the pastry forms a ball.
  • Tip the mixture onto a floured surface and knead smooth.
  • Wrap in plastic and chill for at least 30 minutes.
  • Grease a 22cm fluted, deep, loose-bottom tart tin – a lemon meringue tin if you have one, is ideal.
  • Remove the chilled pastry from the fridge and place on a floured surface.
  • Roll out thinly (7-8mm) and line the prepared tin, gently easing the pastry into the sides.
  • Let the excess pastry hang over the sides of the tin for now.
  • Prick the bottom of the pastry with a fork and put the lined tin back into the fridge to chill for another 30 minutes.
  • Preheat the oven to 200°C, 180°C Fan.
  • Remove the tart from the fridge and trim the excess pastry. Don’t remove too much – allow 3-4cm to overhand the side of the tin – this keeps the pastry from shrinking back into the tin and can be trimmed after cooking.
  • Line the pastry with baking parchment and fill with baking beads/beans/rice.
  • Bake for 12 minutes, then remove the parchment and beads and bake for another 5-6 minutes until the pastry is cooked through.
  • Brush the inside of the pastry with lightly beaten egg-white and return to the oven for 5 minutes. This seems like a faff, but it will ensure you pastry is both cooked AND resistant to the wetness of the filling until it is cooked. *lying* I deliberately undercooked the pastry on the left in the photo to demonstrate.

Filling
150g fresh white breadcrumbs
250ml double cream
75g caster sugar
5 large egg yolks
60ml white wine [1]
1 tablespoon orange flower water [2]
1 teaspoon rose water [2]
zest and juice of a Seville orange [3]
70g clarified butter – melted

  • Mix all of the ingredients together in a bowl and set aside to let the flavours mingle. It will have the consistency of porridge.
  • When the pastry base is finally cooked, turn the oven down to 160°C, 140°C Fan.
  • Cover the top edges of the pastry with tin foil, to prevent them from burning.
  • Pour the filling into the cooked pastry case and bake for 25-30 minutes until the filling is set. There should be a slight joggle to the middle of the tart, but nothing too fluid.
  • Set aside to cool for at least 1 hour.
  • When cold, trim off the excess pastry, remove from the tin and place on a serving plate.
  • Eat slightly warm or at room temperature. Alternatively (and my own personal preference) chill thoroughly in the fridge for at least 5 hours.

[1] The original recipe called for sack, a fortified wine similar to sweet sherry. You could use sherry, madeira even marsala if you like. Whilst I love the flavours of all three, I thought them a little rich for this recipe, so I chose a regular white wine. A sweet and aromatic dessert wine would also be delightful.

[2]Both of these fragrances are available in the baking aisle at the supermarket. They also tend to vary greatly in strength and aroma according to which brand you use. The original recipe called for equal quantities of both, but the rosewater I use is rather strong. In contrast, the orange flower water that I use is rather lightly perfumed, so I used slightly more. if you use different brands, my advice is to use just 1 teaspoon at a time and taste as you go until you’re happy with the flavourings.

[3] If, like me, you made Seville orange ice cubes with the zest and juice back in January, then all you need is one cube. If not, then use the zest only of a sweet orange, together with the zest of either a lemon or lime for added sharpness.