Cookeels

I have a ‘lost’ recipe for you today – a spiced bun that has been known about, recorded and discussed for over 200 years, but for which there has been no recipe. Until now.

British Popular Customs, Present and Past; Illustrating the Social and Domestic Manners of the People: Arranged According to the Calendar of the Year
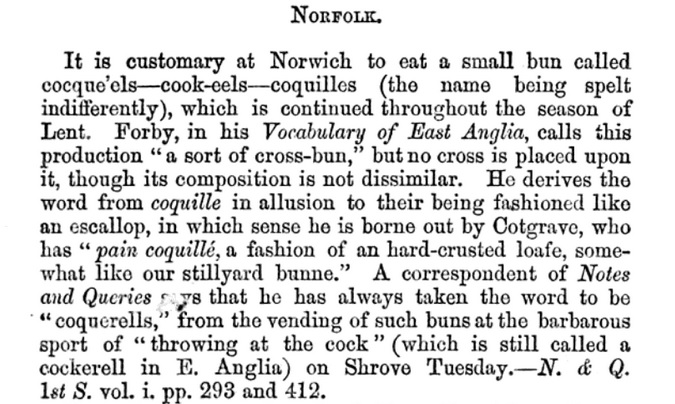
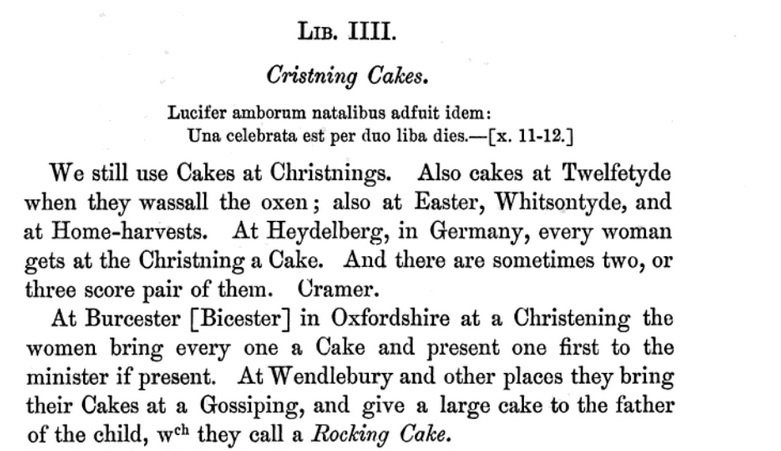
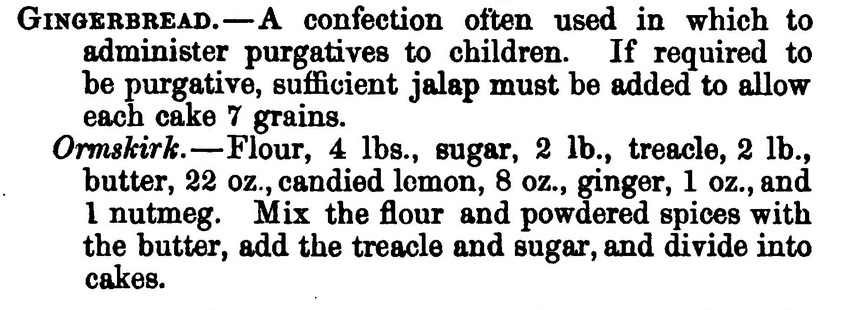
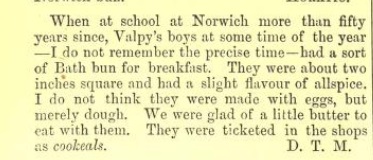
By Thomas Firminger Thiselton Dyer · 1876 p81

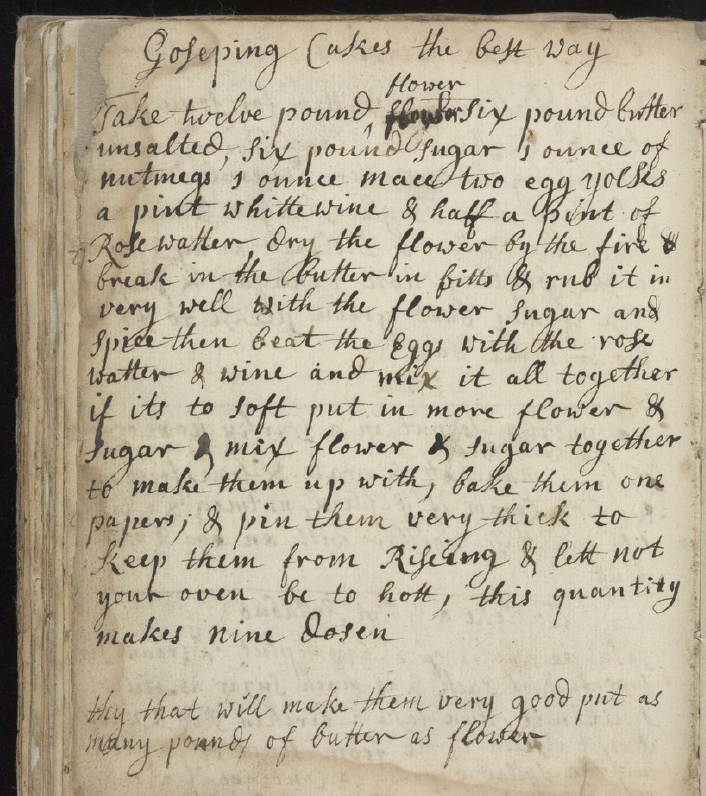
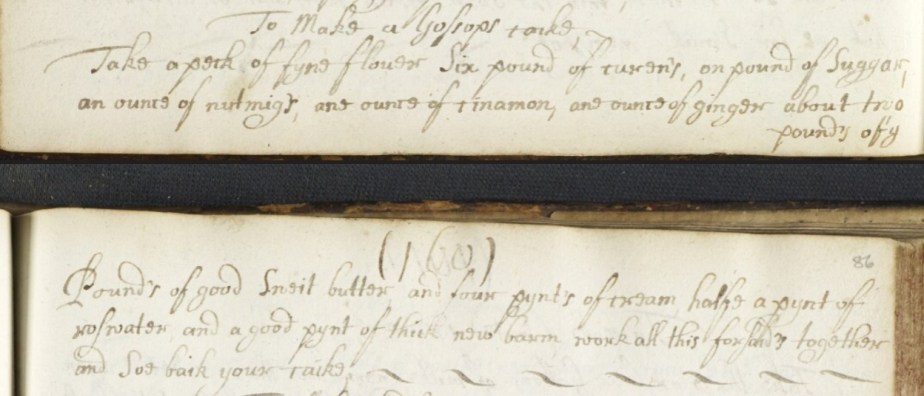
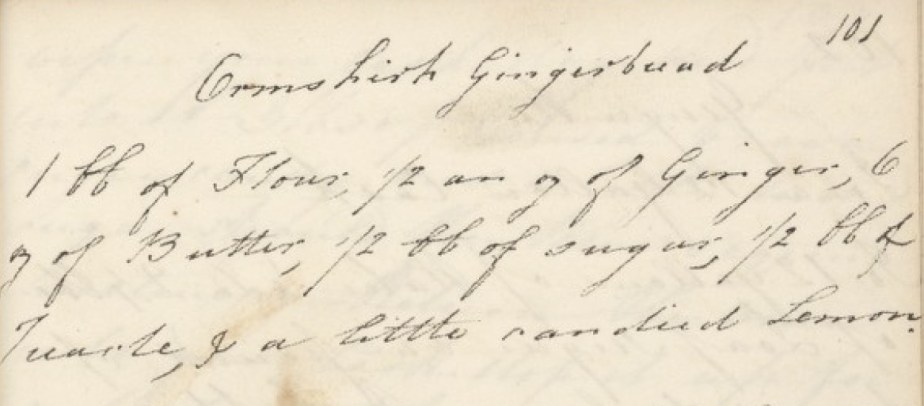
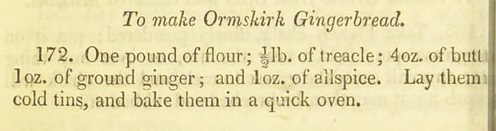
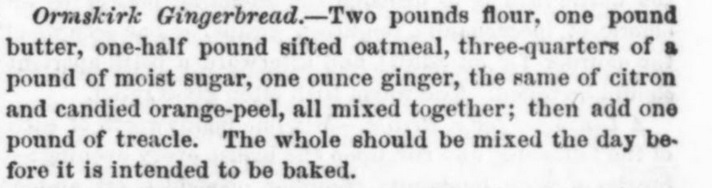
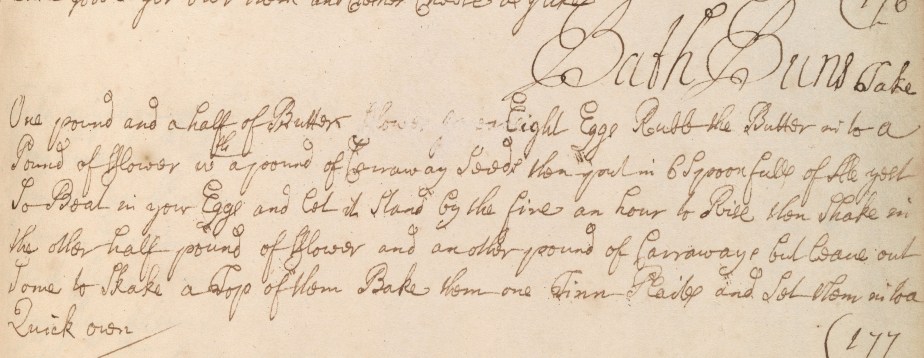
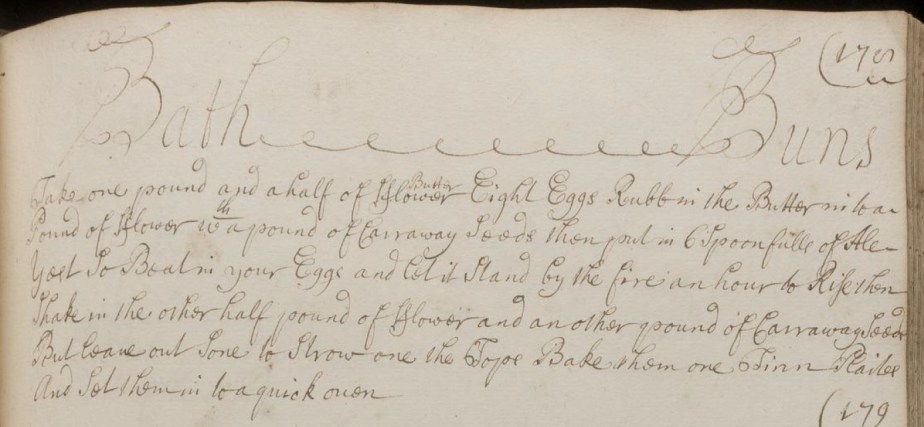
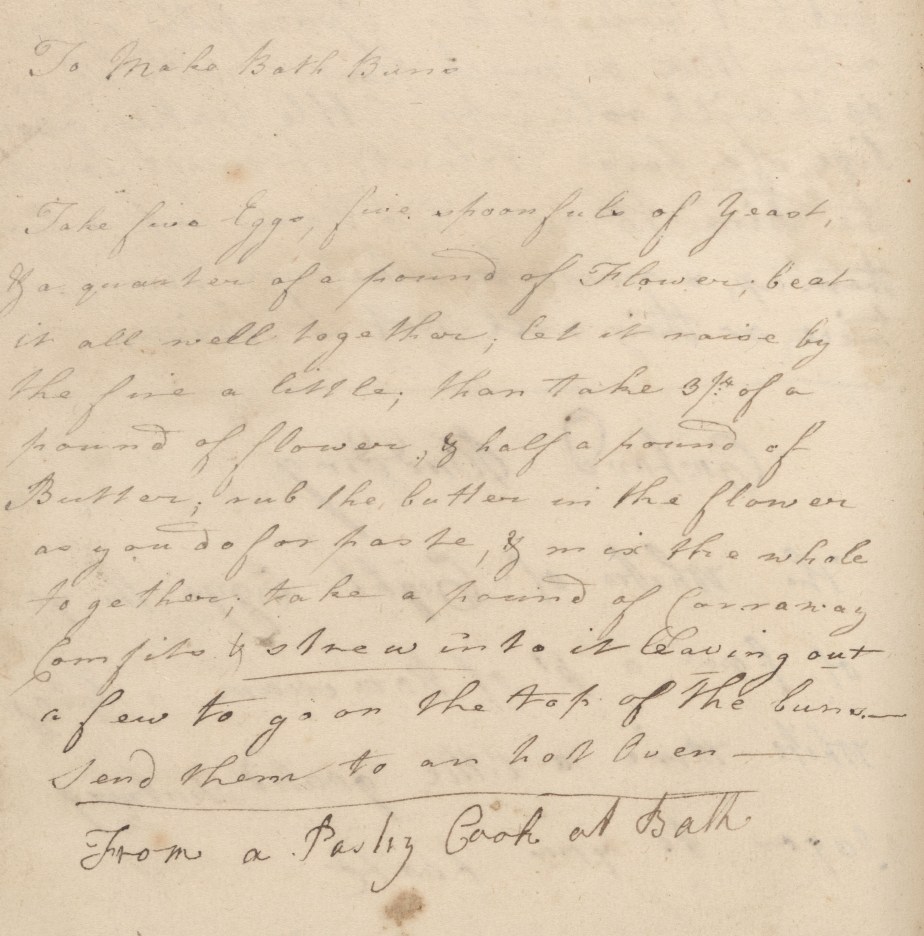
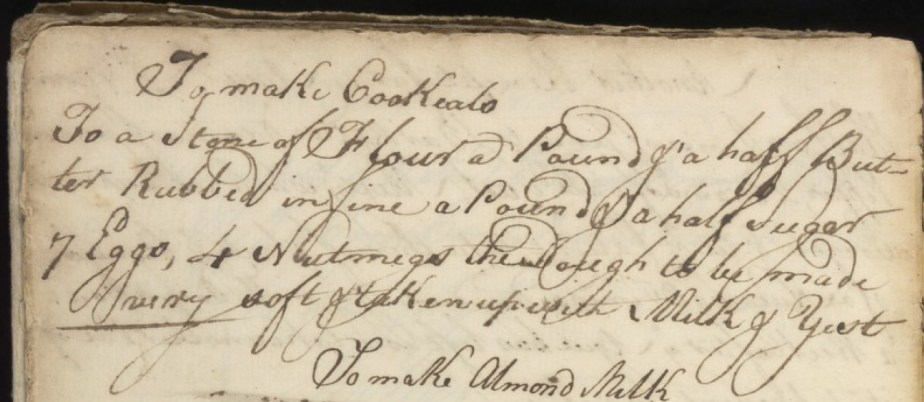
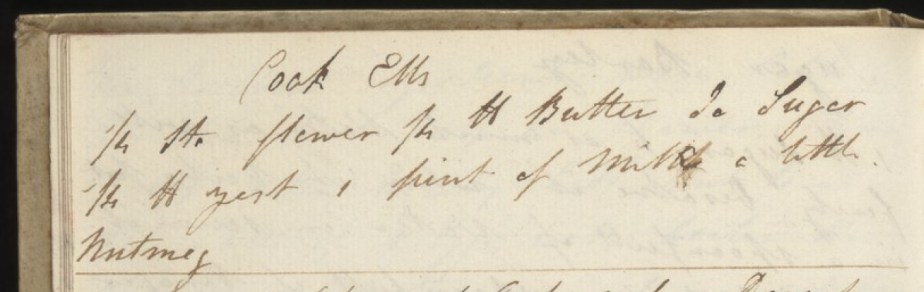
As luck would have it, I found not one but two recipes buried in the handwritten manuscripts held by The Wellcome Collection.

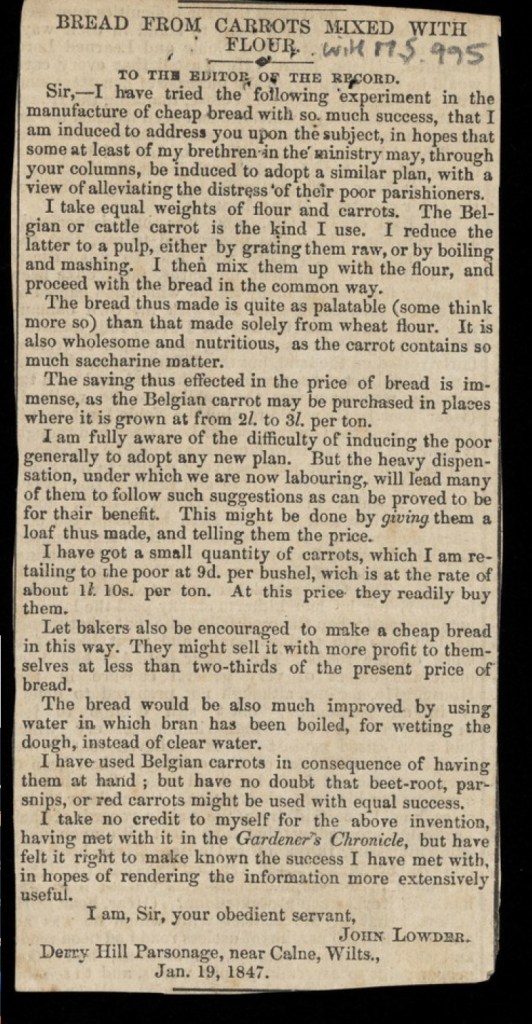
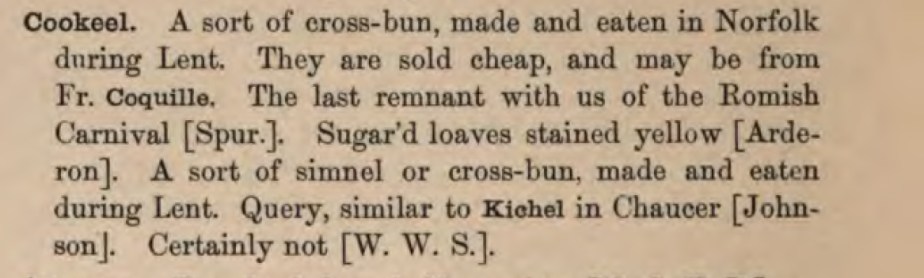
The earliest mention of Cookeels is found in Robert Forby’s The Vocabulary of East Anglia.

Cookeel: A sort of cross-bun, made and eaten in Norfolk during Lent. They are sold cheap and may be from Fr. Coquille.
The Vocabulary of East Anglia, Robert Forby, 1830, p76.

This definition is expanded upon throughout the nineteenth century as more and more academics weigh in with their opinion.

From “A glossary of words used in East Anglia, founded on that of Forby”, p46, Walter Rye, 1895, London
Notes and queries, Fifth Series, Volume Ninth, 1878, Jan-June, London. p87
Notes and queries, Fifth Series, Volume Ninth, 1878 Jan-June, London. p152

Something that became more and more apparent, is the somewhat lackadaisical approach to the spelling of these baked items. This is also true of the names of the two manuscript recipes, to whit Cookeals and Cock Ells:

MS7850, Anonymous manuscript circa 1745, Wellcome Collection

MS7834, Anonymous 19thC manuscript, Wellcome Collection

Confession time, I do like to get the the truth of the matter when it comes to recipe names and history. Love a great backstory, cannot be doing with made-up rubbish. So with all these different names, I decided to drill down and see if I couldn’t get to the bottom of it all (this phrase will come back to haunt me shortly).

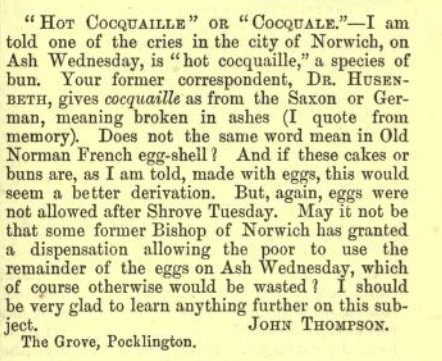
I don’t think there’s much merit in the name deriving from the French ‘coquille’ (shell): there’s no hard crust, due to the butter, milk and eggs, and no mention of them being shell-shaped. Similarly, I think naming them after the cockfighting pits is also a bit of a stretch. The various accounts seeme to waver between Cockeel and Cookeel, and neither of the handwritten recipes offer any definitive help.

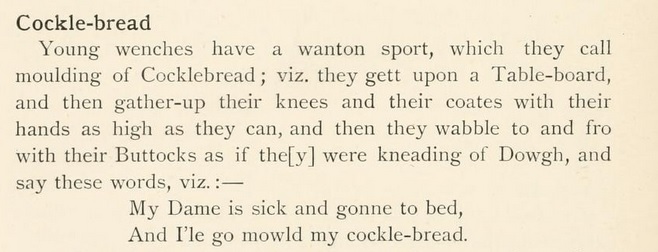
Playing around with the spelling, it turns out that Cockle bread is a thing:

“So far back as the time of Henry III., we find mention made of wassel bread, cockle bread and bread of treet corresponding with the three sorts of bread now in use, viz. white, wheaten and household bread.”

The Englishwoman’s Domestic Magazine, Vol. 1, No. 1, p157, 1852.

Cocklety bread has also been recorded in playground chants:

“The term ” Cockelty ” is still heard among our children at play. One of them squats on its haunches with the hands joined beneath the thighs, and being lifted by a couple of others who have hold by the bowed arms, it is swung backwards and forwards and bumped on the ground or against the wall, while continuing the words, “This is the way we make cockelty bread.”- -Robinson’s Whitby Glossary, p. 40.”

“The traditional games of England, Scotland, and Ireland” 1894-1898, Alice Bertha Gomme, p75

Delighted with this quaint image, I pursued Cockle Bread further – and immediately regretted that decision.

“The traditional games of England, Scotland, and Ireland” 1894-1898, Alice Bertha Gomme, p74

And before I knew it, I was learning that as an extension of this ribaldry, sometimes dough was actually kneaded this way, and then baked and fed to the person whom the girl wished to enamour.

ANYHOO……..Spice buns!
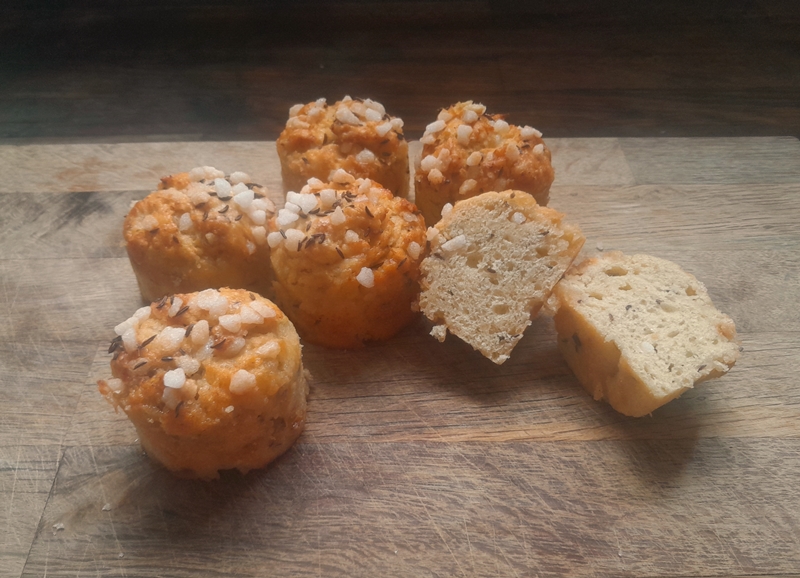
Cookeels

Makes 16

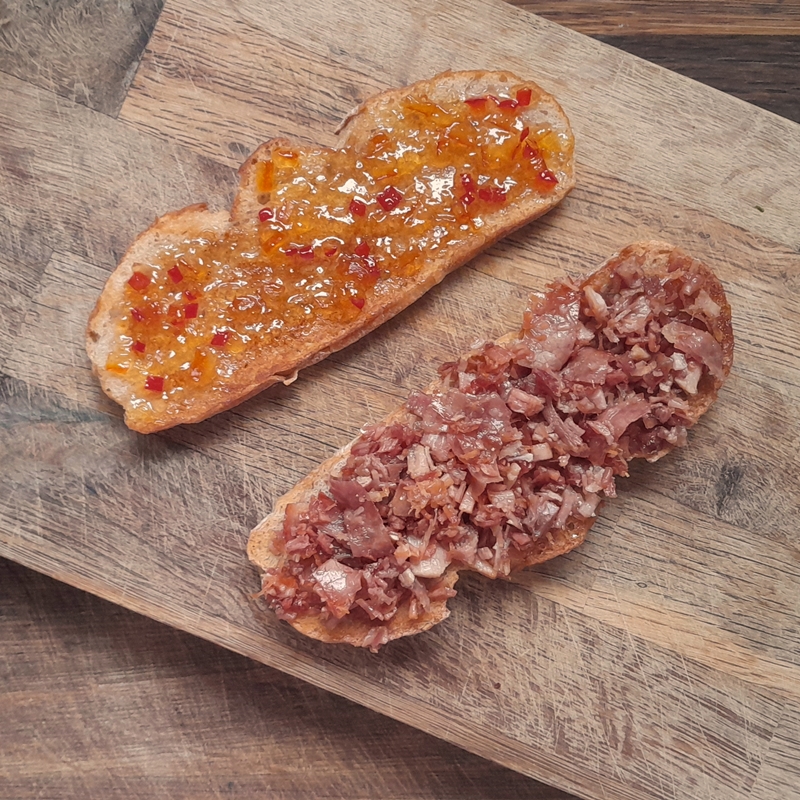
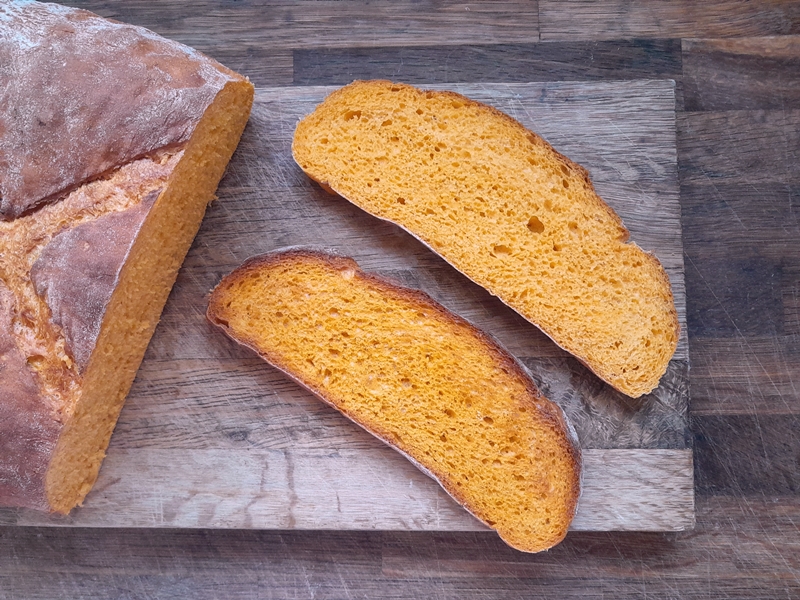
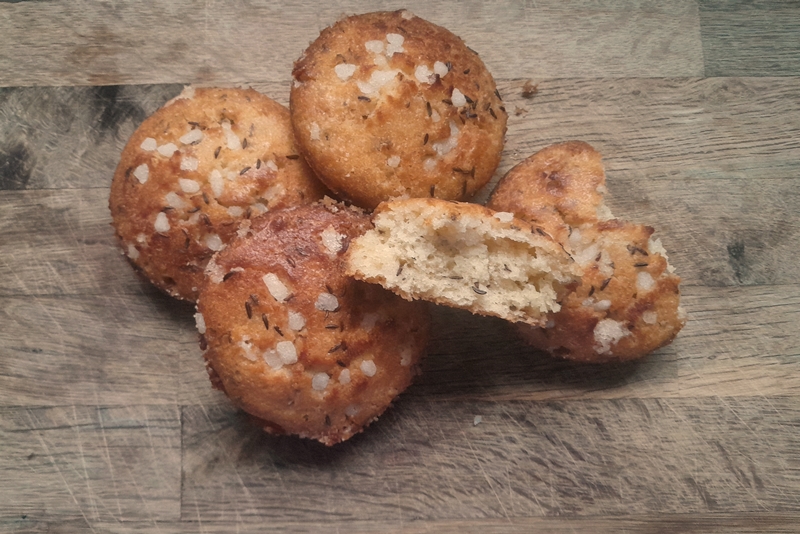
These soft, pillowy buns were enjoyed throughout the season of Lent. Unlike the more famous Good Friday buns, they contained no fruit and neither were they marked with a cross. One of the above anecdotes mentioned allspice as a seasoning, but neither of the recipes do, so we’re going to stick to nutmeg. Usually mixed with several other spices, the fact that these buns have just a single spice adds to their appeal. The enrichment of the egg, milk and butter makes the dough exceedingly soft and the baked bun incredibly tender of crumb. Delicious warm from the oven and freshly buttered, you can also enjoy them toasted with butter and cheese.

150ml water
150ml milk
1 large egg
100g butter
100g caster sugar
pinch of salt
450g strong white flour
2tsp ground nutmeg
1 sachet fast-action yeast

1 large egg yolk
2-3tbs milk

  • Put the dry ingredients into a food processor and blitz until the mixture resembles breadcrumbs.
  • Tip the mixture into a mixing bowl.
  • Zap the water in the microwave for 1 minute. This should heat it but without boiling.
  • Pour the milk into the hot water and stir. It should now be warm. Add the egg to the warm milk mixture and whisk thoroughly.
  • Pour the milk mixture into the other ingredients and mix until the dough comes together. It will be very soft – too soft to knead – but it will become manageable once risen.
  • Cover the mixing bowl with plastic wrap and set aside in a warm place to rise for 1 hour.
  • Cover a large baking tray, or shallow oven shelf for preference, in baking parchment.
  • Once the dough has risen, dust your work surface well with flour.
  • Tip the dough out onto the flour and pat gently to deflate. Dust the surface with flour, then, with the help of a dough scraper, lift and fold the sides inwards and pat down. Continue the dusting and folding until the dough is firm enough to handle. The first time I made this, I put too much liquid in, but it only took three lots of folding to make it manageable.
  • Pat the dough into a square. it will be roughly 20cm, but if it’s larger, that’s fine.
  • Cut the dough into 16 pieces. The easiest way is to cut your square of dough into quarters, then cut each quarter into four.
  • For each piece, fold in the edges of the dough, flip it over and roll into a ball under your hand.
  • Set the shaped dough onto your prepared baking sheet. The dough will spread during rising/baking to the size of a teacake, so space them well apart (7-8cm).
  • When all the dough has been shaped, cover lightly and set aside to rise for 30 minutes.
  • Heat the oven to 180°C/160°C Fan.
  • Whisk together the egg yolk and the milk and brush this glaze over your risen buns. You can use just milk if you prefer.
  • Bake your buns for 20 minutes, turning the baking tray/shelf around after 10 minutes to help with even colouring.
  • Remove from the oven and immediately cover with a clean cloth. This will trap the steam and ensure your buns are soft and pillowy when cooled.
  • Store in an airtight container when cold.

Fried Bread and Marmalade

In the old days, when religious observance was a greater part of daily lives, as Lent approached, efforts were made to use up larder items in preparation for the coming period of abstemiousness. Bacon and eggs were eaten on Collop Monday, Pancakes (using the resulting bacon grease) were enjoyed on Shrove Tuesday, and Lent itself began on Ash Wednesday.

In the past few weeks I have been looking through various manuscript sources in order to find a shiny, new old pancake recipe for you to try, but, alas, my efforts have been thwarted at every turn due to the adorable (!) British quirk of different regions giving a specific dish their own local name.

I scrolled through the thousands of recipes in my spreadsheets and compiled the following list to look at in more detail:

  • Court pancakes
  • Million pancakes
  • Pancake pudding
  • Pancake wafers
  • Paper pancakes
  • Temple pancakes
  • Creeping pancakes

In Every. Single. Case. they turned out to be variations of the recipe most popularly known as A Quire of Pancakes: lots of small, thin, rich, cream-based pancakes stacked in a pile, with sugar strewn between each layer, and served like a cake slice (see image below).

Quire of Pancakes, 1714

So I’ve decided to go in a completely different direction and bringing you a recipe for Collop Monday, or alternately Shrove Tuesday breakfast, and in doing so, recording for posterity a dish I know my mother ate in her childhood: Fried bread and Marmalade.

When I first heard of this as a child myself, I thought it sounded awful, but as an adult, I have come to appreciate the delicious interplay of salty, sweet, bitter and smoke.

Slices of bread were added to the pan after bacon was fried and mopped up the remaining fat and in the process become toasted from the heat of the pan. They were fishes out and spread with marmalade and handed to my mother and her siblings.

Many modern packs of bacon, especially at the lower prices, are injected with water to artificially plump up the weight. When fried, it splutters and spits and seeps a milky liquid that is visually very unappealing. Back in the day – we ‘re talking 1930s here – the bacon would have been purchased from the butcher by the slice, possibly even home-cured by the butcher himself, and the dry-brining method employed drew out moisture from, rather than injecting it into, the slabs of belly pork used for bacon. In the pan the fat would render down into a clear liquid, filled with the smoky, salty flavour of the bacon. When cold, the fat would solidify and could be kept for use, but if this were impractical (it not yet being the age of ubiquitous refrigeration in the home) to use it up at once, it was easy to mop up the fat with slices of bread, which then became imbued with this flavour bomb as an alternative to the (more expensive) butter. It is easy to overdo the bacon fat, and it doesn’t take much for the bread to become overly greasy, so marmalade was a perfect foil to combat this: the bitterness of the Seville oranges and the sweetness of the jelly providing delicious contrasts to the hot, crunchy, salty, smoky bacon fat.

Back then, this snack was born from frugal-by-necessity living. My mother grew up in a one-income household. Nothing was left to waste. But that’s not a reason not to enjoy it today. And additionally, the level at which you enjoy it is completely adaptable – from simple to complex, the components are almost infinitely customisable according to what you have in the cupboard/fridge.

  • The Bread: Whatever you have to hand, or prefer: brown, white, pre-sliced, hand-sliced, doorstep, gluten-free, rye, sourdough… you get the idea.
  • The Bacon Fat: Kinda non-negotiable. I learned recently that Bacon grease is available to buy by the tub in the USA, and in checking online for this post I am slightly horrified to find a 9lb bucket now available to buy in the UK. If you’re a fan, then go for it, but my approach here is to be much smaller in scale – get your bacon fat from cooking bacon. Dry-cure bacon will render pure bacon fat without any white residue.
  • The Marmalade: Regular listeners will be aware of my keenness at the moment to find ways to use the various marmalades I have on hand after entering The Marmalade Awards this year. I have an embarrassment of riches on that score, but any marmalade will suffice. Use whatever you have and like. In the photographs I’ve gone with the Chilli Marmalade I made this year – classic Seville marmalade with fresh red chillies – it looks so pretty with the red flecks of chilli pepper, and the spiciness pairs well with the bacon.
  • The Bacon: Optional. If you want a more substantial snack, tuck in a few slices of your favourite. Smoke, unsmoked, back bacon, streaky bacon, gammon, ham… it’s all delicious.

Fried Bread and Marmalade

Slices of bread
Bacon fat (from dry-cure bacon/gammon)
Marmalade of choice
Bacon (optional)

  • I’m going to stray a little from the traditional preparation method. As mentioned above, the traditional method is to turn the slices of bread over in the fat in the pan, until they have both absorbed the fat and become toasted. Which is fine. Except it’s difficult to get an even colour on the bread – at least so I find. Also, I dislike having greasy fingers from the bread being fried on both sides, so I’m going to suggest the following:
    • Toast the bread in a toaster/under a grill, then spread the solidified bacon fat onto the hot toast with a knife, like butter. This way the toasting of the bread is even, it stays dry on the outside for cleaner eating, and you can easily control the amount of bacon fat used. If your bacon fat is still hot in the pan, use a pastry brush to dip in and then brush over the surface of your toast.
  • Spread your choice of marmalade onto the non-dry sides of the toast.
  • Add your bacon – or not – and enjoy.

Carrot Bread

Personal recipe books can be quite eclectic in the mix of recipes the owner chooses to include. Quite apart from the recipes they (or if you’re a wealthy noblewoman, your scribe) include, there can also be hurried notes scribbled down on scraps of paper or the backs of envelopes, letters and cards answering requests for recipes, as well as clippings from newspapers and magazines.

This recipe was found between the pages of Catherine Ashley’s household book, dated circa 1830 (MS.995, held by The Wellcome Collection). It had been clipped from The Record, a twice-weekly religious newspaper, in January, 1847. The author, The Rev. John Lowder, had experimented with using carrots to make bread after reading an article in The Gardeners’ Chronicle in December 1846. He wrote to the editor of The Record in the hope that by sharing his findings, his clergy brethren might find the results useful for their own poor and needy.

The article in The Gardeners’ Chronicle had detailed an open correspondence between The Right Hon. T.F.Kennedy, Paymaster General for the Irish Civil Service and Henry Labouchere, the then Secretary of State for Ireland in the government of Lord John Russell (1846-1852). In it, Kennedy suggested that experiments done in Austria on the supplementing of flour with beetroot to make bread might help with the (then early stages) of the potato disaster in Ireland. Growing beetroot on just one acre, he maintained, would produce a crop of £30 value, with a clear profit of £15 to the grower, and provide valuable supplementary nutrition  to the Irish poor, being of a much higher value than potatoes. Although noble, this idea falls at the first hurdle because the poor in Ireland were eating potatoes precisely because they did not have access to the flour needed for this scheme to work.

Parsnips were also used in experiments and were deemed excellent, but carrots were not, with the reason being given as carrots were “much less palatable.”

Enter the Rev. Lowder with his own efforts, whereby he succeeded in producing delicious carrot bread by cooking and pureeing the carrots first, whereas the original experiments had been done by grating the raw vegetables.

The recipe is simple: equal weights of (pureed, cooked) carrot and flour mixed together, and then continued with the usual bread-making method. I thought this almost too good to be true and put it to the test by adding only salt and yeast. The result is the loaf picture above. I added no water, bar the 2-3 tablespoons of carrot water needed to get the carrots pureed. In all honesty, it looked too moist in the initial mixing, but I had faith and decided to wait and see what the first rise made of it. The resulting dough after an hour was gloriously light and very lithe and needed only the briefest of shaping before putting it into a 20cm/8″ square tin. Another rise of 30 minutes was followed with a 40 minute bake. The loaf was cooled on a rack overnight before being sliced.

I appreciate that the use of white bread flour is probably of a finer quality than that employed by the good Reverend Lowder in his experimentation, but I made that call in order to give the recipe its best chance of success.

Shortly after this recipe was published (1848) Reverend Lowder moved half a world away, with his wife and five children, to China, after being appointed Chaplain of Shanghai. Heartrendingly, he would perish in a swimming tragedy shortly thereafter (September, 1849) at the age of just thirty-nine.

Carrot Bread sliced – plain (top) and toasted (bottom)

As can be seen in the photo above, the colour of the crumb is glorious. Given the vibrancy, it’s surprising that there isn’t more carrot flavour. The texture is soft, with a slight chew, similar to potato bread. When toasted, the colour changes very little – the darkening of the crust around the edges being the main indicator. There is a suspicion of roasted carrot in the flavour, and if you’re eating it with anything other than butter, you might miss it altogether. Overall, I’m really liking this new (to me) recipe – it will definitely be making a regular appearance in this household.

Carrot Bread

Since proportions of flour and carrot are the only specifications, although I’ve not tried it yet, I see no reason why carrots left over from a previous meal might not be successfully used in this recipe, adding plain water if necessary for a smooth puree. If the total of puree + flour is less than 700g, then only one sachet of yeast would be needed, and half the salt. Some accent spices could also be added, such as caraway or cumin seeds.

500g carrots, peeled and sliced
500g strong white flour
10g salt
2 sachets fast action yeast

  • Put the carrots into a saucepan, cover with water and bring to a simmer.
  • Cook until tender all the way through – between 20-30 minutes, depending on the size of the carrot pieces.
  • When cooked, strain (reserving the liquid) and puree in a liquidiser or using a stick blender. Add a little of the cooking water if the carrots aren’t blending easily.
  • When pureed and smooth, set aside for 10 minutes to cool slightly, in order to not adversely affect the yeast.
  • When just warm, put the carrots and the rest of the ingredients into a bowl and bring together as a dough. Knead either by hand or using a dough hook for 10 minutes.
  • Cover and allow to rise for 1 hour.
  • Tip out the risen dough onto a lightly floured surface and gently deflate.
  • Shape and add to your tin of choice. I used a 20cm/8 inch square tin lined with baking parchment. If you use a different shaped tin, you might have to adjust the cooking time accordingly.
  • Allow to rise for a further 30 minutes.
  • Heat the oven to 220°C/200°C Fan.
  • Just before putting your loaf in the oven, cut some slashes in the top crust to prevent it rising  unevenly during the initial ‘oven spring’. Bake for 35-40 minutes until well risen and with the crust firm. You might want to remove your loaf from the tin and return it to the oven to bake for another 5-10 minutes in order to really crisp up the crust.
  • Cool on a wire rack.
  • Slice when cold.

Marmalade Cake

The recipe I have for you today comes from the classic and ever-reliable Be-Ro baking booklet.


My copy dates from somewhere between 1930 and 1950 (going on the fashions worn in the illustrations), and contains tried and tested recipes both for the everyday and special occasions.

I chose this recipe for a number of reasons:

  • It tastes absolutely delicious.
  • It’s a genuine store-cupboard cake, requiring everyday ingredients.
  • It is an excellent way to use up last year’s marmalade to make way for this year’s batch(es).
  • It is an excellent way to start making use of this year’s batch of marmalade, bursting with freshness.
  • It can be varied with whatever preserves you have on hand (within reason).

It being marmalade season, I have recently been preserving up a storm and entering some marmalades in the annual Marmalade Awards competition.

The method I used was extremely small-batch, but still provided me with more than the single jar required for each entry. Now, this year I entered six categories. I have six lots of extra marmalade. So I was KEENLY in the market for some way to increase marmalade consumption.

Enter the Be-Ro booklet and its recipe for Marmalade Cake with its short list of simple ingredients: flour, fat, sugar, marmalade, eggs, milk.

I’ve increased the amounts of each ingredient to 1.5 times the original quantities, because I had almost exactly that amount of Stork baking margarine in the fridge, and the first cake was so successful I made a second with a different marmalade and used butter, which was just as nice.

A square lime marmalade cake with two pieces cut off and displayed, on a wooden cutting board.

The first cake was made with lime marmalade (see above pic) and was very delicate in flavour and the cake was soft of crumb. The second cake was made with Seville Orange marmalade (see recipe for Dundee Marmalade here), and was just as delicious, possibly even more so. The striking difference was the aroma when the cake was cut – it was like a cloud of intense orange that wafted up. Amazing. I would venture that you could also substitute the marmalade for other jams or preserves, with the caveat that it should be one of the stronger and preferably tart-flavoured fruit: apricot, plum, damson, etc. because the sharpness of the fruit is a delicious contrast to the sweetness of the crumb.

This isn’t the flashiest, most exotic bake you’ll make, but it is easy and very fine-tasting and can be whipped up in about an hour start to finish from the contents of your cupboard/fridge.

Marmalade Cake

This is for the enlarged mix, and requires a 20cm square tin.

170g butter/Stork
170g sugar
170g marmalade
340g plain flour + 1tbs baking powder OR 340g self-raising flour
3 large eggs
80ml milk

  • Heat the oven to 170°C, 150°C Fan.
  • Grease and line a 20cm square tin with baking parchment.
  • Cream the fat and sugar together until light and fluffy.
  • Add the marmalade and mix thoroughly.
  • Sift together the baking powder and flour if using. Otherwise, sift the self-raising flour.
  • Whisk together the eggs and milk.
  • Alternately add these two ingredient mixtures to the mixture in the bowl, stirring, until everything is fully combined.
  • Pour the cake mixture into the prepared tin and smooth evenly.
  • Bake for a total of 45 minutes, turning the tin around after 25 minutes to ensure even baking.
  • Allow to cool for 10 minutes in the tin, then carefully transfer to a wire rack to cool completely.
  • Store in an airtight container.

Christmas Spiced Butter

With only a month to go, I recently realised it’s high time I got my act into gear vis-à-vis some festive recipes.

I have for you here something that I’ve been making for the past few years and, with spectacular timing, only remembering about it come the 24th or so, which is far too late to go about suggesting people add to their military campaign-esque festive ToDo list.

I initially got the idea a few years ago whilst making a batch of Niter Kibbeh, the very aromatic Ethiopian spiced butter used in making the red lentil stew Misir Wat.

It is butter that is flavoured with seasonal spices, and is a doddle to make. I use clarified butter in the form of a tin of ghee, because delicious though browned butter is, the milk solids are easily burned. I simmer – although that is rather too strong a word for sitting on heat 1 of the hob, so perhaps ‘infuse’ is more fitting – whole spices and citrus peels and then allow the flavours to infuse overnight as the butter cools. The use of whole spices keeps the spicing soft – although I have opted to add in ground spices if the whole ones are unavailable. The only downside of using ground spices is that they will speckle the butter, being too small to strain out. Depending on your use of the finished butter, this may not be an issue. Next day, I slowly warm the mixture and, when melted, strain out the solids and pour the beautifully aromatic and flavourful butter back into the tin in arrived in, for ease of storage.

You are then free to use it wherever you see fit in your festive baking.

Brandy Butter and Spiced Hard Sauce: These are rich and delicious accompaniments to both mice pies and Christmas pudding. Equal quantities of icing sugar and butter are whisked with brandy, or indeed any alcohol of your choice, and/or vanilla to produce a light and frothy mixture that you can spoon onto your bakes where it will gently melt and turn into a sauce.

Mincemeat: In case you haven’t seen the recipe, my guilt-free Mincemeat (based on Hannah Glasse’s 1747 recipe) offers all the delights of traditional mincemeat, but without suet, fat or any added sugar and is both vegetarian and vegan. Delicious as it is, you can elevate it to luxury levels by adding a little Spiced Christmas Butter for added richness.

Pastry: Using Spiced Christmas Butter in pastry  adds a whole new dimension to your mince pies and other Christmas fare such as this Welsh cranberry tart.

Shortbread: Why not try your favourite shortbread variation using festive spiced butter?

What Spices Do I Need?

Basically, anything you like. Whilst this might not seem very helpful, I say it to illustrate just how much free reign you can have with this. Either stick to a more traditional mix (see below) or spice it up a little (excuse the pun) with some unusual bits and bobs. You can’t really go wrong, as using whole spices means there’s only ever a gentle flavouring.

A traditional mix might include:

  • cinnamon sticks
  • allspice berries
  • blades of mace
  • whole nutmegs (sliced)
  • cloves
  • orange peel
  • lemon peel
  • sliced ginger (fresh or dried)

Other items you may want to use include:

  • cardamom pods – both green and black
  • star anise
  • aniseeds
  • black pepper
  • cubeb pepper
  • long pepper
  • grains of paradise
  • vanilla
  • saffron
  • licorice sticks
  • caraway seeds
  • coriander seeds
  • cumin seeds
  • rosepetals

All of the spices should be whole, wherever possible. Use anything from 1tsp to 1tbs to your taste.

Spiced butter with different whole spices
Another version of spiced butter, this time with grains of paradise, cubeb pepper and aniseed.

Dietary Guidelines

As ghee has had all the milk solids removed, I would venture to suggest that it might even be suitable for the lactose intolerant.

If you are vegan, you can make your own version using solid coconut oil. If you’re not a fan of the accompanying coconut aroma, this odourless brand is available to order online.

Christmas Spiced Butter

I rarely recommend any particular brand, but in this instance I strongly urge you to seek out (it’s not that hard to find – most supermarkets carry this distinctive green and gold tin) East End ghee. It has a heady, perfumed aroma in its natural state, which greatly enhances the end product.

1 x 600g tin of East End ghee.
3-4 cinnamon sticks
1tbs whole cloves
1tbs allspice berries
4 blades of mace
2 whole nutmegs – sliced
thinly peeled skin of 1 orange
thinly peeled skin of 1 lemon
5 slices of fresh/dried ginger
5 star anise

  1. Put everything into a small saucepan.
  2. Cover and set on the lowest heat possible on your stove/hob.
  3. Leave to infuse for 1-2 hours.
  4. Switch off the heat and leave overnight.
  5. Next day, warm slowly over very low heat until melted, then strain the solids out by pouring through a sieve.
  6. When the butter has completely drained, pour it back into the tin.
  7. Label and store in the cupboard for use.

Gossiping Cakes

I have a confession to make. I chose these recipes because I loved the idea of women baking cakes specifically for having a get-together and swapping gossip. Alas, that’s not where these cakes originate, but the truth just as interesting.

As I’ve mentioned before, I have spent quite a considerable amount of time cataloguing household manuscripts that have been digitised by various libraries around the world. Obviously, there is going to be a certain degree of repetition of the most popular recipes, but there are also those that stand out as original either by name or by ingredient, etc. Whenever I come across such a recipe, I mark it in the spreadsheet with an asterisk, so when I’m looking back over the thousands of recipes, those asterisked ones are easily highlighted as worthy of a second look. And for the other type of recipes, such as the 200+ recipes simply entitled “A cake”, I’ll get to looking at you in all your (presumed) variety  soon, but to be blunt, you’re pretty low on the ToDo list.

The first recipe I found was this one, dated early 18th century (1738), at the Wellcome Collection.

Recipe for Goseping Cakes The Best Way, from the manuscript of Rebecca Tallamy, (1738), MS4759, Wellcome Collection

It appears to be a spiced variation of shortbread, and obviously one to make in quantity, because the yield of the recipe is over 100 biscuits. It’s demonstrating one of the many interpretations of the word ‘cake’, in this case meaning small, circular biscuits. The last line also caught my eye, because it recommends using equal quantities of butter and flour to make them “very good”.

Regular listeners will have read about my shortbread variation testing a few months ago, where the ratio of butter to flour can range from 1:3 to 1:2, so the assertion that 1:1 is the best, had me intrigued.

This recipe was very much on the back burner until I came across another recipe, similarly named, while indexing the digitised manuscripts at the National Library of Scotland.

Recipe for a Gossops Cake, from MS103093966.23, (1660-1699), National Library of Scotland

This recipe is in a manuscript older by almost a century (1660-1699), and differs in that it contains fruit, and is a large yeasted cake – exceedingly large, going by the peck/14lb/9kg of flour required – the term cake being used in this instance more akin to our modern usage.

To delve deeper into this mystery, I turned to the internet, and found the following passage:

Christening cake traditions, from “Remains of Gentilisme and Judaisme 1686-87”, John Aubrey, James Britten, 1881, p65

This threw up the question: What is a Gossiping? And so I went hunting in the Oxford English Dictionary which I learned that a Gossiping is  a christening, or christening feast, derived and corrupted from “Godsibb”, which is an old English word for Godparent.

Not entirely relevant, but interesting nontheless, the oldest usage of Godshib I found was over a thousand years ago in Sermo Lupi ad Anglos, or the Sermon of the Wolf to the English, a sermon given by Wulfstan II, Bishop of Worcester and Archbishop of York (d. 1023) in 1014:

“And godsibbas and godbearn to fela man forspilde wide gynd þas þeode toeacan oðran ealles to manegan þe man unscyldgige forfor ealles to wide.”

Trans: And too many godparents and godchildren have been killed widely through-out this nation, in addition to entirely too many other innocent people who have been destroy­ed entirely too widely.”

Later usages of the word referred to a gathering of women/midwives when a woman was in labour, and hence to the modern usage.

So with a history stretching back many centuries, the account of christening traditions at Wendlebury would appear to neatly explain the differences between our two recipes: a large cake was presented to the father – presumably for all his hard work in the proceedings *eyeroll* – and the smaller cakes were shared with the guests.

So let’s get on with some gosseping!

A Gossop’s Cake

This is a fruited, lightly spiced and yeast-raised cake. If you’re British, it’s like an enriched teacake: delicious fresh, delicious toasted, and delicious either way with butter and a slab of cheese (but better with toasted). I’ve scaled the recipe down to make for a modest sized cake, but you can always double the recipe if it turns out to be a favourite.

315g plain flour
135g raisins
25g caster sugar
1tsp ground nutmeg
1tsp ground cinnamon
1tsp ground ginger
50g unsalted butter
150ml single cream
100ml water
1½tsp rosewater
1 sachet fast-acting yeast

single cream to glaze

  • Plump the raisins: put the raisins in a saucepan and cover with water. Warm gently on a low heat for 10 minutes while the dough mixes. Strain and pat dry.
  • Sift together the flour, yeast, sugar and spices.
  • Put the butter, cream, water and rosewater into a small pan and warm gently over low heat just until the butter has melted.
  • Put all ingredients except the raisins into the bowl of a stand mixer fitted with the dough hook and mix on slow until the dough comes together, then continue to knead for 10 minutes until smooth.
  • Add in the plumped raisins and mix on slow to combine.
  • Grease and line a tall, 20cm cake tin, preferably loose bottomed, with parchment.
  • Form the dough into a smooth cake and place in the prepared tin.
  • Set aside to rise until doubled in size. The enrichments to the dough (cream/sugar/fruit) will impact the rise, which is why there is only a single rise for this cake, thus taking advantage of the initial vigorousness of the yeast.
  • Heat the oven to 190°C, 170°C Fan.
  • When the cake has risen, gently brush the surface with single cream, and bake for 30-40 minutes until well risen and golden brown.
  • Cool the cake for 10 minutes in the tin, then remove and set on a wire rack to cool completely.
  • Store in an airtight container.

Goseping Cakes The Best Way

I’ve opted for the proportions where butter = flour because, contrary to my expectations, it really did taste much better that with just half the amount of butter.

250g plain flour
250g unsalted butter
125g caster sugar
1tsp ground nutmeg
1tsp ground mace
1.5tsp rosewater
1 large egg yolk
30ml white wine

1tbs caster sugar for sprinkling

  • Put the dry ingredients into the bowl of a food processor.
  • Cube the butter and add to the dry ingredients.
  • Blitz the mixture a few times until it resembles breadcrumbs.
  • Whisk together the yolk, wine and rosewater.
  • Add the wet ingredients to the dry and blitz until the mixture comes together in a soft dough.
  • Line a 20cm square tin with parchment paper.
  • Turn the dough out onto parchment paper.
  • Press the dough out evenly and smooth over.
  • Chill in the freezer for 20 minutes.
  • Heat the oven to 160°C, 140°C Fan.
  • Poke holes all over the surface with a fork or using a cocktail stick, in the manner of shortbread.
  • Bake for 30 minutes, turning the tin around after 15 minutes to ensure even baking.
  • Remove from the oven and turn off the heat. Sprinkle the caster sugar over the hot shortbread.
  • Cut the shortbread into pieces using a thin bladed knife or metal dough scraper.
  • Return the tin to the cooling oven until cold, to ‘dry out’.
  • When cold, store in an airtight container.

Cheese biscuits

Three recipes for you this week, all originating from a single idea. I thought I’d take the opportunity to show how it is possible to play with recipes you already know and love, and adapt a favourite one to different flavourings and pairings.

I was catching up on the latest season of the Great British Bake Off the other day, and for Biscuit Week the bakers were asked to make Viennese Whirls for their signature bake. I made a similar biscuit in Season Two – except I called them Melting Moments – so I was interested to see what variations this season’s bakers would bring to the table.

The range was wide and the flavour combinations a mix of both unusual and familiar (you can read more details on the specific flavourings/pairings here), and I got to pondering what I would have made. I think I would probably have gone savoury, and what better place to start than with my original recipe, and seeing if it could be tweaked to a more salty flavouring.

Obviously, the main stumbling block is the Melting Moments I made were sweet. Messing about with other recipes I’ve found that substituting cheese for the sugar on a 1:1 basis can get you a long way down the savoury route. I didn’t want the biscuits to spread much, and I also didn’t want the cheese to clump together and produce blobs, so rather than grating fresh from a block, I chose to use already-finely-grated Parmesan cheese (still fresh, just not grated by me). Test Batch 1 (a half batch of the original quantities – another Top Tip when you’re experimenting – no need for a full batch of anything until you get it right) was a straight substitution of cheese for sugar. To compliment the cheese, I also added dry mustard and ground nutmeg, as well as salt.

The results were cheesy-ish but also a little greasy, so Test Batch 2 involved more cheese (for taste) and more cornflour (to help with the greasiness). Batch 1 also didn’t hold their shape very well, but when I was looking at the tweaked ingredient proportions, I saw they were veering close to those of the best kind of shortbread (I made so many batches the proportions are burned into my brain), and so I opted to bake the dough in a shallow-sided pan, just like the shortbread. I didn’t want to dough to blister or rise up, so I poked holes in the dough, also like shortbread. The baking was also done long and low, and the result was absolutely delicious: strong cheese flavour, with the subtle hints of the mustard and the nutmeg rounding it out. The long, slow baking had toasted the cheese particles, which now had the bonus of adding little nuggets of crunchiness to the texture. Finally, cutting the cooked dough into pieces hot from the oven, then putting the tin back in as the oven cooled, made for a gloriously toasted flavour and appearance. It was an amazingly savoury, cheesy, shortbread, but a bit far from a Viennese Whirl.

In addition, the original prompt required a filling of some sort, so I went back to the drawing board and recalled a recipe for a favourite pull-apart bread flavoured with walnuts and blue cheese. After toying with the idea of adding the nuts to the biscuit filling, I opted for adding them to the biscuit dough, and making the filling with blue cheese.

Test Batch 2 was much better in terms of crumbly texture, but the flavour of the walnuts wasn’t really there. So for what would be the final Test Batch, I reduced the Parmesan cheese to keep it savoury but not intrusive, and toasted the walnuts. I kept the amount of cornflour the same, since walnuts have their own oil and this would also need to be absorbed in order to keep the biscuit texture. The result was just what I was going for: crumbly melt in the mouth biscuit texture, robust walnut taste with just a hint of Parmesan.

The last step was to sort out the filling. I opted for Saint Agur, which is a soft and creamy, relatively mild blue cheese, and mixed it with some cream cheese to make it pipe-able. These biscuits lack the piped form of traditional Melting Moments, so adding the swirl in the filling is a neat compromise. If you’re a blue cheese fiend, then use stronger-flavoured cheeses by all means – you might have to work a little harder to get them blended with the cream cheese. I don’t usually recommend brands, but Philadelphia cream cheese has the firmness and creaminess that is just perfect here. If you use a different cream cheese and the result seems a little watery or not as dense as you would like, you can firm it up by placing it directly onto 4-6 folded layers of kitchen roll (in a sealable plastic box or similar) and chilling in the fridge overnight. The excess moisture will be drawn out into the paper towel, firming the cheese mixture up and making the mix easier to pipe. If you don’t have the time to do this, just use your cream/blue cheese mixture as a dip. There is also a Saint Agur Blue Crème product with the cream cheese already mixed in. It is very smooth indeed, but too soft to pipe. Perfect to use as a dip, though.

So there we are. Arguably three different recipes (yes, yes – I know the dip is a bit of a stretch, recipe-wise) from a single inspiration. I do hope you try them, and then have fun experimenting with tweaking your own recipe favourites.

Cheese Shortbread with blue cheese topping and dip

Cheese Shortbread

125g plain flour
50g cornflour
125g unsalted butter – chilled
½tsp salt
½tsp ground nutmeg
½tsp yellow mustard powder
50g ground Parmesan cheese

  • Heat the oven to 160°C, 140°C Fan.
  • Line a shallow baking tin with parchment. I used one of dimensions 26cm x 18cm, but a 20cm square would also work.
  • Put all of the ingredients into a food processor and blitz in brief bursts until the mixture comes together in a soft paste.
  • Press the paste into the prepared tin and smooth over. Using a skewer or a cocktail stick, poke holes evenly over the whole surface area.
  • Bake for 30 minutes, turning the tin around halfway through to ensure even baking.
  • When baked, turn off the oven, remove the shortbread and cut into pieces. I prefer to use my metal dough scraper, which is super thin, to get nice, clean, sharp cuts.
  • Put the shortbread back into the cooling oven, to finish off.
  • When cold, store in an airtight container.

Walnut & Blue Cheese Melting Moments

30g walnuts
125g plain flour
50g cornflour
125g unsalted butter – chilled
½tsp salt
30g ground Parmesan cheese

  • Toast the walnuts:
    • Heat the oven to 200°C, 180°C Fan.
    • Lay the nuts on a baking tray lined with parchment paper.
    • Bake for 8 minutes, turning the tray around halfway through to ensure even browning.
    • Set aside until cool, then chop with a knife into small pieces.
  • Put the remaining ingredients into a food processor and blitz in brief bursts until the mixture comes together in a soft paste.
  • Tip the mixture out onto a piece of parchment and knead in the chopped walnuts.
  • Lay clingfilm over the dough and roll it out thinly (5mm).
  • Slide the sheet of covered dough onto a chopping board and freeze for 20 minutes. The dough is very soft and chilling it hard will make cutting the biscuits out and transferring them to the baking sheet much easier and with no loss of shape.
  • Turn the oven to 160°C, 140°C Fan.
  • Cut the dough into biscuits using a plain 5cm round cutter. Lay the biscuits on a baking sheet covered with baking parchment. There’s little to no spreading during baking, so you can lay them as close as 1cm from each other.
  • Poke holes in the centre of your biscuits using a cocktails stick. Or not. I tried both ways, and to be honest, there wasn’t really a difference. Arguably the biscuits with the perforations, as in the photo at the top, maybe look a little more aesthetically pleasing, but not by much. You choose.
  • Bake for 30 minutes, turning the baking sheet around halfway through to ensure even baking.
  • Remove from the oven and allow to cool on the tins. The biscuits are rather friable when warm, so don’t be too eager to move them.
  • Store in an airtight container when cold.

Blue Cheese Filling/Dip

150g (1 pack) Saint Agur blue cheese
280g (1 large box) Philadelphia cream cheese

  • Remove both ingredients from the fridge and allow to come to room temperature.
  • Crumble the blue cheese into a bowl and mash with a fork or the back of a spoon until smooth.
  • Add half the cream cheese and mix thoroughly, making sure there are no lumps.
  • Add the rest of the cream cheese and mix until smooth and fully incorporated.
  • Fill a piping bag fitted with a 5mm star nozzle, and pipe onto half your biscuits.
  • Top with the remaining biscuits and arrange on a serving plate.
  • Use any remaining filling as a dip by adding a little cream/creme fraiche, yogurt until the desired consistency is reached.

Ormskirk Gingerbread

If you’d asked me only a few years ago, of my opinion of gingerbread, I would have given an indifferent shrug in response: I didn’t dislike it, but I wasn’t a fervent fan either. Ginger biscuits and the gingerbread used for gingerbread men I thought dull. Ginger cake was fine, but it would never be a first choice. Since then, I have discovered so many old recipes that have range and depth and nuance that it’s turned my head completely. And here we have another to add to the collection.

Ormskirk Gingerbread has a lot going for it, and I’d even go so far as to say it is probably one of the best-tasting gingerbreads you’ve never heard of.

It has a speckled appearance, from mixing the dry ingredients with melted butter and treacle, which is enough to bind, but not drown. There is candied peel, traditionally lemon but sometimes others, and spices, usually ginger, but frequently, additional spices as well. A major attraction, for me at least, is the texture, falling between the softness of parkin and the crispness of a biscuit. As you, quite literally, sink your teeth into a piece, you experience a dense chewiness which, with the variety of flavourings, is immensely satisfying.

Ormskirk Gingerbread (1830s) is  one of the earliest geographically-linked gingerbreads I’ve found – predated only by Wrexham Gingerbread (1828). In the 1850s, a group of five local women paid £20 per year to the East Lancashire Railway company for the privilege to sell their gingerbread to travellers passing through Ormskirk station, which must have contributed to the spread of its popularity.

I have a selection of recipes for you to try, because in all honesty, I like them all. The method is the same for all of them, so I shall be listing the scaled-down ingredients alongside each recipe, then you can scroll down to the method and cooking instructions. All quantities are for a 20cm square tin.

Ormskirk Gingerbread recipe, (1822-1841), MS4998, Wellcome Collection

This recipe is from a handwritten manuscript held at the Wellcome Collection. It might actually be older than the recipe below, but there’s no way of telling for sure. Rather unhelpfully, there are no instructions for either making or baking, but it clearly contains all the classic ingredients and is a great introduction to this type of gingerbread:

225g plain flour
115g soft, light brown sugar
7g/1tbsp ground ginger
85g butter
115g treacle
20g candied lemon peel

From: The domestic receipt-book by Joseph Worrrall, 1832, p38.

This is the earliest printed recipe I found. Unfortunately, it contains an error – the sugar is missing. Aside from this, what I found interesting was the complete omission of what appears to be a major component of other recipes, the candied lemon peel.  In  addition, there is, proportionally, a lot of spice in relation to the quantity of flour, but it is an interesting variation. In the past, I have bought dried, chipped ginger, and ground it as needed, and the flavour is bright and vibrant and, curiously, with a touch of lemon. Similarly with allspice, whose flavour really evokes a blend of spices.

225g plain flour
60g butter
115g treacle
115g soft, light brown sugar
14g ground ginger
14g allspice

From The druggist’s hand-book of practical receipts, Thomas F. Branston, 1853, p80

This recipe echoes the medicinal uses many believed gingerbread possessed in the middle ages. I find it odd that it is Ormskirk Gingerbread that is specified in particular, instead of a generic gingerbread recipe. Jalap is the ground root of a Mexican plant of the Morning Glory family, and it was used in times past for its laxative effect.

225g plain flour
115g soft, light brown sugar
115g treacle
80g butter
30g candied lemon peel
2 tsp ground ginger
1½ tsp ground nutmeg

Peterson Magazine 1861-01: Vol 39 Iss 1, p93

This last recipe is a full-on, all the bells and whistles version. There’s no candied lemon peel – instead there’s candied orange and candied citron and, aside from the ginger, no other spices. There’s a higher than usual farinaceous component, with the addition of some oatmeal flour (which you can make yourself by putting rolled oats into a blender/spice mill). Finally, there’s the instruction to mix it a full day before you want to bake it. Many old gingerbread recipes have this added time requirement, because they’d also use alum and potash as raising agents, and these worked slowly, so a mix for gingerbread could be sitting in a tub for days if not weeks. There’s no raising agent included in this recipe, so I was curious whether there would be any difference to the other batches. Verdict: There was, and the resulting gingerbread was definitely veering towards cakey, although this might have been due to the added oatmeal – if that’s your preferred texture, have at it. The next time I make this I probably wouldn’t wait the 24 hours, but that’s just me being impatient.

225g plain flour
115g butter
60g sifted oatmeal flour
80g soft, light brown sugar
115g treacle
15g candied orange peel
15g candied citron peel
7g ground ginger

As I said at the top, all these recipes are delicious.

Ormskirk Gingerbread

Another reason to choose to make this gingerbread is that it can be made gluten-free, using gluten-free flour (I used Doves Farm) and gluten-free oats (Morrisons have the nicest looking GF oats – they’re like steel-rolled ones!).

It can also be made vegan, if you swap out the butter for either coconut oil or some other fat that is solid at room temperature.

Finally, there’s two slight variations in method, and it relates to how you handle the butter. The traditional method for gingerbread is to melt it in the treacle and then pour the mixture into the dry ingredients to mix. The other method is to blitz it with the dry ingredients in a food processor (or rub it in by hand). It doesn’t matter which method you choose, as the result is the same.

  • Choose your ingredients from one of the four recipes above.
  • Line a 20cm square tin with baking parchment.
  • Heat the oven to 160°C, 140°C Fan.
  • Mix your spices, sugar and flour(s).
  • If you’re blitzing the butter with the dried ingredients, add it now.
  • Blitz the mixture to resemble breadcrumbs.
  • Slice the candied peel thinly and then cut into 1cm pieces. Mix the peel into the dry ingredients, making sure the pieces don’t stick together.
  • Pour your treacle into a pan to warm. I use a large frying pan, as I prefer to add everything to the treacle, as opposed to pouring the treacle into the dry ingredients. Add the butter if you’ve not added it to the flour. You’re not trying to boil it, just warm it up enough that it moves freely and the butter (if using) is melted.
  • When the butter has melted and the treacle warmed, pour  the warm liquid into the dry ingredients and mix in. It doesn’t have to be evenly coloured.
  • Tip the mixture into your prepared pan and level out. I like to leave it rather roughly textured. Don’t press the mixture down hard, just even it out.
  • Bake for 40 minutes, turning the tin around after 20 minutes to ensure even baking.
  • Remove from the oven and , leaving the gingerbread in the tin, divide it into pieces. You can cut it into any shape you please – easiest with a square tin is 16 pieces (4 x 4 grid).
  • Set the pan aside to cool completely.
  • When the gingerbread is cold, store in an airtight container.

18th Century Bath Buns

We don’t eat buns as frequently as we used to, and I think it is a great shame, because buns are synonymous with fun!

I spend a lot of time pondering different recipes, and one thing that causes much musing is the way recipes evolve in the UK, compared to, say, France.

French recipes tend to be rather rigid and proscribed. Definitions of what constitutes those two most recognisable of French baked goods – the croissant and the baguette – have been firmly established, almost set in stone. A croissant is a croissant, a baguette de tradition is a baguette de tradition, – there are rules, there is order, and there is never, ever, deviation. You want to tweak a recipe a little? Then you have to give it a new name. The French have no truck with ‘croissant-ish’ or ‘baguette de tradition adjacent.’ No messing about with rules that have been decided decades, even centuries, ago. Absolument pas!

In contrast, British recipes are a lot more open to interpretation. On the Books and Writing page of this website you will find, amongst other things, a paper I wrote on Pikelets, and how, over the centuries, the word has been used to describe different recipes for arguably quite different items. Also a paper on Summer Pudding, which has undergone its own transformation during its long and illustrious history.

Having given the matter a great deal of thought, I’m pretty comfortable with viewing recipes, especially British ones, as having a timeline. Some are long, some short, but throughout which adapts and changes with tastes and fashions. To illustrate this, in Great British Bakes, I included multiple recipes for Shrewsbury Cakes, an all but forgotten English shortbread that has a history spanning centuries. Others, such as the less-successful Crimson Biscuits (be honest – have YOU ever heard of them?) in Ann Peckham’s 1767 book, have timelines of alarming brevity. An added feature (frustration) with British recipes is that they might go by a number of different names, according to region, or indeed the one name may refer to numerous different dishes.

And so, after WAY too much preamble, we come to Bath Buns, whose history stretches back into the 1600s, and might be a genuine contender for Britain’s Oldest Bun, much to the probable dismay of fans of Sally Luns and Chelsea Buns, very much the Johnny-Come-Latelies of the eighteenth century pastry scene. The glitterati of Bath were happily taking the waters and chomping on this style of bun for the best part of a century before Dr Oliver invented his biscuit in an effort to improve the health of The Ton.

The Bath Bun of the late 17th century is rather different to the buns we might find in bakeries and tea shops today. The early Bath Buns were sweetened and flavoured with caraway comfits: seeds enclosed in numerous layers of sugar and enjoyed as sweetmeats and digestives. Today, a classic Bath Bun should retain the image of these candied seeds by being topped with pearled or candied sugar, which retains its colour and shape during baking, giving them a very distinct appearance. The time and effort required to create seeded comfits is considerable, and it is unsurprising to learn that they are no longer made. In imitation, I have found that using pearled/candied sugar and a sprinkling of unadorned seeds provides the sweetness, flavour and crunch of these forgotten sweetmeats.

The original Bath Buns were also incredibly rich with butter. Looking at recipes throughout the century, the most popular ratios ranged from an almost paltry one third of the weight of flour in butter, up to croissant-exceeding levels of 1.5 times the weight of flour in butter. Add in, as in the recipe below, a couple of pounds of caraway comfits, and these buns are probably a major cause of the gentry having to ‘take the waters’.

The first recipe below, the earliest I could find, is from an old manuscript dated to ‘late 17th century’ and has an equal weight of flour and butter. I scaled the recipe down, but there was still an alarming quantity of butter in not much dough. I broke my own rule too, in the baking, and did not bake it as written. Partly because I suspect that there is an error in the transcribing the original ingredients, and partly because I just couldn’t bring myself to put the full complement of sugar into the dough. I settled for half, and even that was a challenge – the buns were practically crystallized!

Earliest Bath Bun recipe I’ve found, from manuscript dated 1675-1725, MS1792, Wellcome Collection

With all the eggs and butter and sugar the dough is incredibly soft – too soft to knead – and is practically spooned onto baking trays – something which later recipes mention frequently. The modern Bath Bun traditionally should have a rather rough appearance, and shuns the round perfection of Sally Luns or the even sugared, square edges of the Chelsea Buns. Due to all this richness, the dough can take a long time to rise and the finished texture is cake-like rather than bready, crunchy with the sugar crystals and with the unusual (to our modern palates) and distinct flavour and aroma of caraway.

Bath Buns recipe from manuscript dated 1675-1725, MS1792, Wellcome Collection

This recipe is particularly interesting because it has a twin, in another manuscript, on the other side of the Atlantic Ocean. This manuscript is one of the holdings at Yale University Library, and are both written in the same handwriting, possibly that of a scribe. They are mostly similar, but not exact copies. My guess is that one was copied from the other, with edits being made to exclude recipes not liked and including new recipes in the copy. With this in mind, I’m of the opinion that the Wellcome Collection manuscript is the copy. Below is the potential ‘original’.

Bath Bun recipe from MS Osborn fc181, Yale University Library.

All of which is an interesting detour, but doesn’t really get us an enjoyable Bath Bun that respects the traditions of the original, but is also acceptable to our 21st century tastes. Fear not, for galloping to our rescue comes a heroine for the ages: Mrs Bridget Ilbert (1712-1790), daughter of the 6th Earl of Devon and the wife of William Ilbert of Bowringsleigh, Devon.

Recipe for Bath Buns in Bridget Ilbert’s manuscript MS1821, Wellcome Collection

Bridget’s manuscript is held at The Wellcome Collection, and one of the recipes within is for Bath Buns. I particularly like this recipe because it comes with the added credentials of being “From a Pastry Cook at Bath” – and you can’t get much better than that. The recipe is undated, unfortunately, but it is not too big a stretch to allocate a date in the general area of early-to-mid 18th century.

Miniature bath buns adapted from a recipe MS1821, Wellcome Collection

Original 18thC Bath Buns

You can bake these on baking sheets or in silicone moulds. I used a mould like this, and had dough enough left over to make 4 free-form buns in the photo at the top of the page.

Makes 10-12 buns.

225g plain flour – divided
115g unsalted butter
1 sachet fast action yeast
2 large eggs
2tbs warm water
1tbs caraway seeds
100g crystallised sugar

1 large egg for glazing
milk
more crystallised sugar for  finishing
a few caraway seeds to sprinkle

  • Crack the eggs into the bowl of a stand mixer and add the yeast, water and 50g of flour.
  • Whisk together thoroughly, then set aside to rise for 20 minutes.
  • Prepare your baking items – parchment paper on baking sheets if baking ‘free-form’, butter your silicone moulds if using.
  • Put the remaining flour and the butter into a food processor and blitz until the mixture resembles breadcrumbs.
  • Add the butter mixture to the yeast mixture, together with the caraway seeds and mix thoroughly to a smooth paste.
  • Mix in 100g crystallised sugar.
  • Spoon onto/into your prepared baking items. 50g of dough makes an elegant size. Try and make your dough sit up high in as round a shape as you can make. N/A if baking in moulds.
  • Whisk the egg with half an egg-shell of milk.
  • Brush the egg glaze over the buns.
  • Add a scattering of crystallised sugar onto the top of each bun, followed by a pinch of caraway seeds.
  • Allow to rise for 30-45 minutes, depending on how warm your kitchen is. There won’t be a huge rise, because of all the sugar and butter.
  • Heat the oven to 180°C, 160°C Fan.
  • Bake for 15-20 minutes until golden brown. The bottoms of the buns will be slightly brown when baked.
  • Allow to cool for 10 minutes to firm up before transferring to a wire rack to cool completely.
  • Best served fresh.
  • Store in an airtight container.
  • To reheat before serving, microwave briefly, 10 seconds per bun, i.e. for 4 buns, zap them for 40 seconds.

Summer Ice-creams

The brief green gooseberry season is upon us and their delicate but sharp taste is a wonderfully aromatic taste of summer. Reddish dessert gooseberries ripen later in the season, but the sharpness of the green is my preference. They’re a thorny bush, so be prepared for having multiple jabs in your hands. I picked some at a local Pick Your Own fruit farm. Top Tip: most berries conceal themselves on the undersides of branches, so always lift them up for maximum harvesting efficiency. If your local fruit farm doesn’t have PYO gooseberries (and many don’t, sadly) they can also sometimes be found in the freezer of your local Farm Shop.

After laying down a batch of my bi-annual batch of gooseberry vinegar (a doddle to make, but a year in the fermenting/clearing), I decided to make a batch of gooseberry ice-cream. As the owner of a tiny kitchen (2m x 3m), I have neither the counter/cupboard space for an ice-cream maker, nor the patience to keep stirring a semi-frozen mixture in order to break up the ice-crystals, so the ‘set it and forget it’ no-churn recipe employing sweetened condensed milk is pretty much a no-brainer in this household.

The method is practically the same as that given for Damson Ice-Cream from a couple of years ago: Mix most of a fruit puree into the cream/milk mixture, then ripple through a ribbon of the remaining puree and set in the freezer.

The means of obtaining your gooseberry puree is a little different than usual, mainly due to their water content, which will wreak icy-crystal havoc with your ice-cream if it is too high. Rather than simmer with water until they break down, the gooseberries are coddled in a closed vessel over simmering water. The result will be a clear-ish liquid (which can be poured off) and the fruit pulp, which is then used for the ice-cream. This approach preserves not only the colour, but also the flavour, as prolonged cooking and/or high heat impairs both.

The second recipe is my re-creation of an ice-cream I had several years ago in Yorkshire. It’s actually not really a summer ice-cream, because citrus isn’t really in season in July, but oranges are in the shops and marmalade is on the shelves, and I am in love with it, so here we are.

The bitterness of Seville oranges, just as the tartness of gooseberries, is the perfect pairing with this ice-cream method, because the condensed milk is SO sweet, it needs something sharp to cut through all that sugar. Interestingly, in developing this version, I did learn that there is such a thing as too much bitterness. An early version contained both the zest and juice of Seville oranges (which I keep in my freezer as frozen cubes for year-round zestiness), and while I liked the end result, it really leaned heavily into bitterness, so I had to dial it back somewhat. This version uses the zest of regular oranges and no juice, with the slivers of peel from the marmalade providing delicious pops of intense Seville bitterness, tempered with sugar.

Both of these ice-creams will need to be removed from the freezer for 20-30 minutes before serving, in order to soften.

Gooseberry Ice-Cream

I have left the gooseberries without sugar, as there is more than enough sweetness with the condensed milk. Feel free to add some sugar if you feel they need it.

500g green gooseberries

1 x 397g tin of sweetened condensed milk
600ml double cream

  • Put the gooseberries in a lidded pan without any additional water and set it inside a larger pan. Add water until the larger pan is half filled. Heat over medium high heat until the water is simmering and coddle the gooseberries until soft. if you don’t have suitable pans to do this, you can put them into a casserole with a close-fitting lid and bake in the oven at 170°C, 150°C Fan. for 20-30 minutes.
  • Tip the coddled gooseberries into a sieve over a bowl and allow the clear liquid to drain through. Set the liquid aside.
  • Rub the gooseberry pulp through the sieve until all that remains are the seeds. Discard the seeds and set the pulp aside to cool.
  • Put the condensed milk and double cream into a bowl and whisk together until light and billowly.
  • Fold through 3/4 of the gooseberry pulp until well combined.
  • Spoon the ice-cream mixture into containers and then stir through the remaining puree in a ripple.
  • Cover and freeze at least overnight before serving.
  • Waste not, want not: You can add sugar to the clear gooseberry liquid and simmer it down to a syrup to pour over your ice-cream.
  • Bonus: Add a splash of elderflower cordial to taste to the puree, but beware of adding too much liquid.

Marmalade Cheesecake Ice-Cream

There is a slight difference in the method of this ice-cream, in order to get the cream cheese fully incorporated with the other ingredients. There’s no added sugar, as the condensed milk add more than enough. The amount of marmalade you’ll need will depend very much on the whatever marmalade you are using. I used a jar of my Dundee Marmalade, which is quite peel-heavy, so I only needed one jar.  Top Tip: An efficient way to get your marmalade shreds separated from your marmalade jelly, tip your jar(s) of marmalade into a pan and warm it gently until the jelly liquefies, then pour it through a sieve over a bowl. The jelly can then be poured back into the jar(s) for use later. Cut your shreds into smaller pieces if liked.

100g of orange shreds from your favourite marmalade – about half a cup.

zest of 3 oranges
330g cream cheese, Philadelphia for preference – at room temperature
1 x 397g tin of sweetened condensed milk
600ml double cream

  • Put the orange zest and cream cheese into a bowl and whisk until smooth.
  • Pour in the condensed milk and whisk again until smooth.
  • Add the double cream and whisk until light and billowy.
  • Stir through the marmalade shreds.
  • Spoon the ice-cream mixture into containers.
  • Cover and freeze at least overnight before serving.

Serving suggestion

To emulate a regular cheesecake, serve with some crisp/crunchy biscuits – Digestive biscuits/Graham crackers are a favourite. I used amaretti in the picture because that’s what I had, and regular readers will know we don’t make special trips to the supermarket for just one ingredient.