
The brief green gooseberry season is upon us and their delicate but sharp taste is a wonderfully aromatic taste of summer. Reddish dessert gooseberries ripen later in the season, but the sharpness of the green is my preference. They’re a thorny bush, so be prepared for having multiple jabs in your hands. I picked some at a local Pick Your Own fruit farm. Top Tip: most berries conceal themselves on the undersides of branches, so always lift them up for maximum harvesting efficiency. If your local fruit farm doesn’t have PYO gooseberries (and many don’t, sadly) they can also sometimes be found in the freezer of your local Farm Shop.
After laying down a batch of my bi-annual batch of gooseberry vinegar (a doddle to make, but a year in the fermenting/clearing), I decided to make a batch of gooseberry ice-cream. As the owner of a tiny kitchen (2m x 3m), I have neither the counter/cupboard space for an ice-cream maker, nor the patience to keep stirring a semi-frozen mixture in order to break up the ice-crystals, so the ‘set it and forget it’ no-churn recipe employing sweetened condensed milk is pretty much a no-brainer in this household.
The method is practically the same as that given for Damson Ice-Cream from a couple of years ago: Mix most of a fruit puree into the cream/milk mixture, then ripple through a ribbon of the remaining puree and set in the freezer.
The means of obtaining your gooseberry puree is a little different than usual, mainly due to their water content, which will wreak icy-crystal havoc with your ice-cream if it is too high. Rather than simmer with water until they break down, the gooseberries are coddled in a closed vessel over simmering water. The result will be a clear-ish liquid (which can be poured off) and the fruit pulp, which is then used for the ice-cream. This approach preserves not only the colour, but also the flavour, as prolonged cooking and/or high heat impairs both.
The second recipe is my re-creation of an ice-cream I had several years ago in Yorkshire. It’s actually not really a summer ice-cream, because citrus isn’t really in season in July, but oranges are in the shops and marmalade is on the shelves, and I am in love with it, so here we are.
The bitterness of Seville oranges, just as the tartness of gooseberries, is the perfect pairing with this ice-cream method, because the condensed milk is SO sweet, it needs something sharp to cut through all that sugar. Interestingly, in developing this version, I did learn that there is such a thing as too much bitterness. An early version contained both the zest and juice of Seville oranges (which I keep in my freezer as frozen cubes for year-round zestiness), and while I liked the end result, it really leaned heavily into bitterness, so I had to dial it back somewhat. This version uses the zest of regular oranges and no juice, with the slivers of peel from the marmalade providing delicious pops of intense Seville bitterness, tempered with sugar.
Both of these ice-creams will need to be removed from the freezer for 20-30 minutes before serving, in order to soften.
Gooseberry Ice-Cream
I have left the gooseberries without sugar, as there is more than enough sweetness with the condensed milk. Feel free to add some sugar if you feel they need it.
500g green gooseberries
1 x 397g tin of sweetened condensed milk
600ml double cream
- Put the gooseberries in a lidded pan without any additional water and set it inside a larger pan. Add water until the larger pan is half filled. Heat over medium high heat until the water is simmering and coddle the gooseberries until soft. if you don’t have suitable pans to do this, you can put them into a casserole with a close-fitting lid and bake in the oven at 170°C, 150°C Fan. for 20-30 minutes.
- Tip the coddled gooseberries into a sieve over a bowl and allow the clear liquid to drain through. Set the liquid aside.
- Rub the gooseberry pulp through the sieve until all that remains are the seeds. Discard the seeds and set the pulp aside to cool.
- Put the condensed milk and double cream into a bowl and whisk together until light and billowly.
- Fold through 3/4 of the gooseberry pulp until well combined.
- Spoon the ice-cream mixture into containers and then stir through the remaining puree in a ripple.
- Cover and freeze at least overnight before serving.
- Waste not, want not: You can add sugar to the clear gooseberry liquid and simmer it down to a syrup to pour over your ice-cream.
- Bonus: Add a splash of elderflower cordial to taste to the puree, but beware of adding too much liquid.
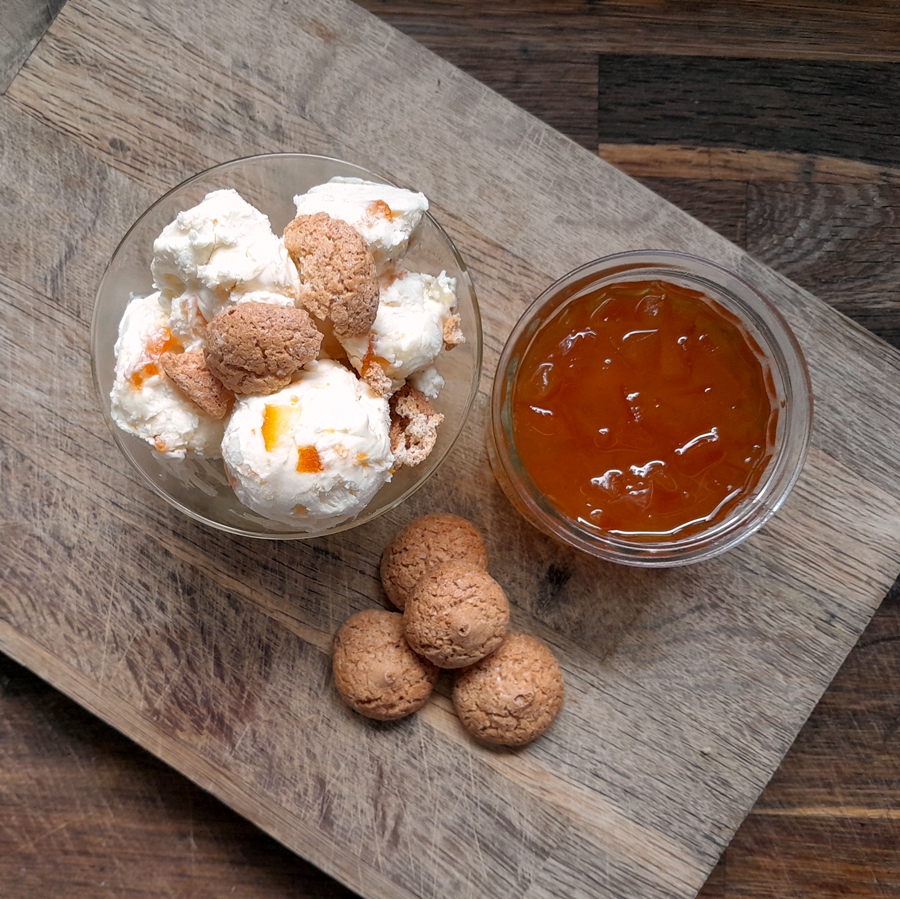
Marmalade Cheesecake Ice-Cream
There is a slight difference in the method of this ice-cream, in order to get the cream cheese fully incorporated with the other ingredients. There’s no added sugar, as the condensed milk add more than enough. The amount of marmalade you’ll need will depend very much on the whatever marmalade you are using. I used a jar of my Dundee Marmalade, which is quite peel-heavy, so I only needed one jar. Top Tip: An efficient way to get your marmalade shreds separated from your marmalade jelly, tip your jar(s) of marmalade into a pan and warm it gently until the jelly liquefies, then pour it through a sieve over a bowl. The jelly can then be poured back into the jar(s) for use later. Cut your shreds into smaller pieces if liked.
100g of orange shreds from your favourite marmalade – about half a cup.
zest of 3 oranges
330g cream cheese, Philadelphia for preference – at room temperature
1 x 397g tin of sweetened condensed milk
600ml double cream
- Put the orange zest and cream cheese into a bowl and whisk until smooth.
- Pour in the condensed milk and whisk again until smooth.
- Add the double cream and whisk until light and billowy.
- Stir through the marmalade shreds.
- Spoon the ice-cream mixture into containers.
- Cover and freeze at least overnight before serving.
Serving suggestion
To emulate a regular cheesecake, serve with some crisp/crunchy biscuits – Digestive biscuits/Graham crackers are a favourite. I used amaretti in the picture because that’s what I had, and regular readers will know we don’t make special trips to the supermarket for just one ingredient.


