The recipe I have for you today comes from the classic and ever-reliable Be-Ro baking booklet.
My copy dates from somewhere between 1930 and 1950 (going on the fashions worn in the illustrations), and contains tried and tested recipes both for the everyday and special occasions.
I chose this recipe for a number of reasons:
It tastes absolutely delicious.
It’s a genuine store-cupboard cake, requiring everyday ingredients.
It is an excellent way to use up last year’s marmalade to make way for this year’s batch(es).
It is an excellent way to start making use of this year’s batch of marmalade, bursting with freshness.
It can be varied with whatever preserves you have on hand (within reason).
It being marmalade season, I have recently been preserving up a storm and entering some marmalades in the annual Marmalade Awards competition.
The method I used was extremely small-batch, but still provided me with more than the single jar required for each entry. Now, this year I entered six categories. I have six lots of extra marmalade. So I was KEENLY in the market for some way to increase marmalade consumption.
Enter the Be-Ro booklet and its recipe for Marmalade Cake with its short list of simple ingredients: flour, fat, sugar, marmalade, eggs, milk.
I’ve increased the amounts of each ingredient to 1.5 times the original quantities, because I had almost exactly that amount of Stork baking margarine in the fridge, and the first cake was so successful I made a second with a different marmalade and used butter, which was just as nice.
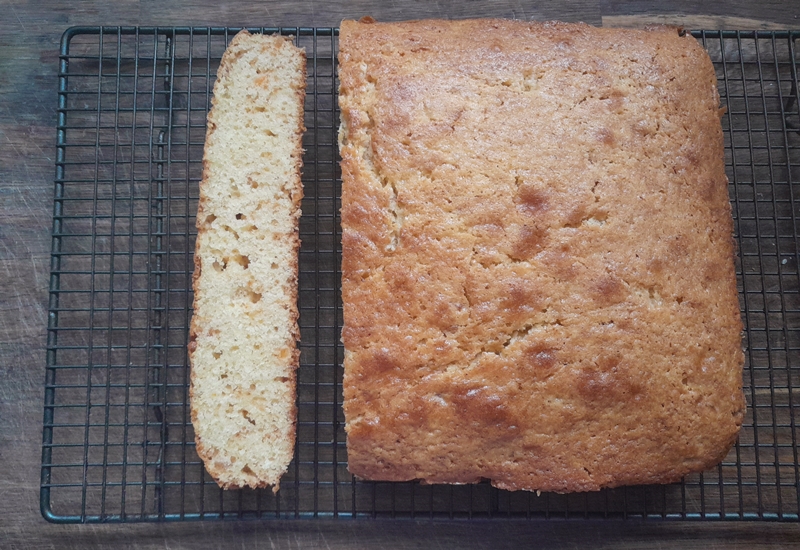
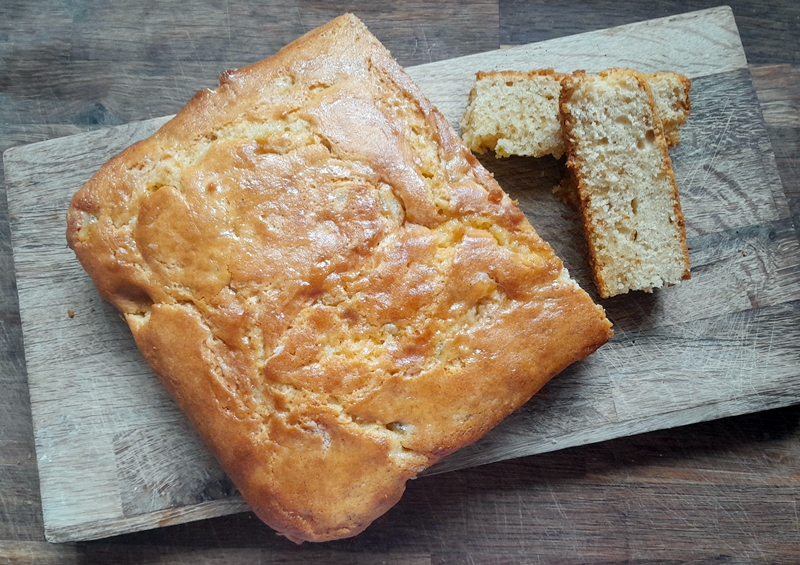
The first cake was made with lime marmalade (see above pic) and was very delicate in flavour and the cake was soft of crumb. The second cake was made with Seville Orange marmalade (see recipe for Dundee Marmalade here), and was just as delicious, possibly even more so. The striking difference was the aroma when the cake was cut – it was like a cloud of intense orange that wafted up. Amazing. I would venture that you could also substitute the marmalade for other jams or preserves, with the caveat that it should be one of the stronger and preferably tart-flavoured fruit: apricot, plum, damson, etc. because the sharpness of the fruit is a delicious contrast to the sweetness of the crumb.
This isn’t the flashiest, most exotic bake you’ll make, but it is easy and very fine-tasting and can be whipped up in about an hour start to finish from the contents of your cupboard/fridge.
Marmalade Cake
This is for the enlarged mix, and requires a 20cm square tin.
I have a confession to make. I chose these recipes because I loved the idea of women baking cakes specifically for having a get-together and swapping gossip. Alas, that’s not where these cakes originate, but the truth just as interesting.
As I’ve mentioned before, I have spent quite a considerable amount of time cataloguing household manuscripts that have been digitised by various libraries around the world. Obviously, there is going to be a certain degree of repetition of the most popular recipes, but there are also those that stand out as original either by name or by ingredient, etc. Whenever I come across such a recipe, I mark it in the spreadsheet with an asterisk, so when I’m looking back over the thousands of recipes, those asterisked ones are easily highlighted as worthy of a second look. And for the other type of recipes, such as the 200+ recipes simply entitled “A cake”, I’ll get to looking at you in all your (presumed) variety soon, but to be blunt, you’re pretty low on the ToDo list.
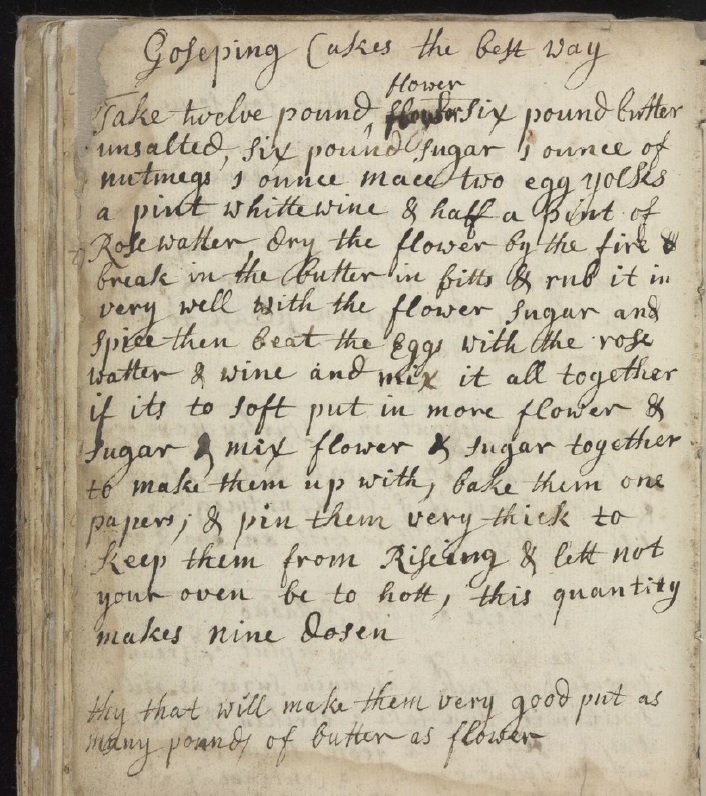
The first recipe I found was this one, dated early 18th century (1738), at the Wellcome Collection.
Recipe for Goseping Cakes The Best Way, from the manuscript of Rebecca Tallamy, (1738), MS4759, Wellcome Collection
It appears to be a spiced variation of shortbread, and obviously one to make in quantity, because the yield of the recipe is over 100 biscuits. It’s demonstrating one of the many interpretations of the word ‘cake’, in this case meaning small, circular biscuits. The last line also caught my eye, because it recommends using equal quantities of butter and flour to make them “very good”.
Regular listeners will have read about my shortbread variation testing a few months ago, where the ratio of butter to flour can range from 1:3 to 1:2, so the assertion that 1:1 is the best, had me intrigued.
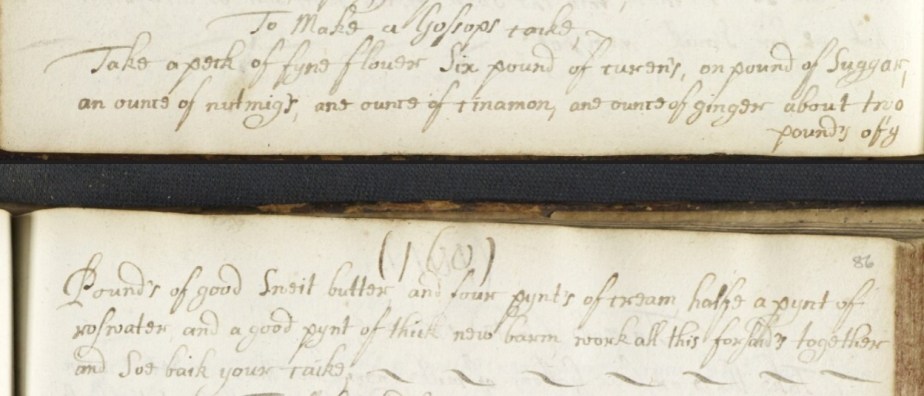
Recipe for a Gossops Cake, from MS103093966.23, (1660-1699), National Library of Scotland
This recipe is in a manuscript older by almost a century (1660-1699), and differs in that it contains fruit, and is a large yeasted cake – exceedingly large, going by the peck/14lb/9kg of flour required – the term cake being used in this instance more akin to our modern usage.
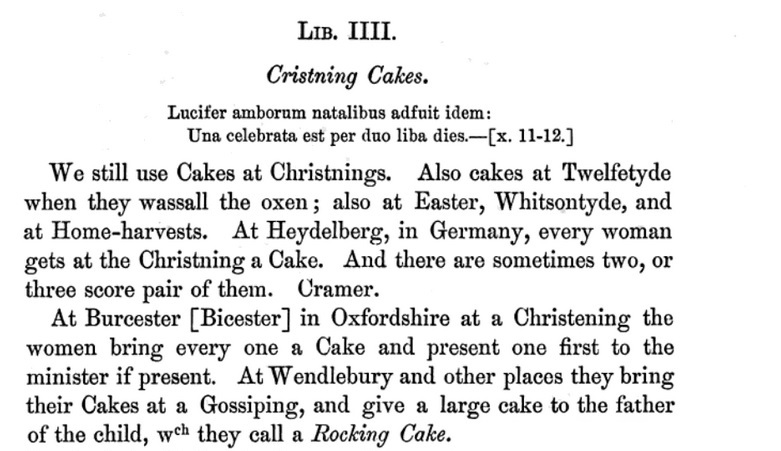
To delve deeper into this mystery, I turned to the internet, and found the following passage:
Christening cake traditions, from “Remains of Gentilisme and Judaisme 1686-87”, John Aubrey, James Britten, 1881, p65
This threw up the question: What is a Gossiping? And so I went hunting in the Oxford English Dictionary which I learned that a Gossiping is a christening, or christening feast, derived and corrupted from “Godsibb”, which is an old English word for Godparent.
Not entirely relevant, but interesting nontheless, the oldest usage of Godshib I found was over a thousand years ago in Sermo Lupi ad Anglos, or the Sermon of the Wolf to the English, a sermon given by Wulfstan II, Bishop of Worcester and Archbishop of York (d. 1023) in 1014:
“And godsibbas and godbearn to fela man forspilde wide gynd þas þeode toeacan oðran ealles to manegan þe man unscyldgige forfor ealles to wide.”
Trans: And too many godparents and godchildren have been killed widely through-out this nation, in addition to entirely too many other innocent people who have been destroyed entirely too widely.”
Later usages of the word referred to a gathering of women/midwives when a woman was in labour, and hence to the modern usage.
So with a history stretching back many centuries, the account of christening traditions at Wendlebury would appear to neatly explain the differences between our two recipes: a large cake was presented to the father – presumably for all his hard work in the proceedings *eyeroll* – and the smaller cakes were shared with the guests.
So let’s get on with some gosseping!
A Gossop’s Cake
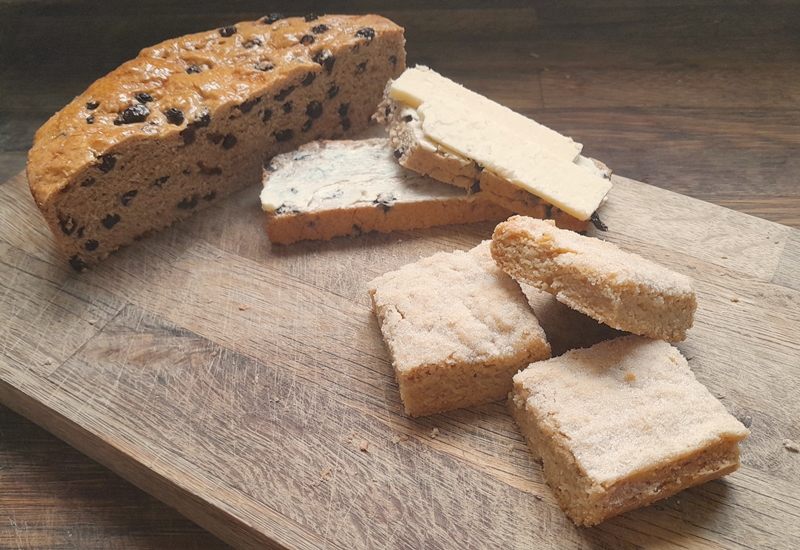
This is a fruited, lightly spiced and yeast-raised cake. If you’re British, it’s like an enriched teacake: delicious fresh, delicious toasted, and delicious either way with butter and a slab of cheese (but better with toasted). I’ve scaled the recipe down to make for a modest sized cake, but you can always double the recipe if it turns out to be a favourite.
Plump the raisins: put the raisins in a saucepan and cover with water. Warm gently on a low heat for 10 minutes while the dough mixes. Strain and pat dry.
Sift together the flour, yeast, sugar and spices.
Put the butter, cream, water and rosewater into a small pan and warm gently over low heat just until the butter has melted.
Put all ingredients except the raisins into the bowl of a stand mixer fitted with the dough hook and mix on slow until the dough comes together, then continue to knead for 10 minutes until smooth.
Add in the plumped raisins and mix on slow to combine.
Grease and line a tall, 20cm cake tin, preferably loose bottomed, with parchment.
Form the dough into a smooth cake and place in the prepared tin.
Set aside to rise until doubled in size. The enrichments to the dough (cream/sugar/fruit) will impact the rise, which is why there is only a single rise for this cake, thus taking advantage of the initial vigorousness of the yeast.
Heat the oven to 190°C, 170°C Fan.
When the cake has risen, gently brush the surface with single cream, and bake for 30-40 minutes until well risen and golden brown.
Cool the cake for 10 minutes in the tin, then remove and set on a wire rack to cool completely.
Store in an airtight container.
Goseping Cakes The Best Way
I’ve opted for the proportions where butter = flour because, contrary to my expectations, it really did taste much better that with just half the amount of butter.
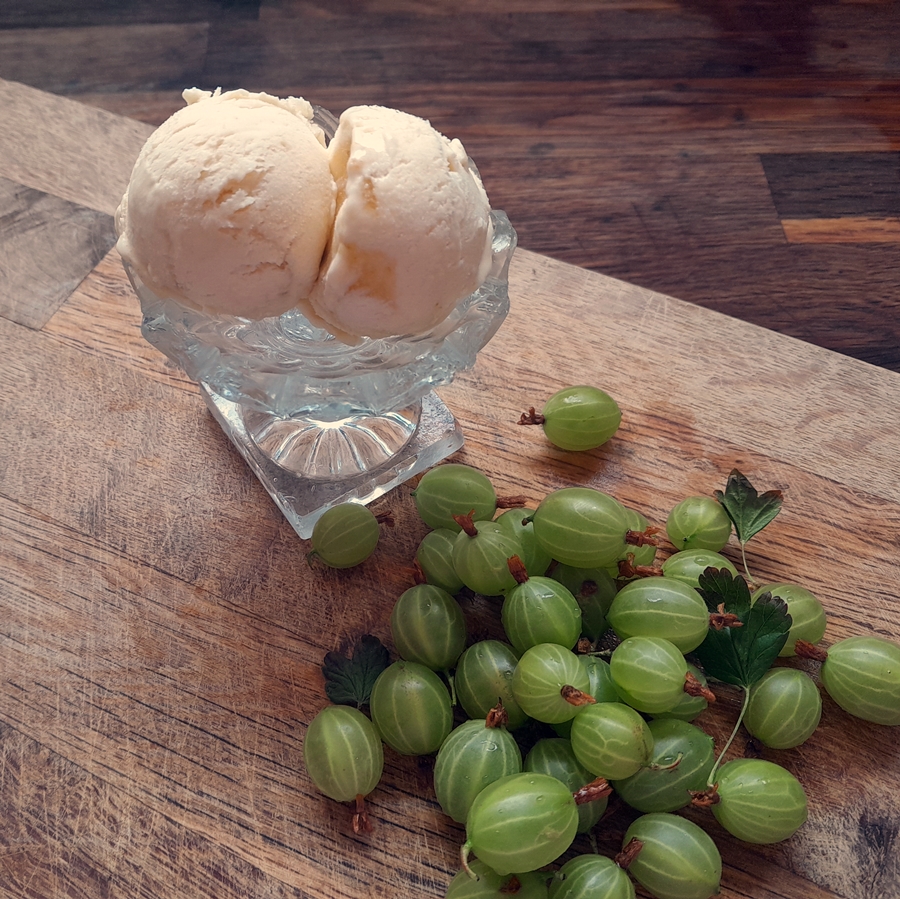
The brief green gooseberry season is upon us and their delicate but sharp taste is a wonderfully aromatic taste of summer. Reddish dessert gooseberries ripen later in the season, but the sharpness of the green is my preference. They’re a thorny bush, so be prepared for having multiple jabs in your hands. I picked some at a local Pick Your Own fruit farm. Top Tip: most berries conceal themselves on the undersides of branches, so always lift them up for maximum harvesting efficiency. If your local fruit farm doesn’t have PYO gooseberries (and many don’t, sadly) they can also sometimes be found in the freezer of your local Farm Shop.
After laying down a batch of my bi-annual batch of gooseberry vinegar (a doddle to make, but a year in the fermenting/clearing), I decided to make a batch of gooseberry ice-cream. As the owner of a tiny kitchen (2m x 3m), I have neither the counter/cupboard space for an ice-cream maker, nor the patience to keep stirring a semi-frozen mixture in order to break up the ice-crystals, so the ‘set it and forget it’ no-churn recipe employing sweetened condensed milk is pretty much a no-brainer in this household.
The method is practically the same as that given for Damson Ice-Cream from a couple of years ago: Mix most of a fruit puree into the cream/milk mixture, then ripple through a ribbon of the remaining puree and set in the freezer.
The means of obtaining your gooseberry puree is a little different than usual, mainly due to their water content, which will wreak icy-crystal havoc with your ice-cream if it is too high. Rather than simmer with water until they break down, the gooseberries are coddled in a closed vessel over simmering water. The result will be a clear-ish liquid (which can be poured off) and the fruit pulp, which is then used for the ice-cream. This approach preserves not only the colour, but also the flavour, as prolonged cooking and/or high heat impairs both.
The second recipe is my re-creation of an ice-cream I had several years ago in Yorkshire. It’s actually not really a summer ice-cream, because citrus isn’t really in season in July, but oranges are in the shops and marmalade is on the shelves, and I am in love with it, so here we are.
The bitterness of Seville oranges, just as the tartness of gooseberries, is the perfect pairing with this ice-cream method, because the condensed milk is SO sweet, it needs something sharp to cut through all that sugar. Interestingly, in developing this version, I did learn that there is such a thing as too much bitterness. An early version contained both the zest and juice of Seville oranges (which I keep in my freezer as frozen cubes for year-round zestiness), and while I liked the end result, it really leaned heavily into bitterness, so I had to dial it back somewhat. This version uses the zest of regular oranges and no juice, with the slivers of peel from the marmalade providing delicious pops of intense Seville bitterness, tempered with sugar.
Both of these ice-creams will need to be removed from the freezer for 20-30 minutes before serving, in order to soften.
Gooseberry Ice-Cream
I have left the gooseberries without sugar, as there is more than enough sweetness with the condensed milk. Feel free to add some sugar if you feel they need it.
500g green gooseberries
1 x 397g tin of sweetened condensed milk 600ml double cream
Put the gooseberries in a lidded pan without any additional water and set it inside a larger pan. Add water until the larger pan is half filled. Heat over medium high heat until the water is simmering and coddle the gooseberries until soft. if you don’t have suitable pans to do this, you can put them into a casserole with a close-fitting lid and bake in the oven at 170°C, 150°C Fan. for 20-30 minutes.
Tip the coddled gooseberries into a sieve over a bowl and allow the clear liquid to drain through. Set the liquid aside.
Rub the gooseberry pulp through the sieve until all that remains are the seeds. Discard the seeds and set the pulp aside to cool.
Put the condensed milk and double cream into a bowl and whisk together until light and billowly.
Fold through 3/4 of the gooseberry pulp until well combined.
Spoon the ice-cream mixture into containers and then stir through the remaining puree in a ripple.
Cover and freeze at least overnight before serving.
Waste not, want not: You can add sugar to the clear gooseberry liquid and simmer it down to a syrup to pour over your ice-cream.
Bonus: Add a splash of elderflower cordial to taste to the puree, but beware of adding too much liquid.
Marmalade Cheesecake Ice-Cream
There is a slight difference in the method of this ice-cream, in order to get the cream cheese fully incorporated with the other ingredients. There’s no added sugar, as the condensed milk add more than enough. The amount of marmalade you’ll need will depend very much on the whatever marmalade you are using. I used a jar of my Dundee Marmalade, which is quite peel-heavy, so I only needed one jar. Top Tip: An efficient way to get your marmalade shreds separated from your marmalade jelly, tip your jar(s) of marmalade into a pan and warm it gently until the jelly liquefies, then pour it through a sieve over a bowl. The jelly can then be poured back into the jar(s) for use later. Cut your shreds into smaller pieces if liked.
100g of orange shreds from your favourite marmalade – about half a cup.
zest of 3 oranges 330g cream cheese, Philadelphia for preference – at room temperature 1 x 397g tin of sweetened condensed milk 600ml double cream
Put the orange zest and cream cheese into a bowl and whisk until smooth.
Pour in the condensed milk and whisk again until smooth.
Add the double cream and whisk until light and billowy.
Stir through the marmalade shreds.
Spoon the ice-cream mixture into containers.
Cover and freeze at least overnight before serving.
Serving suggestion
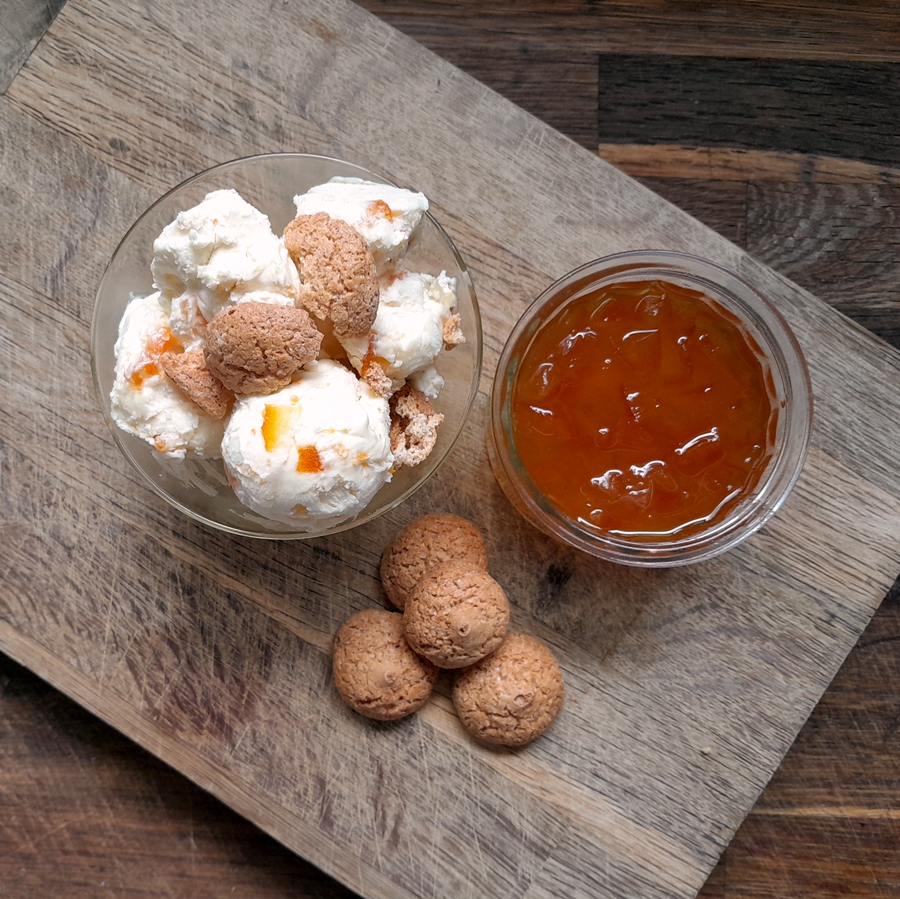
To emulate a regular cheesecake, serve with some crisp/crunchy biscuits – Digestive biscuits/Graham crackers are a favourite. I used amaretti in the picture because that’s what I had, and regular readers will know we don’t make special trips to the supermarket for just one ingredient.
I seem to be on a bit of a shortbread obsession lately, but this is the last post on it for now, promise.
Today I have for you a combination of two festive treats: Mince Pies & Shortbread.
Back in the far off days of the 1980s, I had the distinct pleasure of discovering Jocelyn Dimbleby’s “Cooking for Christmas” – a slim paperback book of recipes, produced in association with Sainsbury’s. Amongst its pages I found Deluxe Mince Pies, a version of which I have had posted over on my other blog for over 12 years now. With their orange pastry and decadent cream cheese and mincemeat filling, if you’re only going to eat one mince pie during the season, it really should be those.
However, even I will admit that they are a bit of a faff and since they are best served warm, it does limit their accessibility. So recently, whilst experimenting with the butterscotch shortbread, I got to thinking whether I could make a mincemeat version, and from there it was just a hop and a skip to re-imagining Jocelyn’s recipe.
This recipe is also an adaptation of recipes I’ve already posted on here, which I love as an example of some real Lego™ thinking, taking two different recipes and smushing them together to create something new.
The shortbread here is standing in for the mince pie pastry, so the only thing I changed was to add some orange zest. The mincemeat is an adaptation of the guilt-free mincemeat, based on Hannah Glasse’s 1747 Lenten mince pie recipe. The potential problem here was whether it would hold together on top of the shortbread, so the slight tweak I made was to increase the quantity of dates, which break down into a sweet and sticky paste during the simmering of the fruit, and firm up when cooled. I increased the spices a little, to compensate for the mincemeat being eaten cold, which tends to dull their potency. I also used an egg-white wash over the top of the shortbread, which when briefly baked forms something of a barrier to keep the moisture from the mincemeat compromising the crispness of the shortbread. Finally, I decided to top things off with white chocolate flavoured with lemon zest, to mimic the cream cheese element of the original mince pies.
Baking a slab of shortbread is a lot more straightforward than battling with pastry and filling and fretting whether the lids are sealed properly and whether the bottoms are properly cooked, etc. Bonus: you can cut your shortbread into as many pieces of whatever size you like.
Mince Pie Shortbread
The Mincemeat
You can make this several days beforehand and store in the fridge, if liked. When required, to make it easier to then spread over the shortbread, put it into a pan, cover and heat on the lowest setting. You might want to add a little more liquid (apple juice/orange juice/brandy/sherry) to help it loosen up. The additional dates add to the sweetness, so if you don’t have a sweet tooth, you might want to substitute the apple juice for the juice of an extra orange or even lemon
50g currants 50g raisins – crimson raisins look pretty 50g sultanas 200g dates – finely chopped 25g candied orange peel 25g candied lemon peel 25g candied grapefruit or citron peel 35g dried cranberries 25g slivered almonds or flaked almonds – chopped 2tbs sherry 1tbs brandy juice & grated rind of 1 orange ¼ tsp of ground ginger ¼ tsp of nutmeg, ¼ tsp of ground cinnamon ¼ tsp of mixed spice ¼ tsp of ground cloves
60-100ml apple juice or juice of 1 orange/lemon
Put the dried fruits into a small saucepan.
Cut the candied peel into small pieces with scissors and add to the pan with the spices. NB If you’re using your home-made candied peel that has been stored in syrup, then there’s no need to soften it in the saucepan – just stir it in with the nuts once the fruit has plumped.
Add the orange juice and zest, brandy, sherry and 60ml of apple juice (or the extra orange/lemon juice).
Stir gently to combine and set pan over the lowest possible heat.
Cover and let the mixture stew gently until all the liquid has been absorbed.
If the fruit isn’t as plumped and juicy as you would like, add a little more liquid.
The mixture should be moist, but with no liquid visible in the bottom.
When you’re happy with the consistency, stir through the almonds.
The Shortbread
Make whichever shortbread variation you prefer, regular or gluten-free.
60g soft brown sugar 120g unsalted butter, chilled 180g plain flour – or gluten-free flour 60g your choice of additional flour (rice flour, cornflour, cornmeal, semolina, etc) ¼ tsp salt zest of 1-2 oranges, depending on size
1 egg-white for glazing
Line a small baking tin (18cm x 25cm) with baking parchment. Leave extra parchment overlapping the sides, to assist in moving the baked shortbread.
Heat the oven to 160°C, 140°C Fan.
Cut the butter into cubes and add to the bowl of a food processor fitted with a blade.
Add the remaining dry ingredients and zest to the butter and pulse briefly until the mixture resembles breadcrumbs.
Tip the mixture onto the parchment, and press into an even layer.
Use a round skewer or cocktail stick to poke holes all over the surface of the slab of shortbread.
Bake the shortbread for 30 minutes, turning the tin around after 15 minutes to ensure even baking.
Once the shortbread is baked,
Remove the shortbread from the oven. Keep the oven on.
Whisk the egg white until frothy, then paint a layer onto the hot shortbread and return it to the oven for 3 minutes to set.
Remove the tin from the oven, switch off the heat and using a very thin bladed knife or (ideally, in my opinion) a metal dough scraper, cut the shortbread into pieces. I cut mine lengthwise in half, then across into fingers 2-3cm wide.
Return the tin to the cooling oven to cool.
The Topping
250g white chocolate zest from 1 lemon
Break the chocolate into pieces and melt in a bowl either over simmering water, or by zapping in the microwave in short bursts.
Stir through the lemon zest.
To Assemble
Spread a layer of mincemeat over the cooled shortbread. I didn’t use all of the batch, only about 2/3, but if you’d prefer a thicker layer, have at it by all means.
Smooth over the top with a palette knife or similar.
Pour over the lemon-flavoured white chocolate and smooth over.
Put it in the fridge to set (optional – you can leave it on the worktop if you have the room).
To Divide
In a repeat of the instructions from Butterscotch Shortbread, here is how to ensure your slab of mince pie shortbread emerges in sharp and clean slices.
When you’re ready to portion it out, remove your slab of mince pie shortbread from the fridge and set it on the countertop. Leave it to come to room temperature. Trying to cut through the chocolate layer whilst chilled will just shatter it. If your shortbread cooled on the worktop, you can, if course, skip this step.
Take a clean cloth or a double layer of kitchen roll and lay it on top of the set chocolate.
Lay a cutting board on top of that, and carefully turn the whole slab over, so that once the tin and the baking parchment are removed, the shortbread is uppermost.
The lines from cutting the shortbread earlier should be clearly visible.
Slide your dough blade into the cuts in the shortbread, then press down sharply to cut through both the mincemeat and the chocolate layers in one clean movement.
Make sure you have cut – or rather re-cut – through all of the pieces before trying to move your mince pie shortbread.
Store your shortbread in an airtight container. Use a piece of parchment between layers to keep crumbs off your pristine chocolate finish.
The deliciousness I have for you this week is something of a Lego™ recipe in that it started with A New Thing, which was exciting and delicious, but for which I had no use for at the time. However, if you then clip it together with two other things, Voila! A NEW New thing that VERY usable anytime, but especially as a delicious-mouth-filler-round-about-mid-morning-with-some-hot-strong-coffee-thankyousoverymuch.
OK, enough code-talking. The New Thing to which I refer is something that I found on the internet which is Whipped Caramel. A simple and straightforward combination of sugar, cream and butter which is whipped as it cools to incorporate air into the mixture, thus making it light and creamy. It holds it’s shape very well, making it an indulgent means of filling and topping cakes, large and small.
However, I must confess to taking issue with the name, because it’s not so much caramel as butterscotch. Because, and I don’t feel this is too much of an exaggeration, it has butter in it. I also think it has something to do with the incorporation of the air. It’s almost as if it tastes lighter. Anyway, I only mention this because if you’re expecting a caramel from a recipe and you end up with a butterscotch, it might throw a spanner in your recipe works. A delicious spanner, but a spanner nonetheless.
So there I was, with some delicious whipped butterscotch, and nothing to use it on, so I popped it in the fridge, reasoning that, if nothing else, I could determine how long it would last.
Well, as luck would have it, my daughter came home from school the very next day with news that the school’s Macmillan Coffee Morning was scheduled for the end of the week and she needed ALL the bakes. Also lucky was the fact that I’d just finished my mammoth shortbread testing session, so it was just a matter of thinking what to top it off with, found I had some white chocolate in the cupboard, and the Coffee Morning was saved!
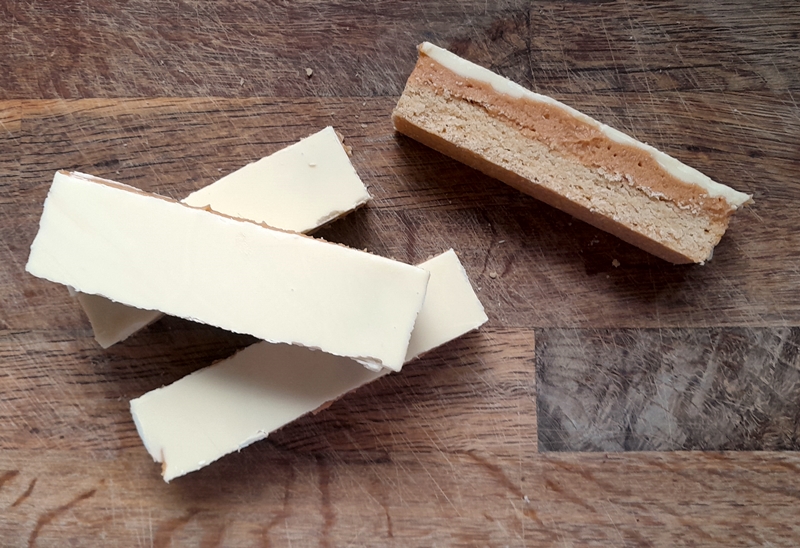
I was pleased with the way that the white chocolate finished it all off, and the overall result is very similar to Millionaire’s Shortbread (Sidebar: the difference between Millionaire’s and Billionaire’s Shortbread is, apparently, Billionaire’s Shortbread has a little salt in the caramel – who knew!?) to look at. The butterscotch and white chocolate gives it a flavour combination which is both decidedly different, and rather moreish. Teamed with your favourite 1:2:4 shortbread, and you have a customised treat fit for bake sales, gifting or even just hiding away for your own special treat.
The only changes I’ve made to the Whipped Caramel are a couple of suggestions for the method, which, due to the somewhat Faffy™ approach, will markedly reduce your chances of failure.
I am suggesting making a large batch here, mainly due to the Faff™ Factor, because you don’t want to end up having to go through it all again because it has been inhaled by your nearest and dearest. That said, you could make a batch of the caramel and just a regular batch of shortbread, and keep the extra in the fridge for later (it will keep a week at least).
Butterscotch Shortbread
There are three elements to this recipe: the shortbread, the whipped butterscotch and the white chocolate topping. I recommend that they are made in that order, or if you want to spread out the tasks, make the whipped butterscotch the day before.
For a small batch, that uses only half the quantity of whipped caramel, use a tin of size 18cm x 25cm.
For the large amount of butterscotch shortbread, I used a double batch of shortbread and a tin of dimensions 30cm x 22cm and bake for a total of 40 minutes, turning the tin around halfway through.
Take the cooked shortbread out of the oven and cut it to the size pieces you wish to serve your butterscotch shortbread. I cut fingers of dimensions approximately 3cm by 10cm. NB The finished shortbread is very rich, so smaller is better – with hindsight, a more reasonable size would have been 5cm x 3cm. Remember, you can always go back for another piece, but a too-large piece… well, let’s just say it IS possible to have too much of a good thing.
Set the shortbread aside to cool, either in the cooling oven or on the worktop.
The Whipped Butterscotch
375g caster sugar
100ml water
100g unsalted butter cut into cubes
300ml double cream[1]
Add the sugar and water to a pan. A broad (frying) pan will help with moisture evaporation more than a saucepan. A non-stick pan for preference.
Stir the sugar and water together over low heat until dissolved. It is possible to skip using the water and just melt the sugar, but you then run the risk of burning the sugar, and once burnt, there’s no disguising the bitterness. And I know this because I did it myself. I was melting the sugar without water, and I thought I’d smelled a touch of burn, but ploughed on regardless. After going through all the whipping and cooling and more whipping, it was very disappointing to be able to taste the burn in the finished butterscotch. So making a syrup and evaporating the water is worth it for peace of mind and guaranteed success, and doesn’t lengthen the process by much.
Simmer the syrup to evaporate the water, and allow it to bubble until it has reached a golden caramel colour. Once all the water has evaporated, it will caramelise quickly, so keep a beady eye on it.
When the caramel has darkened to your liking, add in the butter and whisk it as it melts.
Add the cream and continue whisking over heat until combined – about 2 minutes.
Pour the butterscotch into a bowl and cool in the fridge for 20 minutes. It won’t be cold, but it will be much cooler than it was, and quicker than waiting for it to cool on the side.
Using a hand whisk, or a stand mixer, whisk the butterscotch for 1-2 minutes. The aim is to incorporate as much air into the butterscotch as it cools. It will thicken as it cools and the colour will become lighter.
Put the butterscotch bowl into the freezer and chill for 10 minutes, then whisk again. Each time you whisk, the butterscotch will thicken and get lighter again.
You can now use your whipped butterscotch, or keep it in the fridge until required.
To Assemble
400g white chocolate
If you’ve stored your whipped butterscotch in the fridge, you might want to give it an extra whisk, to make it easier to spread.
Spread the butterscotch over your shortbread in as thick a layer as you wish. I recommend erring on the side of caution, as it is very rich. Smooth over the surface and chill in the fridge while the chocolate is prepared. If you don’t use all your whipped butterscotch, you can store it in the fridge in a covered container. When needed, just whisk it briefly to get it to a suitable softness.
Break the chocolate into squares and melt – either over hot water or in 30 second intervals in the microwave. Stir the chocolate until fully melted, and then for 1-2 more minutes in order to cool it down: too hot, and it will start to melt the butterscotch and you won’t get a clean finish. Then again, a few swirls of butterscotch in the chocolate isn’t the end of the world by any means.
Take the shortbread and butterscotch slab out of the fridge and pour over the melted chocolate. Smooth it to an even layer using an offset spatula.
Return the tin to the fridge to set completely.
To Divide
Regular listeners will be aware of how much I love a clean, sharp slice. Even the humblest of recipes can become eye-catching with the cunning wielding of a sharp blade.
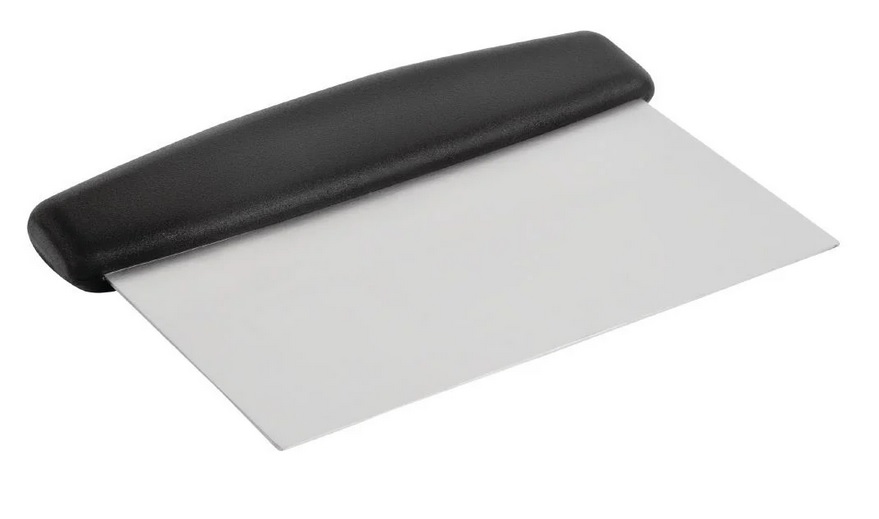
That said, I’ve found one of the best blades is one of these dough scrapers. The blade itself isn’t sharp, but it is super thin and can make an excellent and clean cut.
Here is how to ensure your slab of butterscotch shortbread emerges in sharp and clean slices.
Remove your slab of butterscotch shortbread from the fridge and set it on the countertop.
Take a clean cloth or a double layer of kitchen roll and lay it on top of the set chocolate.
Lay a cutting board on top of that, and carefully turn the whole slab over, so that once the baking parchment is removed, the shortbread is uppermost.
The lines from cutting the shortbread earlier after it was baked should be visible.
Slide your dough blade into the cuts in the shortbread, then press down sharply to cut through both the butterscotch and the chocolate in one clean movement.
Make sure you have cut – or rather re-cut – through all of the pieces before transferring your butterscotch shortbread to an airtight container. Use a piece of parchment between layers to keep crumbs off your pristine chocolate finish.
NB I recommend storing your butterscotch shortbread in an airtight container in the fridge, or failing that, somewhere cool, in order to preserve the clean, sharp edges of the butterscotch. Allow it to come to room temperature before serving.
[1] You can also use whipping cream, which will give a softer textured butterscotch, that might be more suitable for frosting/filling cakes/cupcakes.
On a recent holiday in France I had some wonderful strawberries: heady, aromatic and bursting with flavour.¹
Still a bit mesmerised, two punnets of strawberries were one of the first things I bought when we got back. Alas, compared to the French ones, they were decidedly underwhelming. I know it’s late in the season for strawberries, but even so, a great disappointment.
Since we now have the luxury of strawberries year-round, I thought I’d bring you this method of not only rescuing below-par strawberries, but also demonstrating how you can use them in a couple of recipes, as well as enjoying them in their new and improved, glow-up form.
The method is very simple, too. Cut up your strawberries and sprinkle them with a little sugar – NOT icing sugar, because it contains an anti-caking agent. Use white caster or granulated. The sugar will gradually draw out the juices from the strawberries, which will in turn absorb some of the sugar.
You can enjoy them as is, and luxuriate in their much improved flavour, or you can use them in other things. Below I have two suggestions – a strawberry scone and in a mille feuille made from stale croissants.
To Confit strawberries
I’ve gone back and forth quite a bit to come up with a term for this method and, to be honest, I’m not entirely happy with ‘confit’, because to confit something generally involves the use of heat to cook the items, which this patently doesn’t. However ‘macerating’ wasn’y really suitable either, because that involves adding liquid, and here the liquid comes from the fruit itself. If someone can find a word that fits better, do please leave a comment.
strawberries
caster or granulated sugar – 1tbs per 100g strawberries
Remove the green stalks and leaves from the strawberries and cut each one into 6-8 pieces, depending on size.
Put the cut strawberries into a bowl and sprinkle over the sugar.
Turn the berries over gently so that the sugar is distributed evenly.
Cover with plastic and set somewhere cool. I prefer to keep them at room temperature rather than chilled, at least in the initial stages as I believe it produces a better overall flavour, but keep in the fridge if you prefer.
Gently stir occasionally.
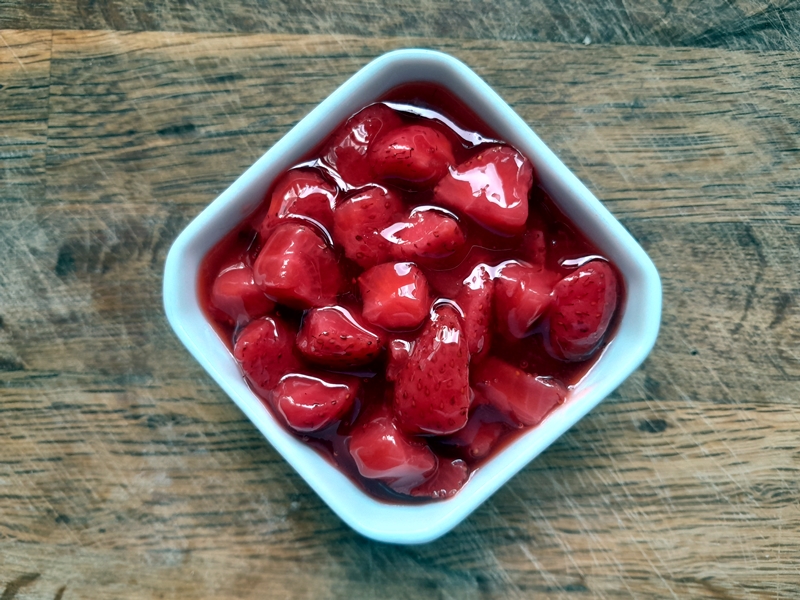
Allow your strawberries to macerate for up to 24 hours. The longer you leave them, the more juice will be drawn out. After about 24 hours, the strawberries will be practically floating in a light syrup and their flavour will be deliciously intense.
You can choose when to eat/use your strawberries. For the two recipes below I used berries that had been macerating for 24 hours.
Strawberry Scones
Fresh strawberries release too much juice to be included in regular scones, but by using confit strawberries, you can get all the concentrated flavour and still maintain the integrity of your scones. This recipe is based on that of Mrs McNab (19thC farmer’s wife from Ballater, Scotland – see Great British Bakes). It makes 8 scones. It is deliberately unsweetened, as I believe the plainness of the scone dough highlights the flavour of the strawberry pieces much better than a sweet dough. You might disagree, and that’s fine. You can add 30g of sugar to the mixture before baking if you like, or sprinkle some sugar over the hot scones after baking (as in the picture).
225g plain flour
2tsp baking powder, or 1 tsp cream of tartar, ½ tsp bicarbonate of soda.
½ tsp salt
30g unsalted butter
1 large egg
60ml plain yogurt
60ml milk
100g drained, confit strawberries.
Milk for glazing
sugar to sprinkle (optional)
Heat the oven to 220°C, 200°C Fan.
Put the flour, powder(s), salt, butter, sugar if using, and egg into the bowl of a food processor fitted with a blade and blitz until the mixture resembles breadcrumbs.
Tip the mixture into a bowl.
Add the drained strawberries and fold in.
Mix the yogurt and milk together until smooth.
Fold in the yogurt mixture little by little, ideally with a round-ended knife. NB Do NOT slosh it in all at once. You may not need all of the liquid, especially if the strawberries are juicy. You want just enough liquid to bring the dough together.
NB The faster you do the shaping/cutting/getting the scones in the oven, the more they will rise.
Turn the dough out onto a floured surface and pat into a circle about 4cm thick. NB Don’t roll it with a rolling pin, you’ll just squash out all the lift from the raising agents.
Using a dough scraper or thin-bladed knife, cut the disk of dough into eight triangles. They will look small, but they will rise splendidly in the oven.
Transfer the triangles to a parchment covered baking sheet and brush over with milk to glaze.
Bake for 15 minutes, turning the baking sheet around after 10 minutes to ensure even colouring.
Remove from the oven and sprinkle caster sugar over the hot scones if liked.
Transfer to a wire rack to cool.
Enjoy warm as is, or with butter or cream.
Strawberry Croissant Mille Feuille
You know when you have stale croissants lying around?
…
*crickets*
…
Of course not. No-one does.
HOWEVER!
The thought “What if…” did cross my mind over the aforementioned holidays, and that led me to thinking about how they might be used in a new and exciting way. The idea is related to the puff pastry more traditionally used insofar as I brought back some delicious French butter with the intention of making a batch, and now I’m procrastinating like mad because, although delicious, it’s SUCH A FAFF™! Bonus: You can use gluten-free croissants (Schar is one brand I have tried – find them in the freezer section of your local supermarket).
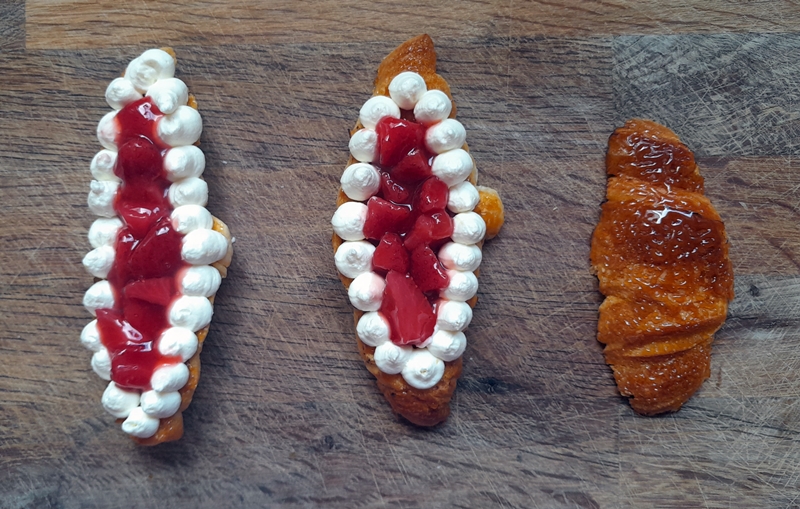
Using a croissant reduces the Faff to almost non-existant levels and provides another opportunity to use the strawberries prepares above – this time using the juice as well. Slicing, toasting and then bruléeing the croissants will give both crunch and shine. The last two things needed for our croissant mille feuille are Brulée Sugar and some whipped cream.
To thicken liquid with Arrowroot
Why arrowroot, you may be asking? Well, it thickens and turns clear when heated, but unlike cornflour, when cooled it does not go ‘gloopy’ as such, rather it forms a loose jelly-like texture that clings wonderfully to the fruit (see top photo) making it bright and glossy, and doesn’t form a skin.
For each 80ml of liquid/syrup, use 1tsp arrowroot, or 1 tablespoon per 250ml.
Mix your arrowroot with an equal quantity of cold water until smooth.
Add the arrowroot slurry to your syrup and heat gently, stirring all the while.
NB Do not boil the mixture. High heat will break down the thickening properties. Remove from the heat when thickened and clear.
Stir in your strawberries and chill until required.
To Assemble
Slice your croissant(s) into three, horizontally.
Toast the slices lightly on both sides. Be careful, they will take less time to toast than regular bread, due to the higher fat content.
Dust the slices thickly with brulée sugar, then either grill them or use a blow torch to melt the sugar. The sugar will melt quickly, so keep an eye. Allow to cool, so that the sugar hardens.
To serve: pipe a rim of cream around the edge of the bottom two layers, and fill the middle with your strawberries in thickened juice.
Stack the layers together and serve.
¹ From the Calais Cité Europe Carrefour near the Tunnel, which I can highly recommend for all those last minute foodie purchases on your way home. If you’re interested in growing your own, the variety I recommend is Charlotte.
This is a recipe that I’ve had on my ‘To Do’ list for years. I first came across it in an old, spiral-bound, Women’s Institute cookery book. Over the years I’ve seen many different versions, some with sour cream, some from the 19th century are made with “Swiss Milk” (the equivalent of modern condensed milk – although just to be confusing, some recipes sometimes list “unsweetened Swiss Milk”, thus making it equivalent to evaporated milk). It would be interesting to see how these recipes compare in texture to the classic fudge recipe posted elsewhere on this site.
But anyhoo…
From “The Art of Sweetmaking” by Beatrice Manders, L. Thorne & Co., London, 1901, pp31/2
This version, from 1901, uses red currant jelly, which gives the toffee a lovely reddish tinge and a delicious tang of sharpness against the sweetness from all the sugar. Redcurrants are about to come into season, and this recipe might be useful to either use up last year’s jelly or make use of this year’s fresh batch. Alternately, you can just buy red currant jelly in the supermarket.
I deliberately chose this version because it dates to the height of Russian Toffee popularity, and I find it funny that the writer sees fit to include finger-wagging admonishment to take care to make it properly and not over-cook it, all the while failing to give proper instructions on how to do just that.
So! Let us talk about the intricacies of toffee making.
In short, there aren’t any. It is fundamentally about heating your sugar mixture to a particular temperature point in order to achieve a certain texture when it cools down. This is done by heating until sufficient moisture has evaporated, which will result in the sugar reaching a high-enough temperature.
The difficulty for our Victorian ancestors and earlier was, a lack of sufficiently detailed thermometers with which to aid their efforts. That’s not to say that sugar confectionery was unheard of in earlier times. Quite the opposite, in fact. Confectioners in Times of Yore™ devised a visual scale to judge the heat of the sugar solution, and divided it into six levels, each with their own particular uses: smooth, pearled, blown, feathered, cracked and caramel. Francis Massialot’s “The Court and Country Cook” (1702) goes into detail across several pages describing the physical and visual cues of each stage.
Luckily for modern cooks, there are digital thermometers which can eliminate much of the guesswork. The difficulty lies in ensuring that the whole of your batch of boiling sugar has reached the correct temperature, hence the need to keep your mixture well stirred. Care must also be taken, if using a probe thermometer, not to accidentally touch the tip against the bottom of the pan, which will register as several degrees higher than the sugar itself.
All that remains is to decide on the consistency you wish to enjoy your toffee. You can take it to whatever degree you prefer. I have made this specific recipe four times, taking each batch to a different temperature and each has its pluses and minuses. Its up to you which you choose.
120°C – toffee is soft and chewy at room temperature.
130°C – toffee is firmer but still chewy. Thin sheets will bend easily.
140°C – toffee is hard at room temperature, but will soften in the mouth and become chewy.
150°C – toffee is brittle at room temperature, will eventually soften in the mouth and become chewy.
Personally, I prefer the last two: for toffee to consume as is I like to take it to 150°C; for toffee to use in other recipes, since it will have further heating in the oven, I prefer to take it to just 140°C.
One final point, toffee is hygroscopic. It loves to absorb moisture. As soon as it is cooled, you should pack it in an airtight container. A plastic ziplock bag might lack visual appeal, but it is marvellous for keeping your toffee shiny and free of stickiness for days on end. Alternatively, you can choose to either wrap your toffee pieces in waxed paper or cover your toffee in chocolate to prolong its shelf life.
Russian Toffee
This is just a half batch of the original recipe, and still makes a sizeable slab. I have elected to interpret ‘loaf sugar’ as soft, light brown sugar, for added flavour. After a few trial runs, I opted to omit the vanilla as it wasn’t adding anything to the flavour, and actually impairing the redcurrant flavour coming through. You could vary this recipe by using similar quantities of other sharp fruit jellies such as cranberry, black currant, quince or apple.
225g soft light brown sugar 115g unsalted butter 100g red currant jelly 150g double cream
200g dark chocolate (optional)
Line an edged baking pan with baking parchment. I used a pan 30cm x 22cm and it was more than large enough.
Add all ingredients to a pan and heat gently until the butter and jelly have melted and the sugar dissolved. A wide pan (like a frying pan) is better than a tall (saucepan) pan, as the greater surface area facilitates evaporation.
Increase the heat slightly (I suggest level 6 on a 1-9 scale) and stir gently but continuously until the mixture boiled for several minutes and has thickened slightly.
Check with a thermometer (if using a frying pan, you may need to tilt it in order to get an accurate reading of the sugar mixture temperature), and remove from the heat when your sugar mixture has reached your chosen temperature.
Pour the mixture onto the baking parchment in your prepared pan and allow to cool. NB If you wish to mark out your toffee into squares like in the top picture, don’t let it cool longer than 8 minutes before doing so, otherwise it will have set too firmly.
To mark out your toffee, lightly butter the blade of a long, straight-bladed knife and press down firmly into the toffee. About 1.5cm squares is a good size. The knife won’t easily cut all the way through, but will make strong enough marks so that it is easy to break into pieces when cooled.
After 20 minutes of cooling, cover the pan with cling film, or slide the whole thing, pan and all, into a large ziplock bag, and leave to cool completely (both Sainsbury’s & Tesco sell XL ziplock bags that are ideal for this).
If you’re planning to enjoy your toffee as is, then, once completely cold, you can give it a sharp tap on the counter and it should break into pieces quite easily. Be sure to transfer it to an airtight container to keep it free of stickiness.
If you’d like to cover it with chocolate, you can temper it relatively quickly and easily by using the seeding method and 200g of the chocolate of choice. I used dark chocolate. Also, Instead of dipping pieces individually, which is a Faff™, I opted to brush the tempered chocolate over the whole sheet, on both sides, then break into pieces once the chocolate had set and cooled. It doesn’t cover the toffee completely, but enough to keep it from dissolving into a sticky mess, and the contrast between the bitterness of the chocolate with the sweetness of the toffee and the tang of the redcurrants is delightful.
This might seem like a double recipe post, but it is more of a ‘two for one’ in that the same ingredients can be presented in different ways, depending on your inclination and the effort you wish to put in.
So… Petticoat Tails.
Much has already been made of the contortion of ‘petites gatelles’ into ‘petticoat tails’, as well as other origins, so I’m going to dwell no more upon it.
No, what I’ve been looking at/obsessing over of late is the early recipes. Late eighteenth/early nineteenth century recipes.
Mrs Frazer’s 1806 recipe for “Petticoat Tails For Tea” caught my eye, as it seems to be the earliest recipe in print.
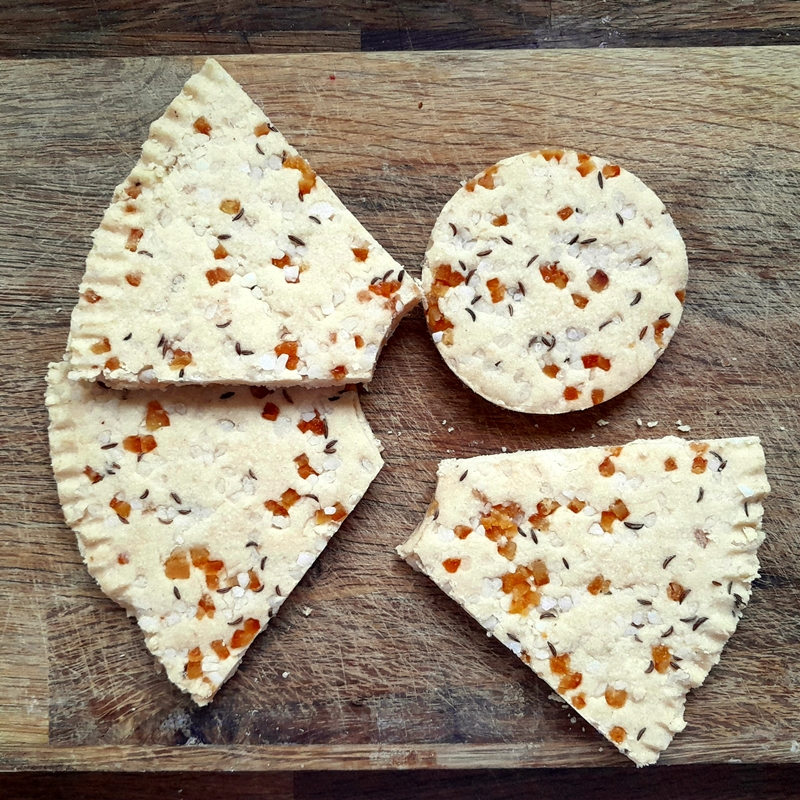
Two interesting details about this recipe are the inclusion of caraway seeds and the first (to date) description of the now iconic Petticoat Tails shape. There’s also oblique reference to the Scottish weights and measures system, which is significantly different to the English one at the time. This factor was the source of much head-scratching until I eventually managed to get the ingredients scaled accurately. It is a much less rich version than that which is popular today, and while I will concede that caraways aren’t a regular sweet spice these days, they are strangely compelling and I can heartily recommend them if you’ve not tried them before in a sweet context.
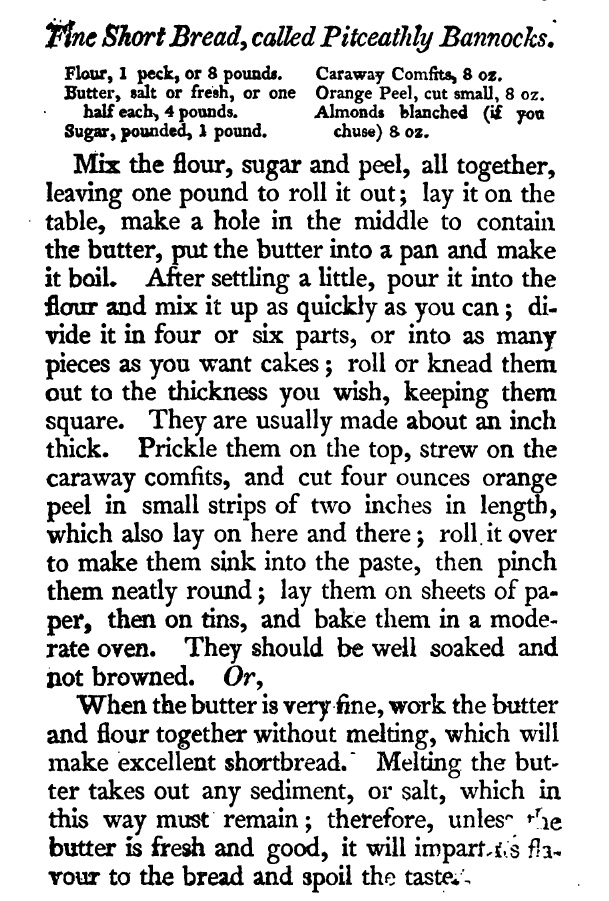
The next recipe I spotted comes from John Caird (1809) as something of a post-script to his recipe for “Fine Short Bread, called Pitcaithly Bannocks”.
From “The Complete Confectioner and Family Cook” by John Caird, 1809
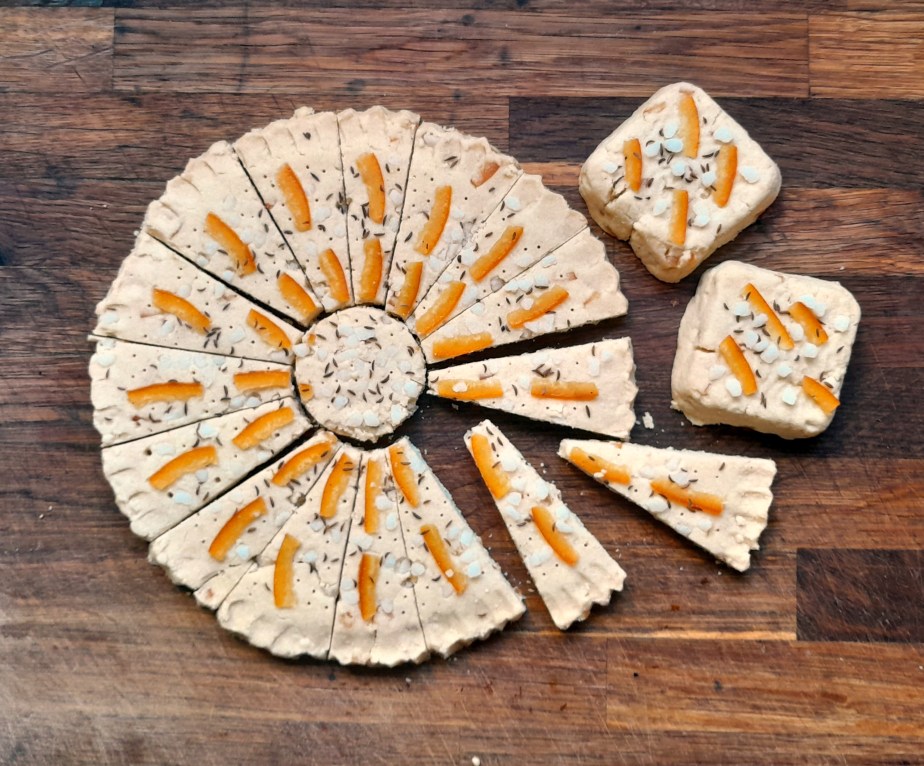
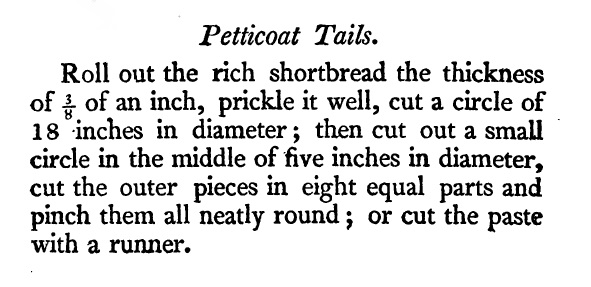
So it would seem that Petticoat Tails are just a thin version of rich shortbread or Pitcaithly Bannocks. It certainly makes Petticoat Tails a lot more interesting than the pale and unadorned recipes we have today. I must take issue, however, with the size of Mr Caird’s Petticoat Tails – they’re enormous! Eighteen inches in diameter? What on earth is he cutting round – a cartwheel? I used a dinner plate and a pastry ring to cut the two circle in the photo at the top of the page, and doubled the number of slices to sixteen to make the portions reasonable and not too slab-like, because in the first test batch of eight portions (using a dinner plate – see below) they were so massive I could only fit four pieces on my cutting board. Mr Caird only suggests cutting his cartwheel of shortbread into eight pieces, so I am puzzled as to how it was then served: broken into smaller pieces by hand, perhaps? Seems odd to go to the trouble of observing the format outlined by Mrs Frazer, but insisting on them being of giant size.
The other challenge was the sticky issue of caraway comfits. These were popular confections of caraway seeds coated in several layers of sugar and often enjoyed at the end of a meal, or in sweetened, baked goods, as an aid to digestion. No-one makes caraway comfits these days, that I have been able to find, at least – and the process of making them is very time-consuming, even with the correct equipment (which I don’t have). Thus I have come up with an adaptation which mimics bith the flavour and texture, but without all the Faff™ of having to make them yourself. Adding caraway seeds to the dough, then scattering sugar nibs ensures both the added sweetness and the caraway flavouring can be enjoyed together, as well as the textural crunch. Just scattering seeds over the surface of the shortbread doesn’t work, as they tend to fall off, even when they have been vigorously rolled in.
So here we have a recipe that can be shaped in two separate ways – thick and chunky or thin and ladylike. Whichever way you decide to make it, with the candied peel and the caraway seeds and the rich buttery taste, it is going to pack a real punch in terms of flavour. Enjoy!
Petticoat Tails and Pitcaithly Bannock, 1809
After persevering for several batches, I made the decision to change the method slightly, as the recipe as written just wasn’t working out very well, being very dry and crumbly. I suspect that the butter of times past might have had a higher water content than modern butters. It is still prone to crumbling, and so if it’s not coming together for you, try adding a little cream to help things along.
225g room temperature best butter*
60g caster sugar
390g plain flour
2 tsp caraway seeds
60g sliced, blanched almonds
60g orange peel, cut small
a little double cream (optional)
To decorate
30g sugar nibs
sliced candied orange peel to taste
Decide how you want to bake your shortbread. If its the traditional shape, line a baking sheet with parchment. If you prefer to bake a slab, line a suitably sized baking tin with parchment. I suggest 20cm x 30cm or similar. A third alternative is to bake individual portions. In the top photograph, I have included a couple of thick, square servings. I made them with the offcuts of the circle of shortbread, and shaped them in a brownie pan with square holes, before baking them ‘free-standing’.
Cream the butter and sugar together until light and fluffy.
Add the caraway seeds.
Gradually add in the flour, almonds and peel and mix until incorporated. Add a little cream if necessary.
Tip out the dough onto whatever you are baking it on/in.
If making thin Petticoat Tails,
Roll out to 1cm thick.
Scatter over sugar nibs and orange peel to taste. Use the rolling pin to roll over and press them into the dough.
Use a skewer to poke holes all over the surface of the dough.
Use a dining plate to cut out a circle, and a large, plain pastry cutter to cut the centre circle.
Pinch the edges of the outer circle between finger and thumb to decorate.
With a thin, bladed knife or pastry scraper, cut the outer circle into 16 wedges.
If making thick Pitcaithly Bannock,
Press the dough evenly into your baking tin.
Scatter over sugar nibs and orange peel to taste. Use the rolling pin to roll over and press them into the dough.
Use a skewer to poke holes all over the surface of the dough.
Use the tines of a fork to mark a border around the edges.
With a thin, bladed knife or pastry scraper, cut your dough into serving size pieces – squares or fingers.
Chill the dough for an hour or until ready to bake.
Heat the oven to 150°C, 130°C Fan.
Bake for 45-50 minutes, until pale but still cooked through. Turn the baking tin/sheet around half-way through, to ensure even baking. Yes, it is the same baking time whether it be thick chunks or broad but thin Petticoat Tails. The colour will darken only very slightly.
When baked, remove from the oven. Using the same thin-bladed knife/dough scraper to refresh the cuts in the dough, but do not lift out.
Allow to cool in/on the tin.
Store in an airtight container.
* Salted or unsalted, as you like. I used Isigny Sainte-Mère Unpasteurised Salted Butter, because it has a wonderful flavour and might actually be close in flavour to the best butter of old.
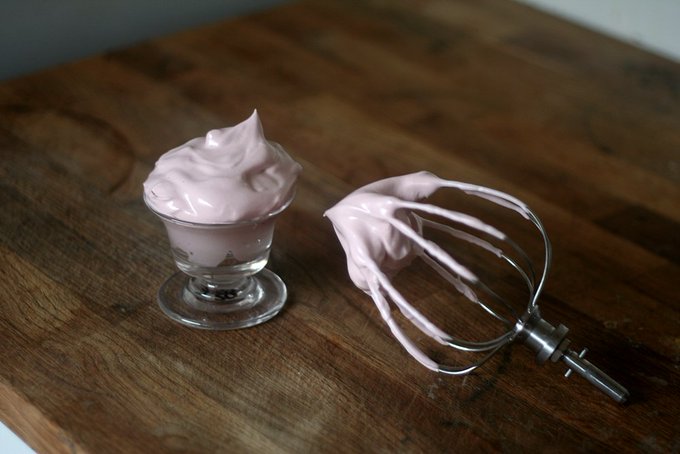
Here is very useful recipe for those looking to avoid dairy products or even to just reduce the amount of fat in their diet. By whisking together some smooth jam and a couple of egg-whites, a deliciously light and frothy ‘cream’ can be created, for use as a finishing touch to trifles, puddings and pastries, or to enjoy by itself. The cream will be influenced by whatever flavour of jam you choose to use, but it doesn’t dominate at all. The above was made using seedless raspberry jam, and the subtlty of colour reflects the subtlty of flavour – a mere whisper on the palate. For an almost white ‘cream’ with a very faint flavour (if that suits your needs best), I can recommend making and using Christine Ferber’s Green Apple Jelly.
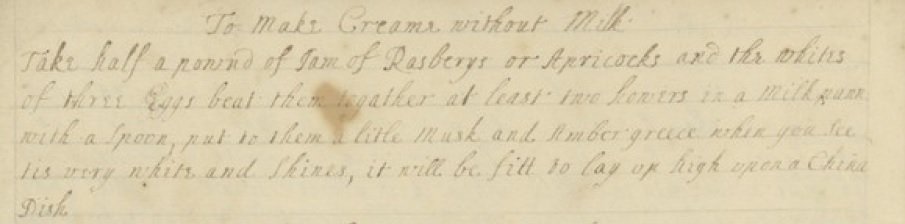
It is a surprisingly elegant solution for anyone with dietary restrictions, and dates from the cusp of the 17th and 18th centuries (circa 1700).
This particular recipe I found in a manuscript held by the Wellcome Collection in London, but I have also read variations in other manuscripts and locations. I am surprised tht it has fallen out of favour, for it is one of the simplest and easiest recipes I have adapted.
Well, I say adapted. In fact I have changed very little from the original instructions.
To Make Cream Without Milk, MS1804, dated circa 1700, Wellcome Collection.
The one detail I did change was to reduce the number of egg-whites from three to two, reasoning that the eggs we have nowadays are much larger than those of three hundred years ago.
Thanks to modern technology, we are also spared the two hours of hand whisking (with a spoon of all things!) required in order to achieve the light and fluffy outcome pictured above, and can achieve the same result with about 10 minutes of whisking with your kitchen gadget of choice.
The potential worry regarding the consumption of raw egg whites is eliminated by the convenience of being able to purchase pasteurised egg whites in a carton.
The finished whip will hold its shape for several hours, should the need arise, allowing you to prepare this well in advance of your entertaining needs. I decided to leave the whipped ‘cream’ out, to test it’s durability, and can confirm that after 5 hours, it was still (mostly) holding its shape, as can be seen below.
Dairy Free Cream after five hours
Furthermore, this recipe is customisable in that you can vary the flavour of the whip by using different jams/jellies. For the smoothest result, they should be clear and set. Alternately, you could make your own by gently warming and sieving the jam to remove the fruit pieces in the conserve or jam flavour that you require. Apple, apricot, redcurrant, cranberry, blueberry, blackcurrant, plum, damson, marmalade…the possibilities are endless!
Dairy-Free Cream
You can easily halve the recipe at first, to make a trial batch to see if you like it. However, this might be too small an amount for a stand mixer to get to grips with, so use a hand-held whisk instead.
2 large egg whites (80ml) 225g seedless raspberry jam (or smooth jam/jelly of choice)
Put both ingredients into a bowl and whisk using a mixer, for about 10 minutes, until the mixture is thick and glossy and holds its shape.
Marble Cake can be considered a classic British cake, still enjoyed by many all over the country. To my mind, however, it has always seemed less marble-y and more blobby, in that the big dollops of (usually) vanilla and chocolate cake batters are frequently only half-heartedly stirred together.
Well, as we all know, there’s nothing new under the sun and just over 100 years ago, Frederick T. Vine was thinking just the same thing. In his 1908 commercial baking book “Cakes and How To Make Them”, he has entries for several different marble cakes, whether by design or whether he forgot he’d already included some in the front of the book and just bunged a couple more in later on, we don’t know. His suggestions are obviously geared towards commercial bakeries turning out dozens of different cakes, as he initially suggests taking quantities of mixtures that are probably prepared on a daily basis and combining them into marble cakes a lot more colourfully than we do today.
Marble Cake No 2: 1 batch Silver Cake, divided: ¼ coloured pink, ¼ coloured brown with cocoa, ½ left white.
Marble Cake No 3: ‘White Part’ made with egg-whites, ‘Dark Part’ made with yolks, treacle, cinnamon and dark brown sugar.
Marble Cake No. 4: Silver Cake, with coloured and flavoured milk.
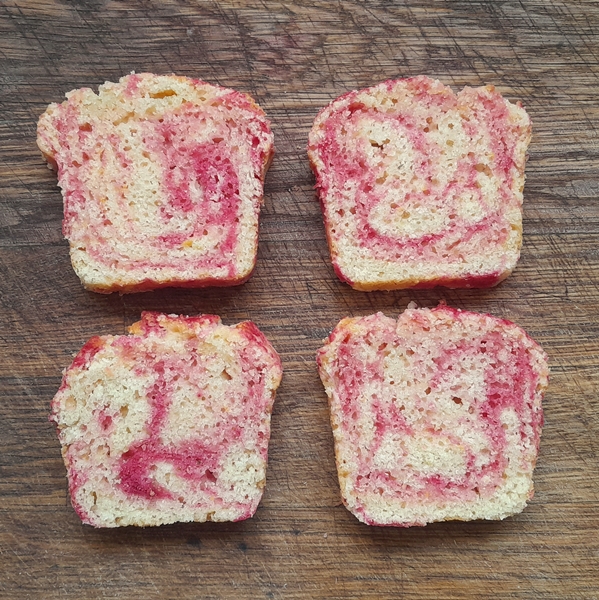
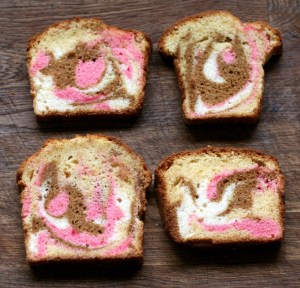
I tried a version of Marble Cake No. 1 some time ago, in a variety of loaf tins (see image below), and it certainly made a very jolly and colourful cake. However, if I’m being honest, it was still rather on the blobby side. So trying the ‘coloured milk’ method has been on the ToDo List ever since, and here we are.
The original recipe did not call for any flavouring, aside from some brandy, so after a couple of trials I decided that a better approach was to flavour both the cake and the milk. I chose to flavour the cake with lemon and the milk with raspberry, to both preserve the paleness of the Silver Cake, and to make the milk complementary in flavour and contrasting in colour. You can, of course, choose any combination that appeals.
Using coloured/flavoured milk for the contrast allows for a much more delicate pattern to be achieved, and although a little fiddly in the construction, the results are very pleasing. The fine lines of red are a much more accurate depicion of the patterns in marble, and these are interspersed with the strong patches of colour/flavour where the milk has pooled between the spoonfuls of cake batter, almost a raspberry ‘ripple’ effect.
Marble Cake
I baked this Silver Cake mixture in mini loaf tins, but you could also use larger or smaller loaf tins and adjust the baking time accordingly.
115g unsalted butter, softened 140g caster sugar 140 egg whites 30ml brandy zest of 1 large lemon 190g plain flour 60g cornflour 1tsp cream of tartar ½tsp bicarbonate of soda milk (maybe)
Grease and line 3 mini loaf tins (16cm x 9 cm x 5cm) with baking parchment.
Heat the oven to 180°C, 160°C Fan.
Mix the colour and flavouring into the milk. You want both to be strong, in order to be able to see and taste them in the baked cake.
Whisk the softened butter until light and creamy.
Add the sugar and whisk until pale and fluffy
Add the eggwhites and mix thoroughly.
Mix in the brandy and the lemon zest.
Sift the remaining dry ingredients together, and gradually mix into the wet ingredients.
If the mixture seems a little tight, mix through some milk until you achieve a dropping consistency.
Spoon the mixture into the bottom of each tin in shallow blobs. Brush over the flavoured milk. There should be no uncoloured cake mixture. The excess milk will pool between the spoonfuls of batter and that’s fine. Each ‘layer’ should be a series of uneven portions of cake mix, rather than a smooth layer. Having the cake mix too smooth will make the flavoured marbling appear too formal. I found the best method was to scoop half a spoonful of cake mixture and lay it into the tin by ‘unscooping’ using the opposite wrist action, to lay it in a partial layer rather than a blob.
Repeat the spooning and painting until all the cake mixture has been used up.
Bake for about 25 minutes, turning the tins around after 15 minutes to ensure even baking. NB Be careful not to overbake – as an egg-white-only cake it will never be golden brown, and overbaking will make your cakes dry.
When baked, remove from the oven and allow to cool for 10 minutes, before removing the cakes from the tins, peeling off the parchment and setting to cool on a wire rack.